
How To Finish A Seam
Not sure how to finish your seams? Not sure what it even means to ‘finish a seam’.
I’m here to help!
In this blog post I’ll explain exactly what it means to finish a seam, why you might need to do it and show you a few different ways to try.
What Does 'Finishing A Seam' Mean?
When you sew a seam using a sewing machine, you will be left with two layers (or occasionally more) of fabric on the inside of your garment. ‘Finishing a seam’ means you do something to the raw edges of your fabric in that seam allowance to protect the fabric and make it look, well… finished!
When Do I Need Finish A Seam?
Finishing a seam is essential when using any fabric that frays. If you don’t, then as you wear and wash your garment the fabric will fray more and more and eventually the seams will come undone. Most woven fabrics will fray.
You may also wish to finish the seams even when using fabric that doesn’t fray. A finished seam will often feel more comfortable against the skin and gives a much more professional look to a garment. Most knit fabric will not fray.
How Can I Finish A Seam?
There are LOTS of ways to finish a seam but I’m going to stick with some simple choices.
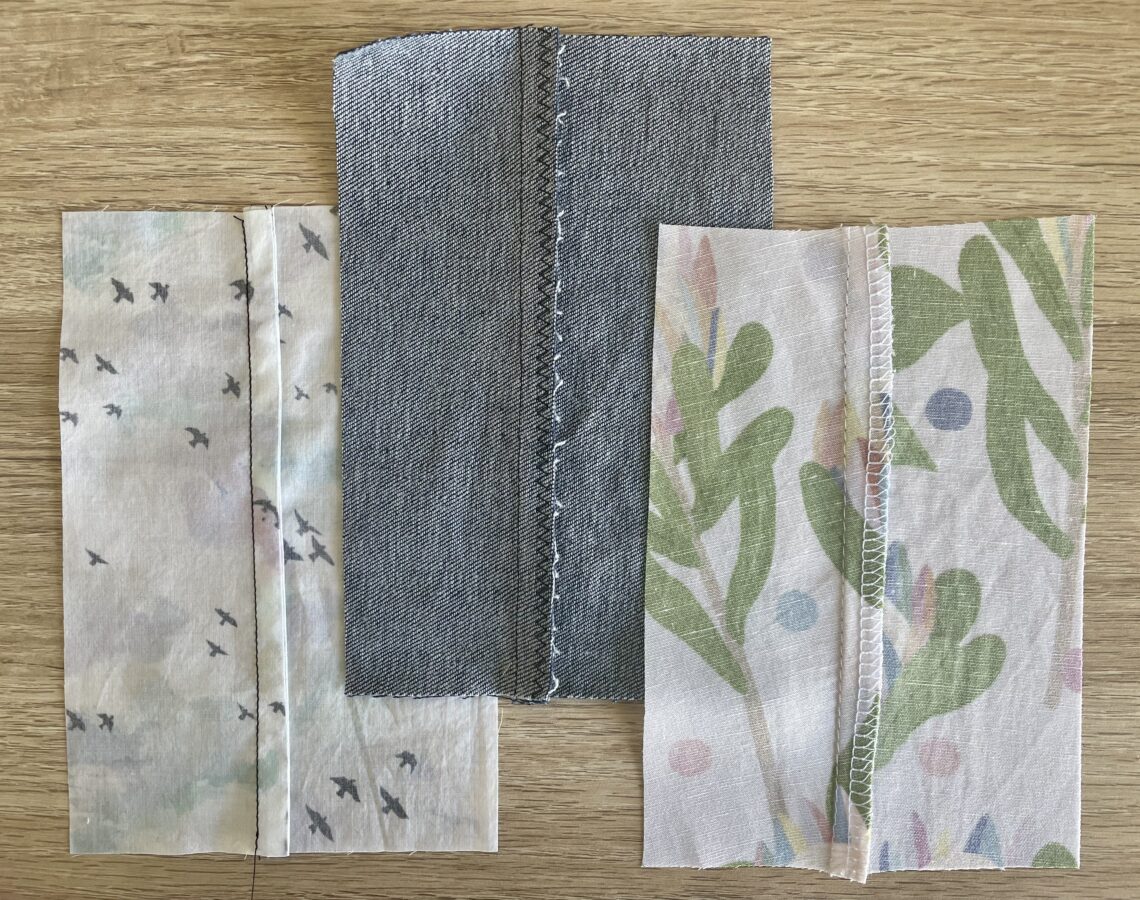
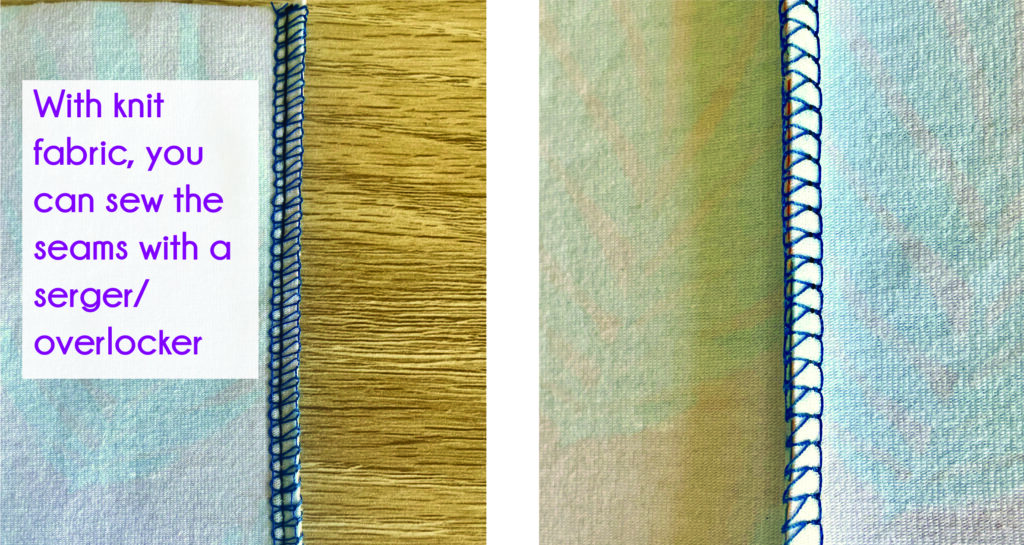
1. Overlocker/Serger
This is the quickest way to get a really smart looking finish. An overlocker uses several threads to create a loopy chain around the raw edges of your fabric.
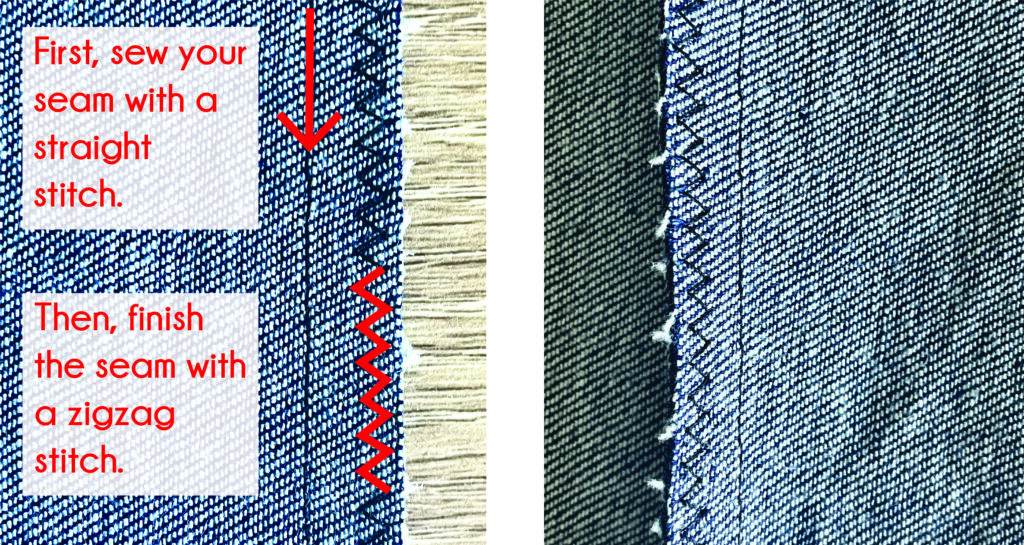
If you are using woven fabric, you must sew your seam using a sewing machine first and then go over the seams again with your overlocker/serger.
If you are using knit fabric, you have the option to go straight to the overlocker – there’s no need to sew your seams twice.

2. Zigzag Stitch
If you do not have an overlocker/serger then don’t panic! You can use a regular sewing machine and a zigzag stitch instead. With this option, you must sew your seams first, no matter what kind of fabric you are using. Then you go back over the raw edges and sew them together with a zigzag stitch. This option isn’t quite as neat or effective as using an overlocker/serger, but it’s a brilliant option for those just starting out.
(Note: If you are using this option on knit fabrics, you should either sew your seam using a straight stitch with stretch thread such as Maraflex, or using a stretch stitch a regular thread. Don’t use a straight stitch and regular thread – your seams will pop when worn!)
3. French Seams
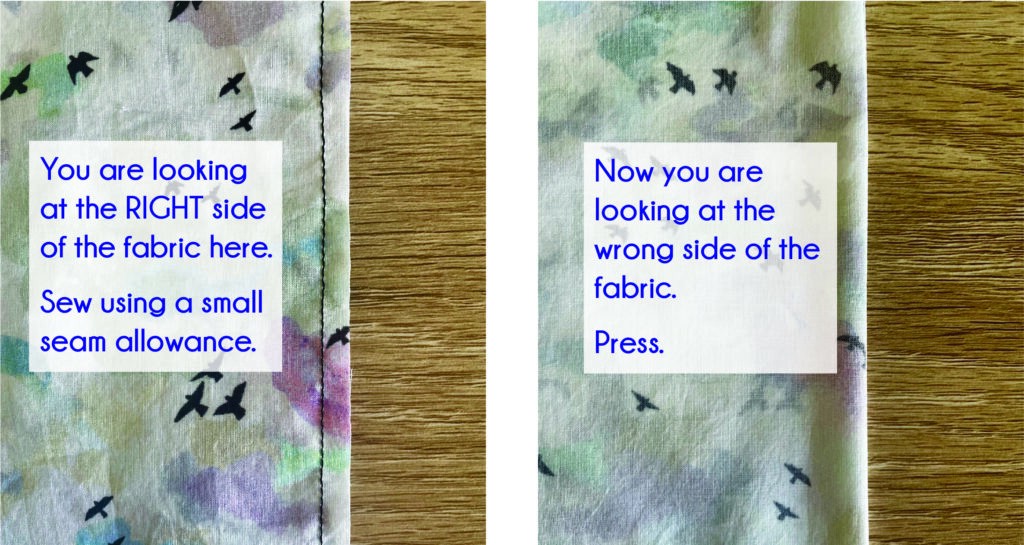
This is one of my personal favourites! It particularly useful when sewing with light, delicate fabrics, but can also be used on regular/mid-weight fabrics to give a special finish. To create a French seam, take your two pieces of fabric and place them wrong sides facing (this feels so naughty!). Sew using a small seam allowance. You may choose to trim away some of the seam allowance here to keep your finished seam small and neat. Press the seam with the fabric right sides facing. Your raw edges will now be hidden inside. Sew the seam again using a larger seam allowance.
In other words you sew the seam, press and then sew the seam again the other way, hiding the raw edges inside.
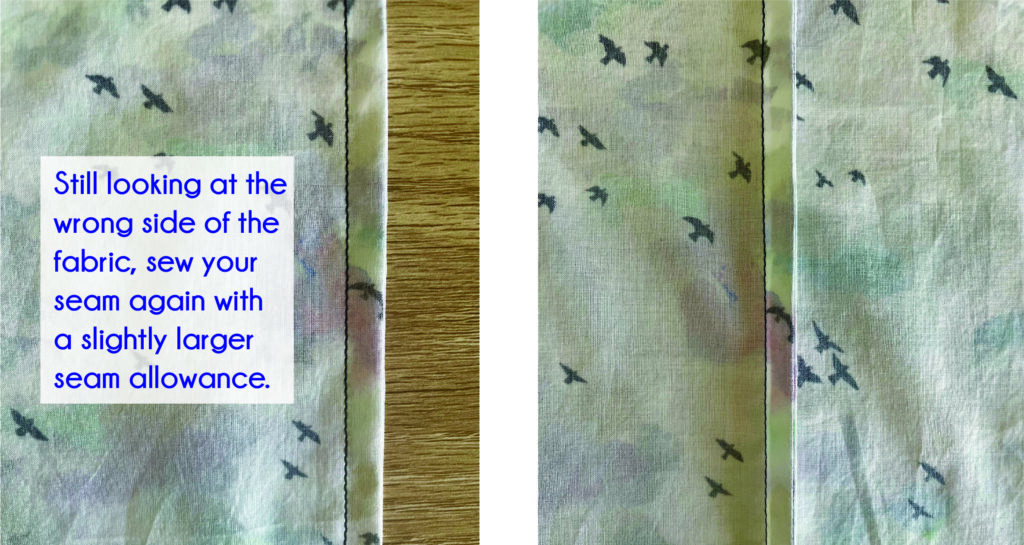
If you choose to use French seams on a pattern that doesn’t specify them, make sure your two seam allowances add up to whatever the seam allowance of that pattern is. If you use a pattern such as the Kinjarling Dress, the pattern is already drafted to use a French seam and all the information is in the instructions.
If you’ve found this useful, let me know and I’ll write a second blog post with more advanced seam finishing options.
Happy sewing!
Great blog post thank you. I always imagined that French seams were much more complicated than your blog depicts them. I may now be brave enough to purchase patterns which use them.
They’re really not once you get your head around starting with your fabric right sides out. You have to sew accurately, but they’re not complicated at all and create such a lovely looking seam.
Really useful, thank you! And yes, sharing more of your knowledge and experience would be much appreciated!
Very useful thank you !
More information on now to use an overlocker would be great 👍
Just wondering why you need to do a straight stitch first before overlooking on woven fabrics? Thank you.
The overlocker stitch on its own will generally not be strong enough for a woven fabric seam. It would work initially, but it would not last.
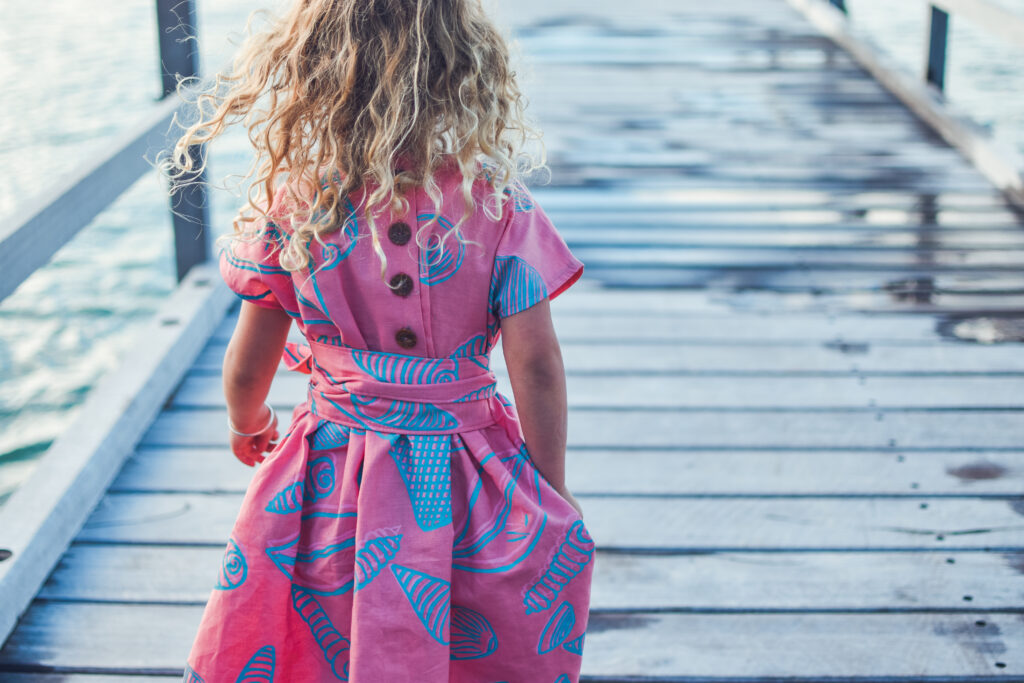
Hello, I’d love another blog post about more advanced seam finishing options. I always appreciate what I learn from your posts. Thanks! Also – is there an adult version of that pink seashell dress? I love the wrap belt and buttons!
Thank you! And yes, the adult Kinjarling Dress is just as fabulous and can be found here: https://www.wavesandwild.com/shop/kinjarlingdress/ The adult version doesn’t have a button back in the options, but it’s very easy to add and there’s a blog post for that too! https://www.wavesandwild.com/buttonup/
This was great!! Thankyou. I am a beginner sewer, for clothing, a quilter previously. One of the questions i have is do you finish your seams each time you sew two pieces together, or do you wait until you have completed the item then finish all the seams? if that makes sense.
Great question! I recommend finishing each seam as you go. With most garments, there will be seams that intersect (think of the inside leg seam and crotch seam on a pair of leggings). If you wait until the end, you would be trying to finish seams that are now joined to another which could end up untidy. Finishing each seam as you go will give a much better end result.
Thank you for the explanation of French seams, would you be able to explain a felled seam?
I’ve got it on my list to include in part 2, coming soon!
Thanks for this. Looking forward to the next one