
Button Up!
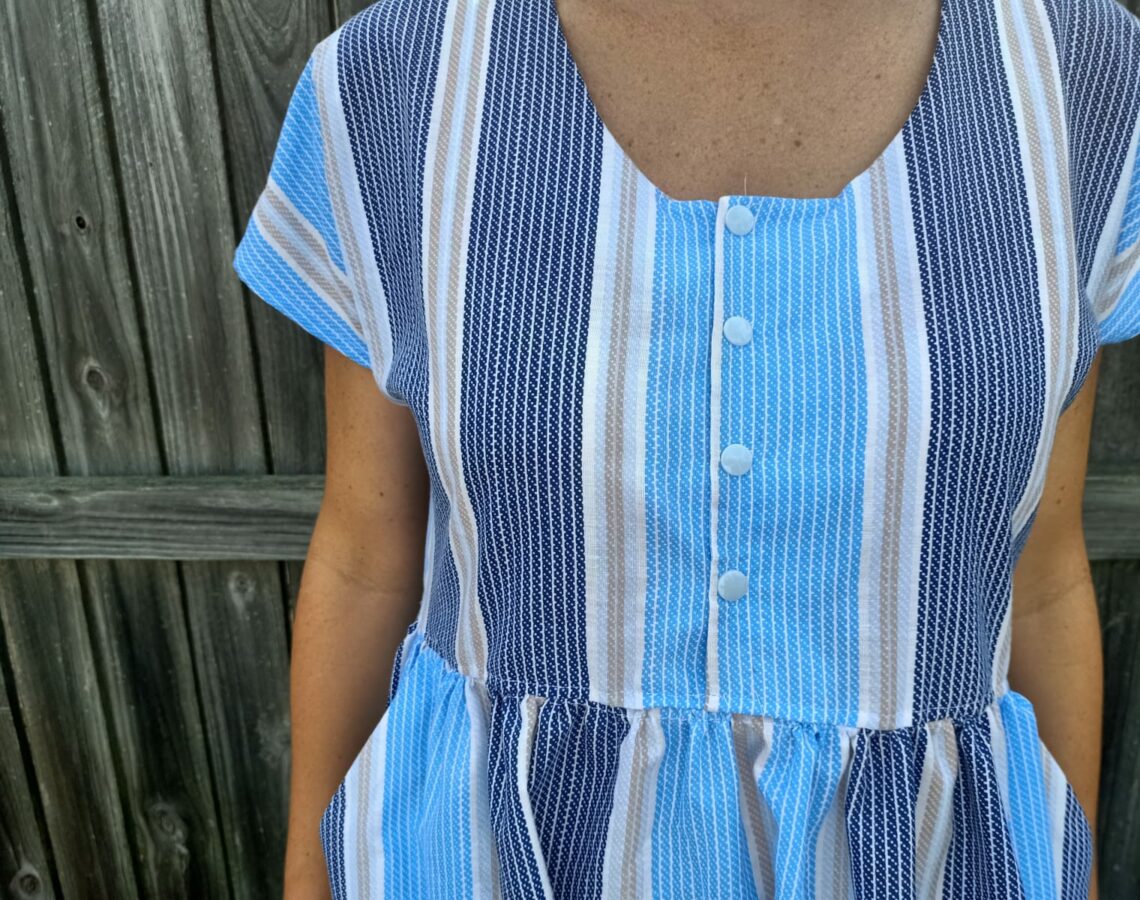
One of the features of the Kinjarling Dress is that it has no fastenings. However, perhaps you love the look of buttons, or maybe you’re breastfeeding and need better access. It’s super easy to adapt the pattern to open at the front and I’m here to talk you through it.
On top of the supplies mentioned in the original instructions you will also need buttons or snaps. Buttons look very pretty but snaps are easier to apply and use.
You will need to change the order you put the dress together. Make sure to read through the original instructions right the way through before starting this tutorial.
The original construction goes: sew bodice to skirt – sew shoulders – sew sides – finish neck – finish sleeves and skirt
To use the button front hack you will change the construction order to: sew shoulders – finish neck – sew bodice to skirt – sew sides – finish sleeves and skirt.

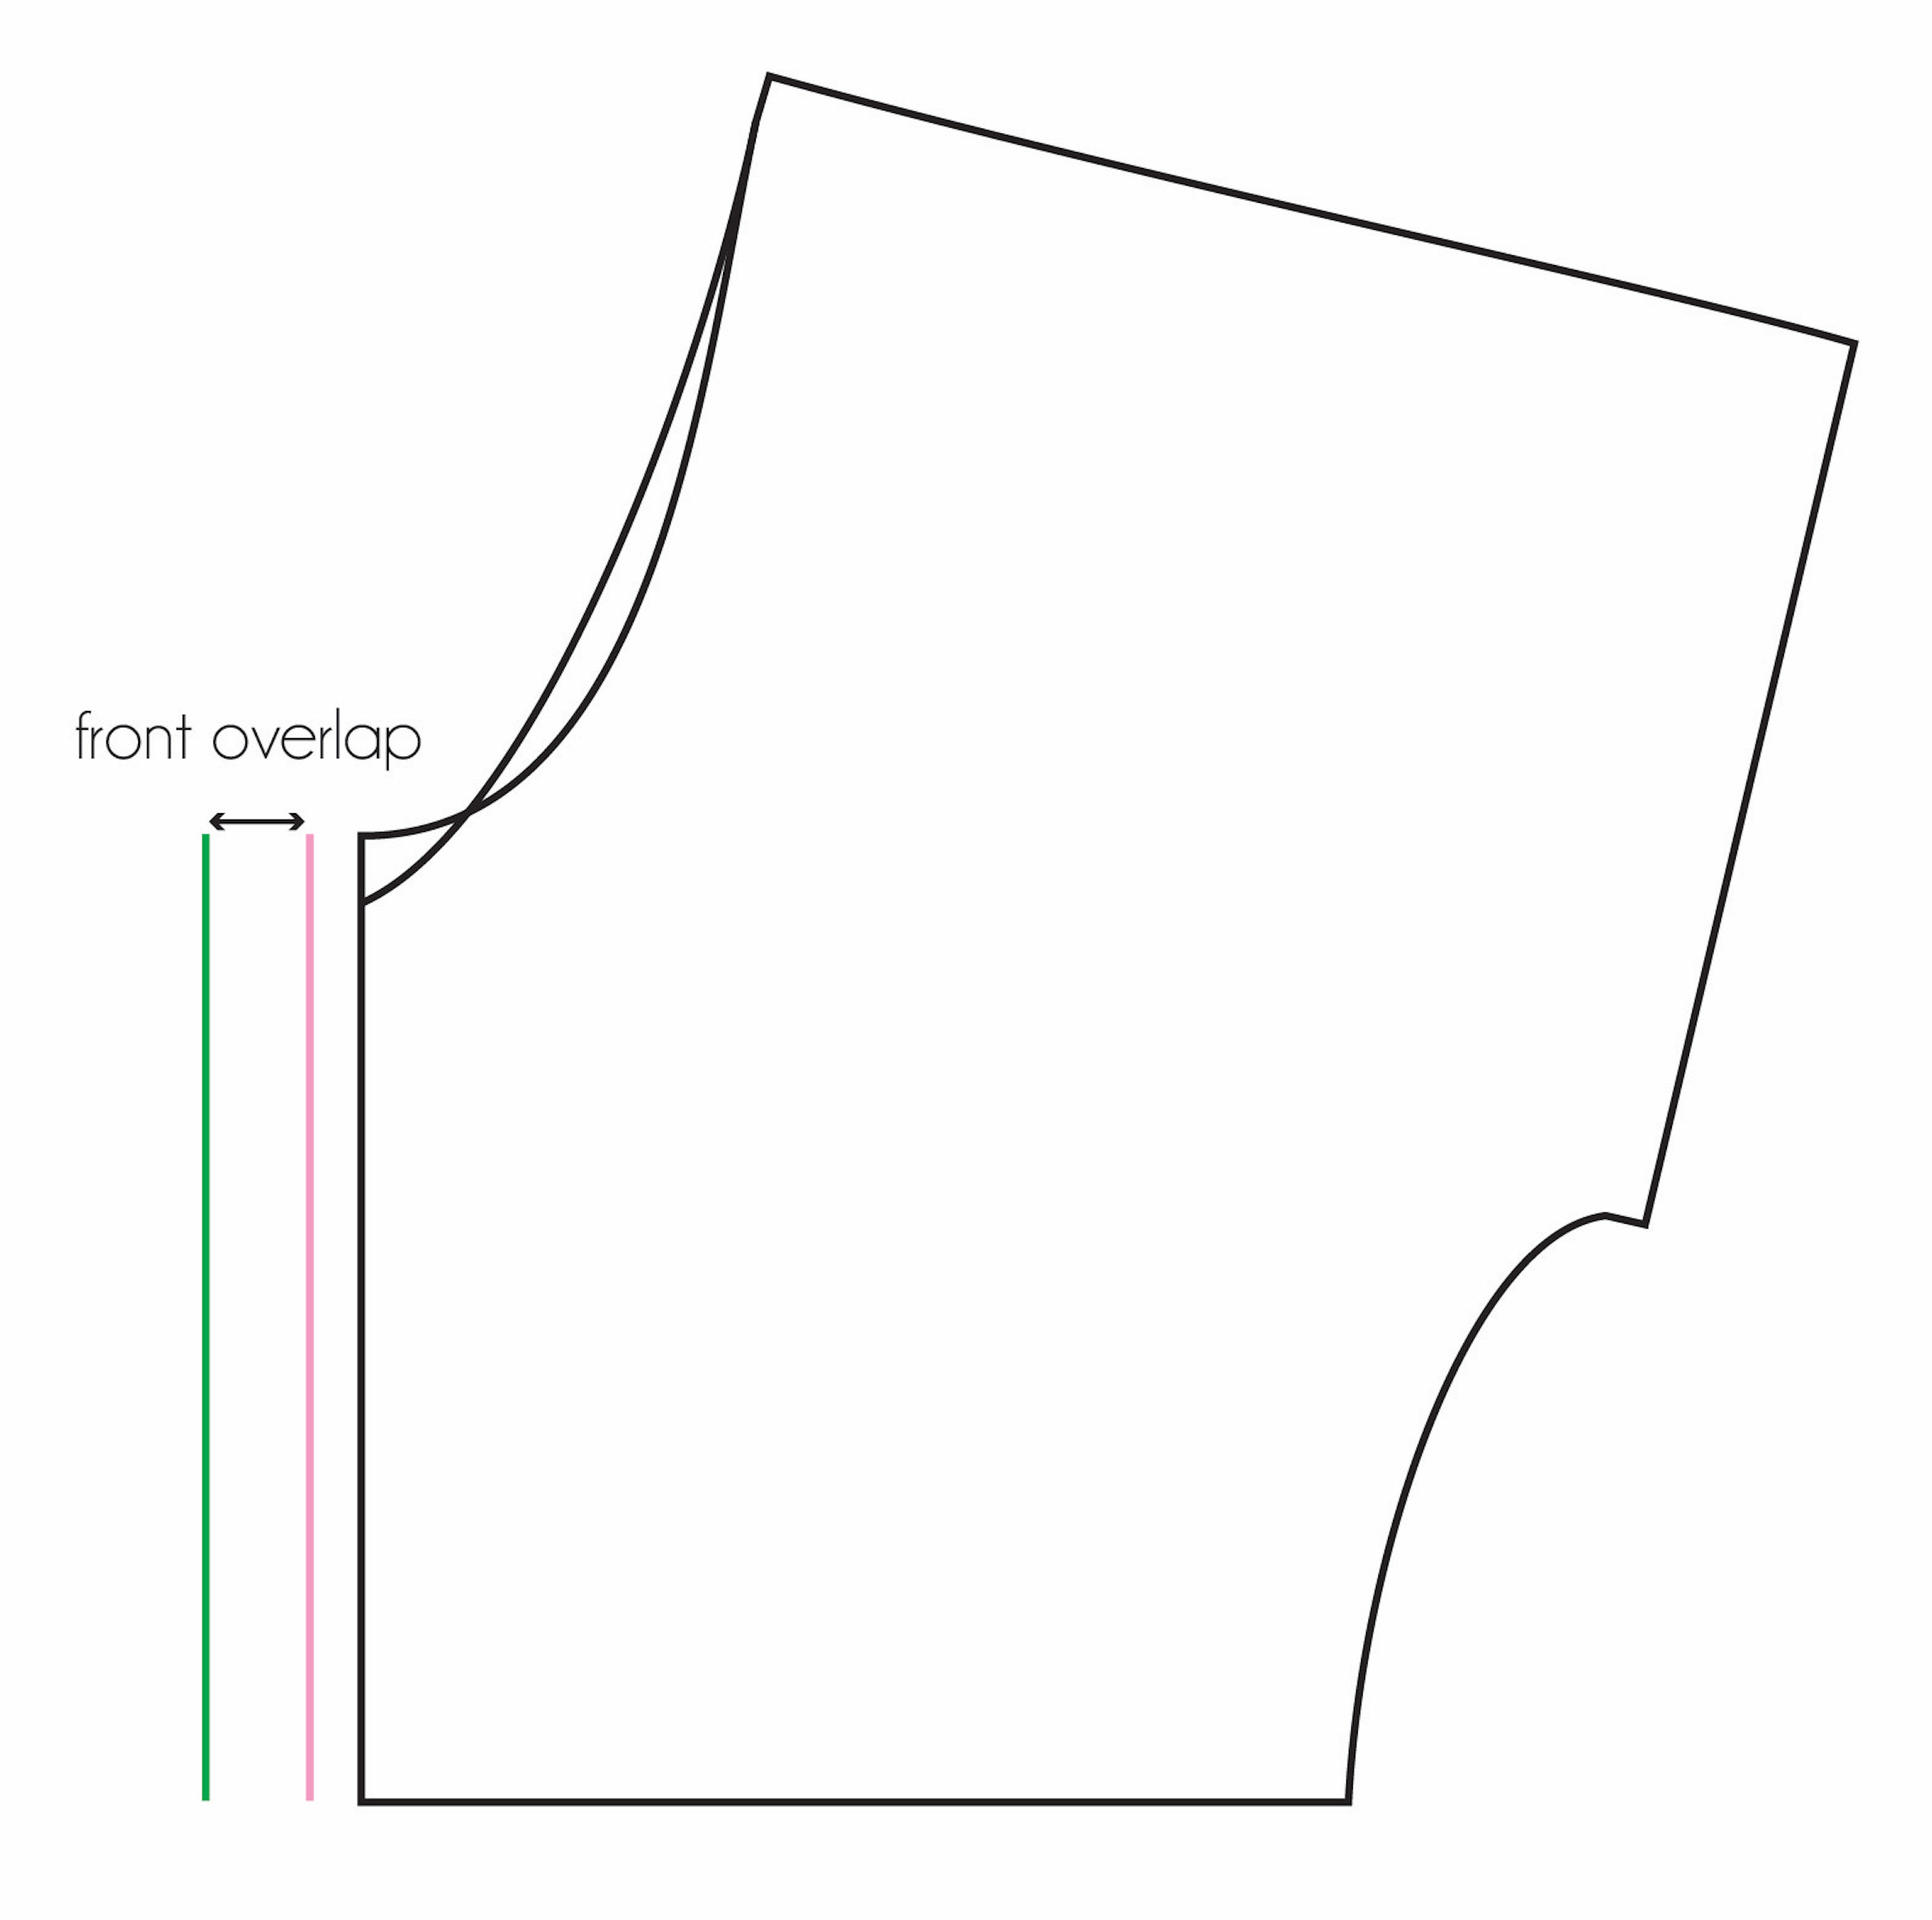
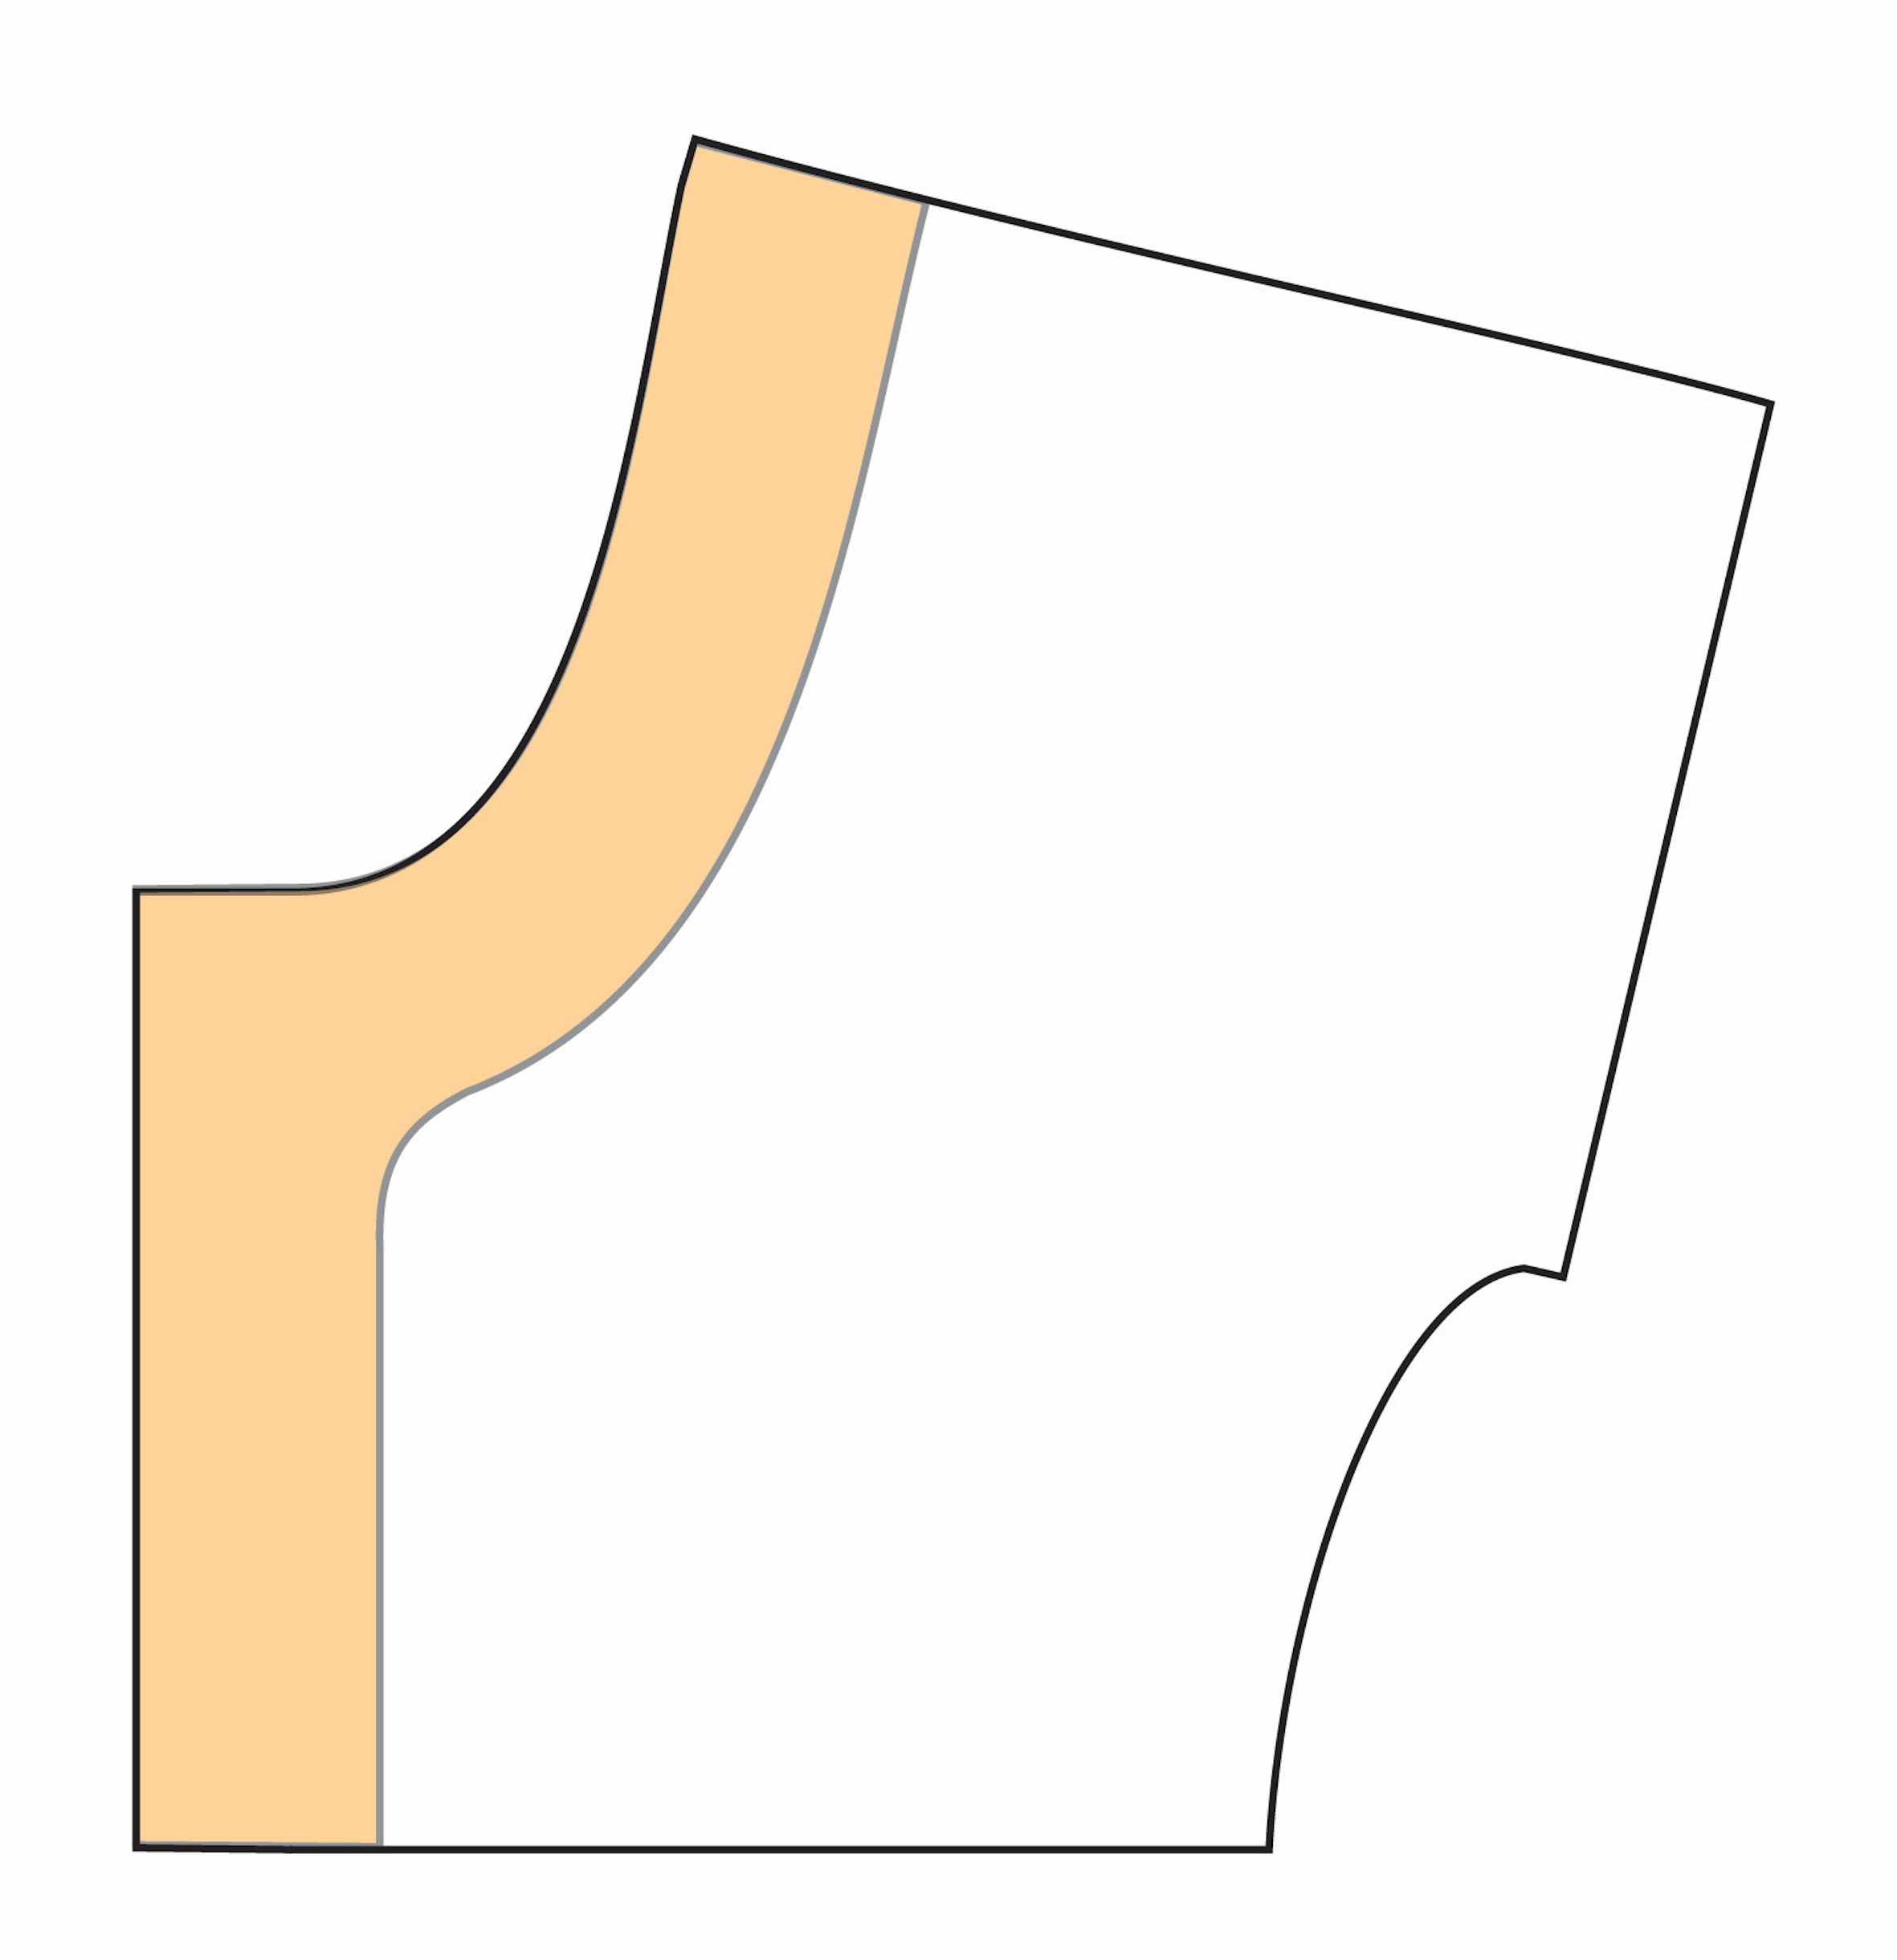
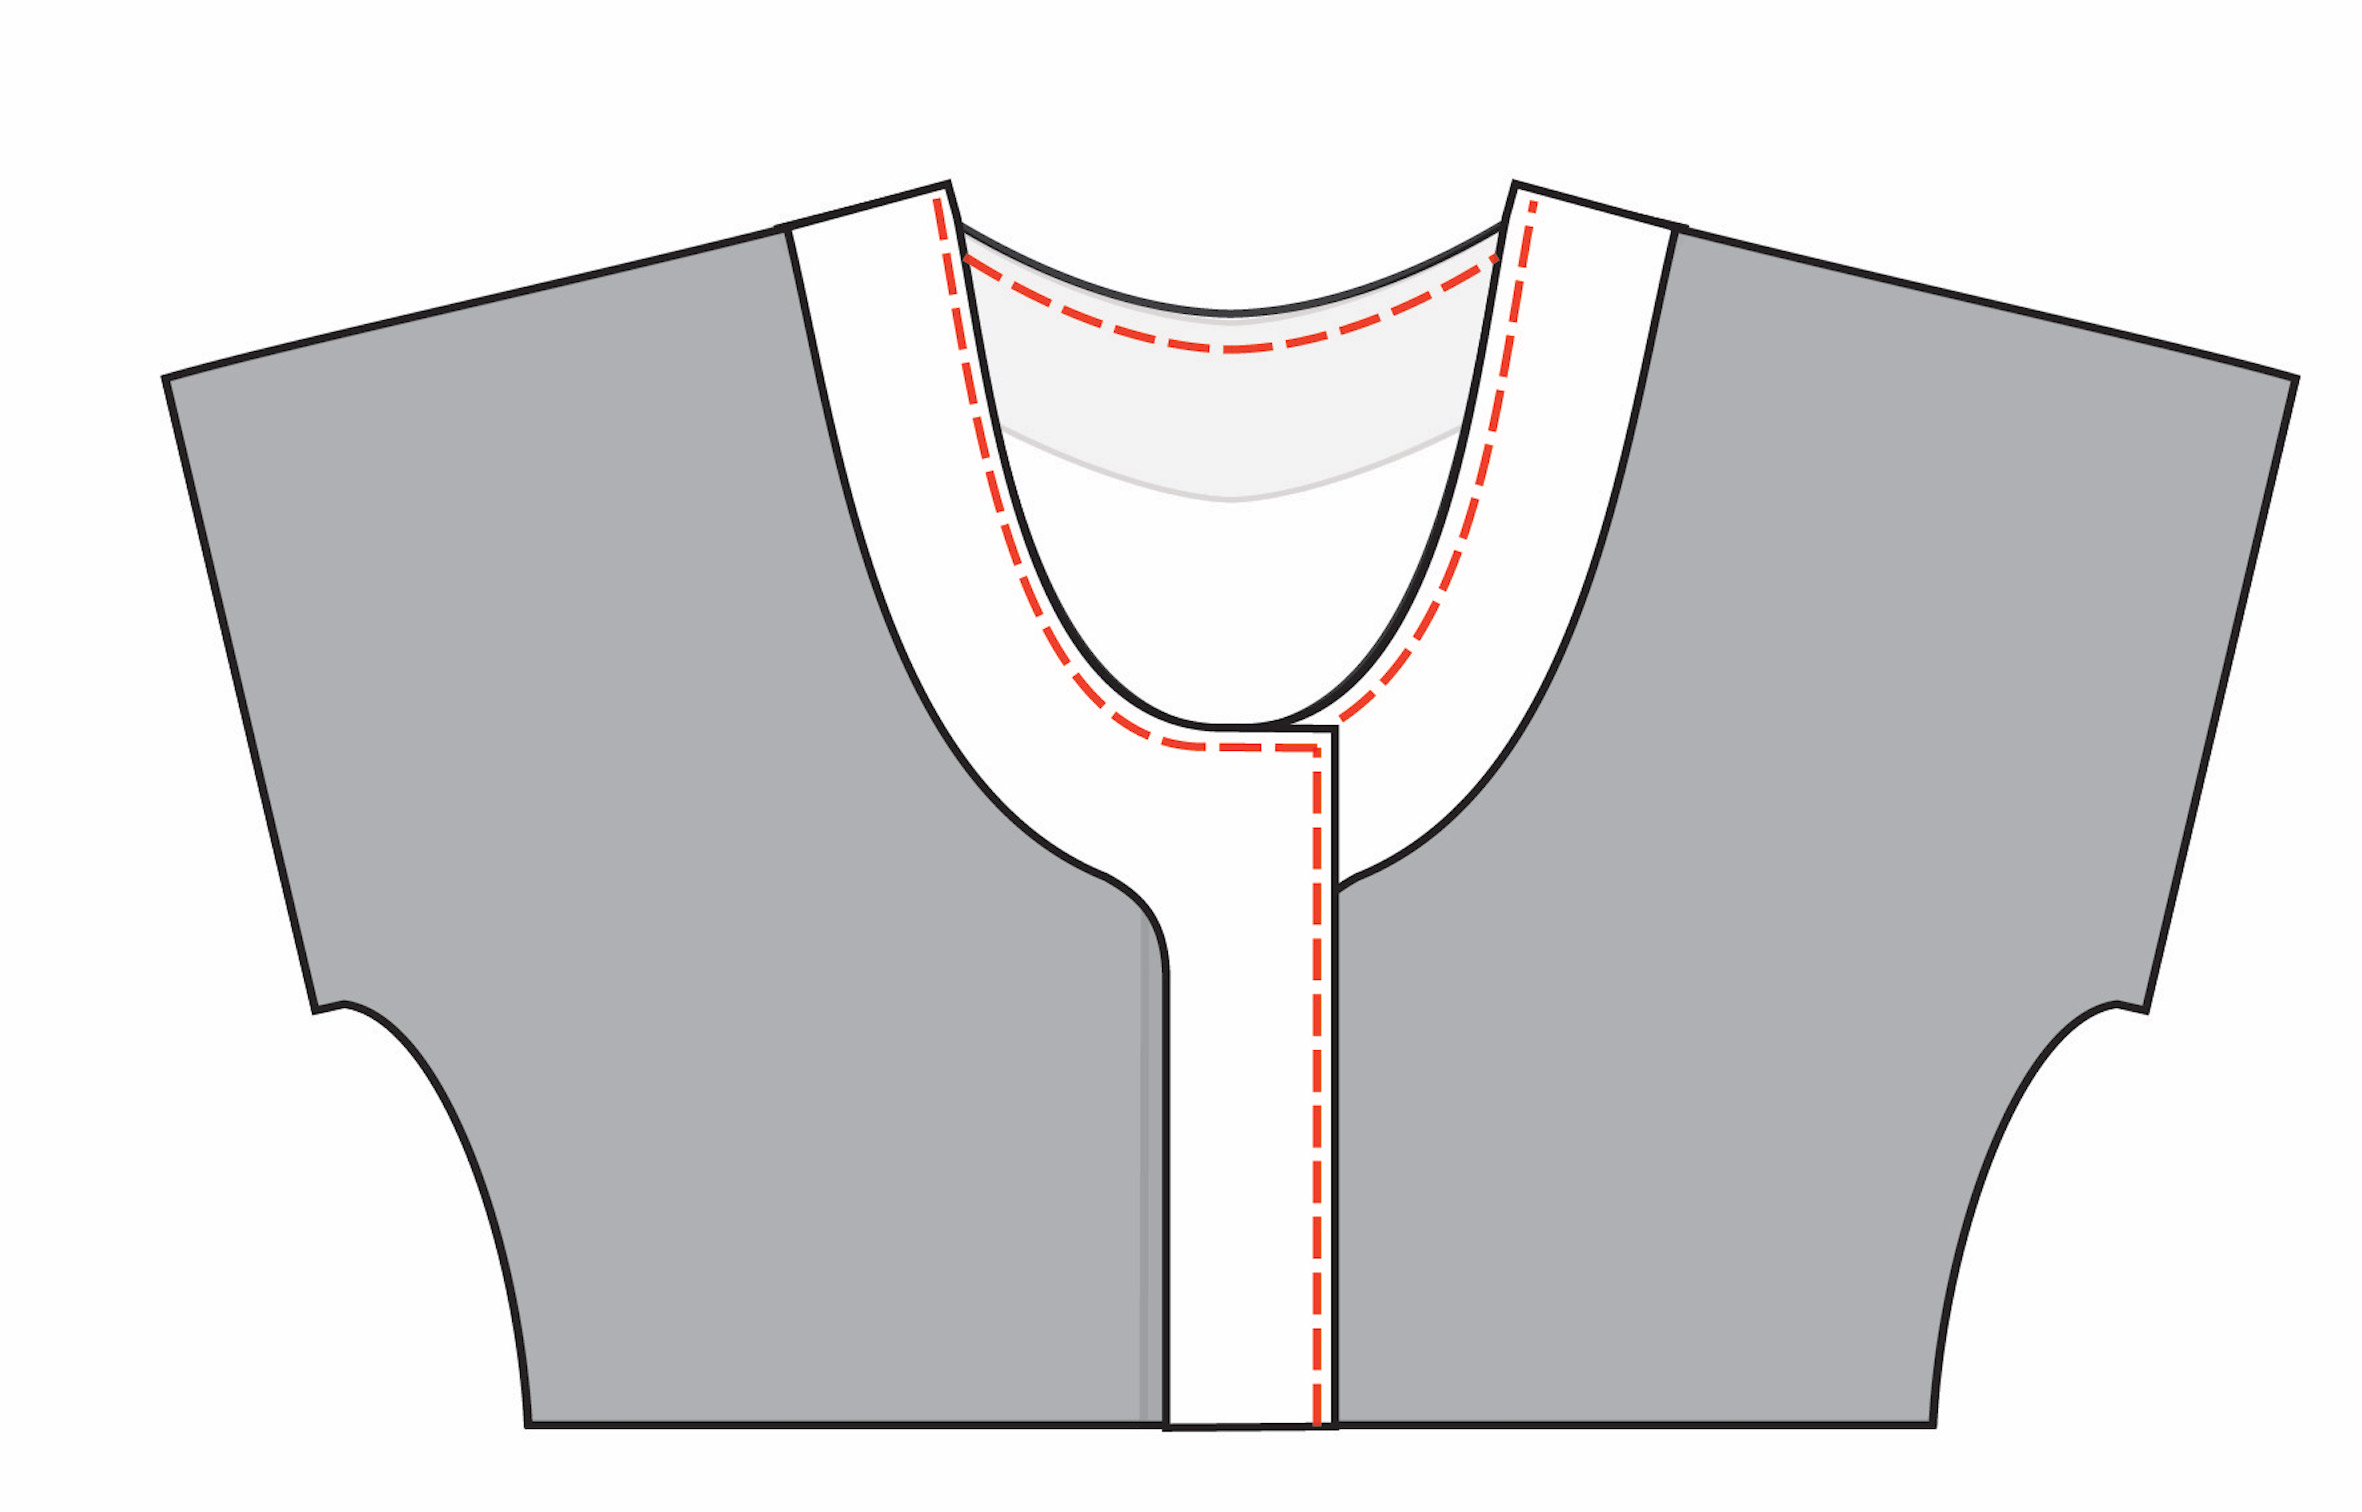
1. Since you want your dress to open at the front you need to ignore the ‘cut on fold’ instruction on the front bodice pattern piece. Place the pattern piece on a large sheet of paper and prepare to create a new front pattern piece.
2. Add a 6mm (¼”) seam allowance to the centre front.

3. Add extra to the centre front to create your overlap. You can go big or small depending on the size of your buttons (or snaps). If you’re unsure, 2.5cm (1″) is a good place to start.
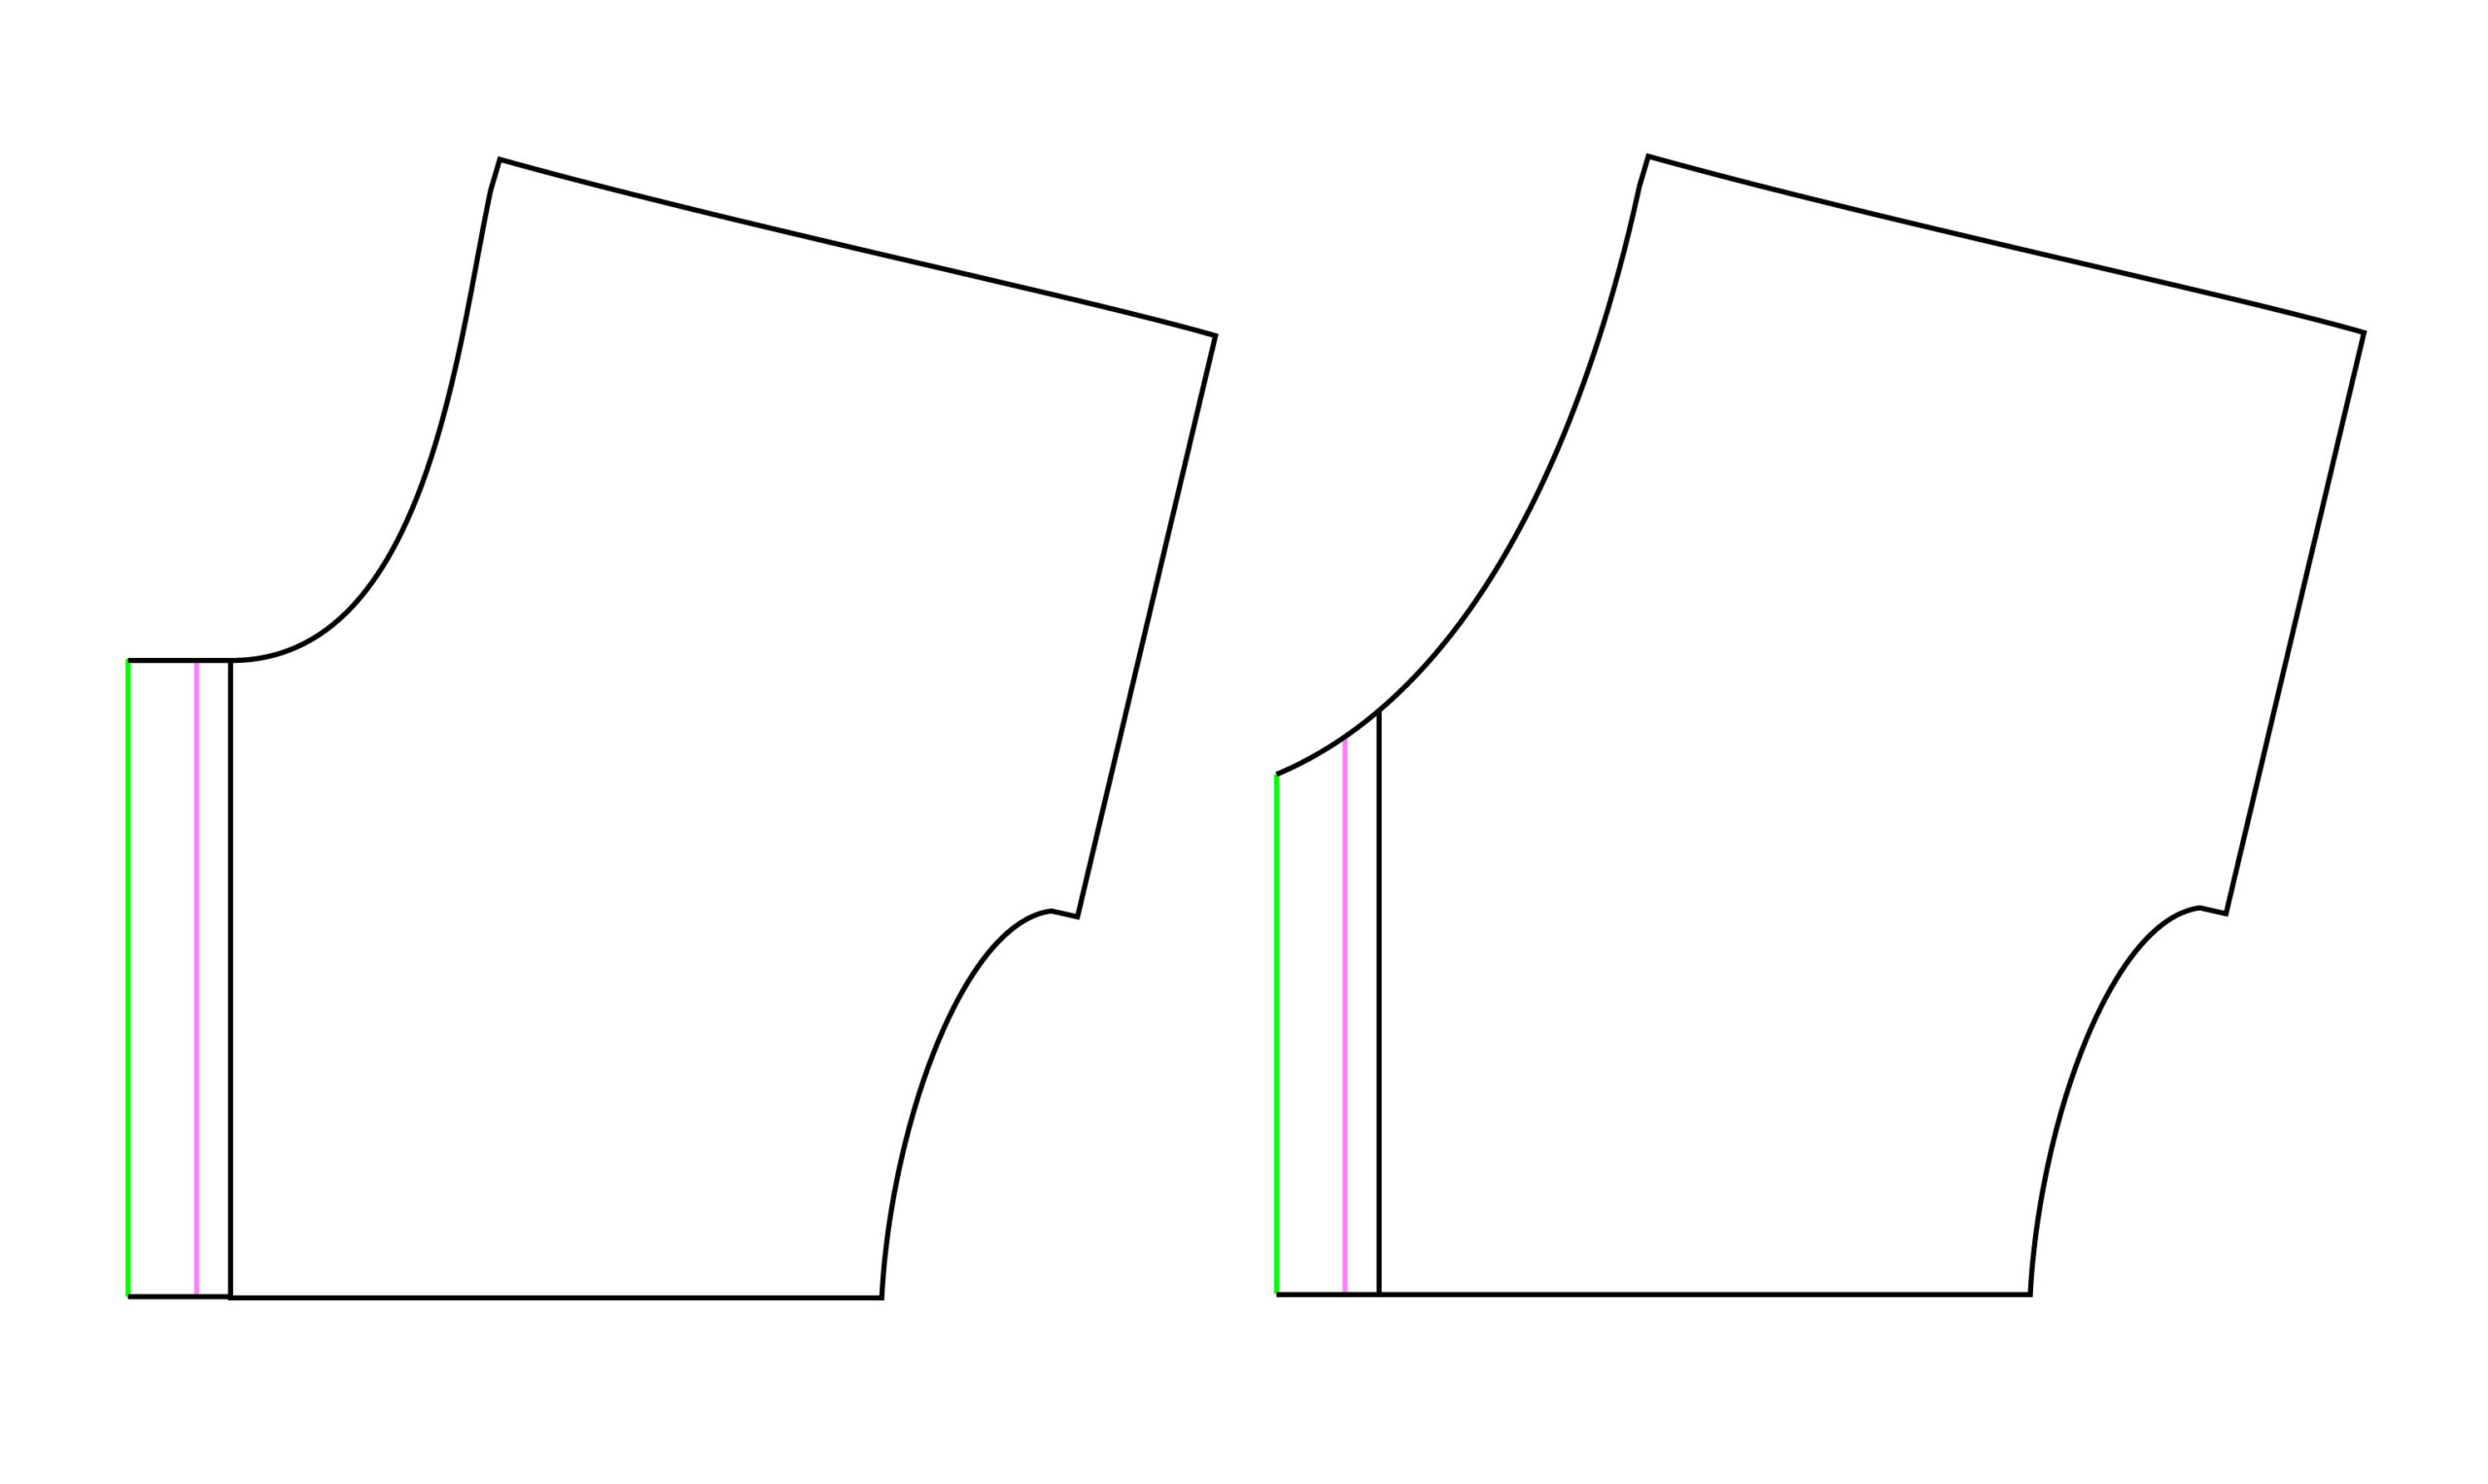
4. Join the green (overlap) line to the rest of the pattern. If you are doing the round neck you should join by continuing the neckline straight across. If you are doing a V neck then join by continuing the V shape downwards. This is now your front bodice pattern piece. Cut 2 (mirror image) from your main fabric
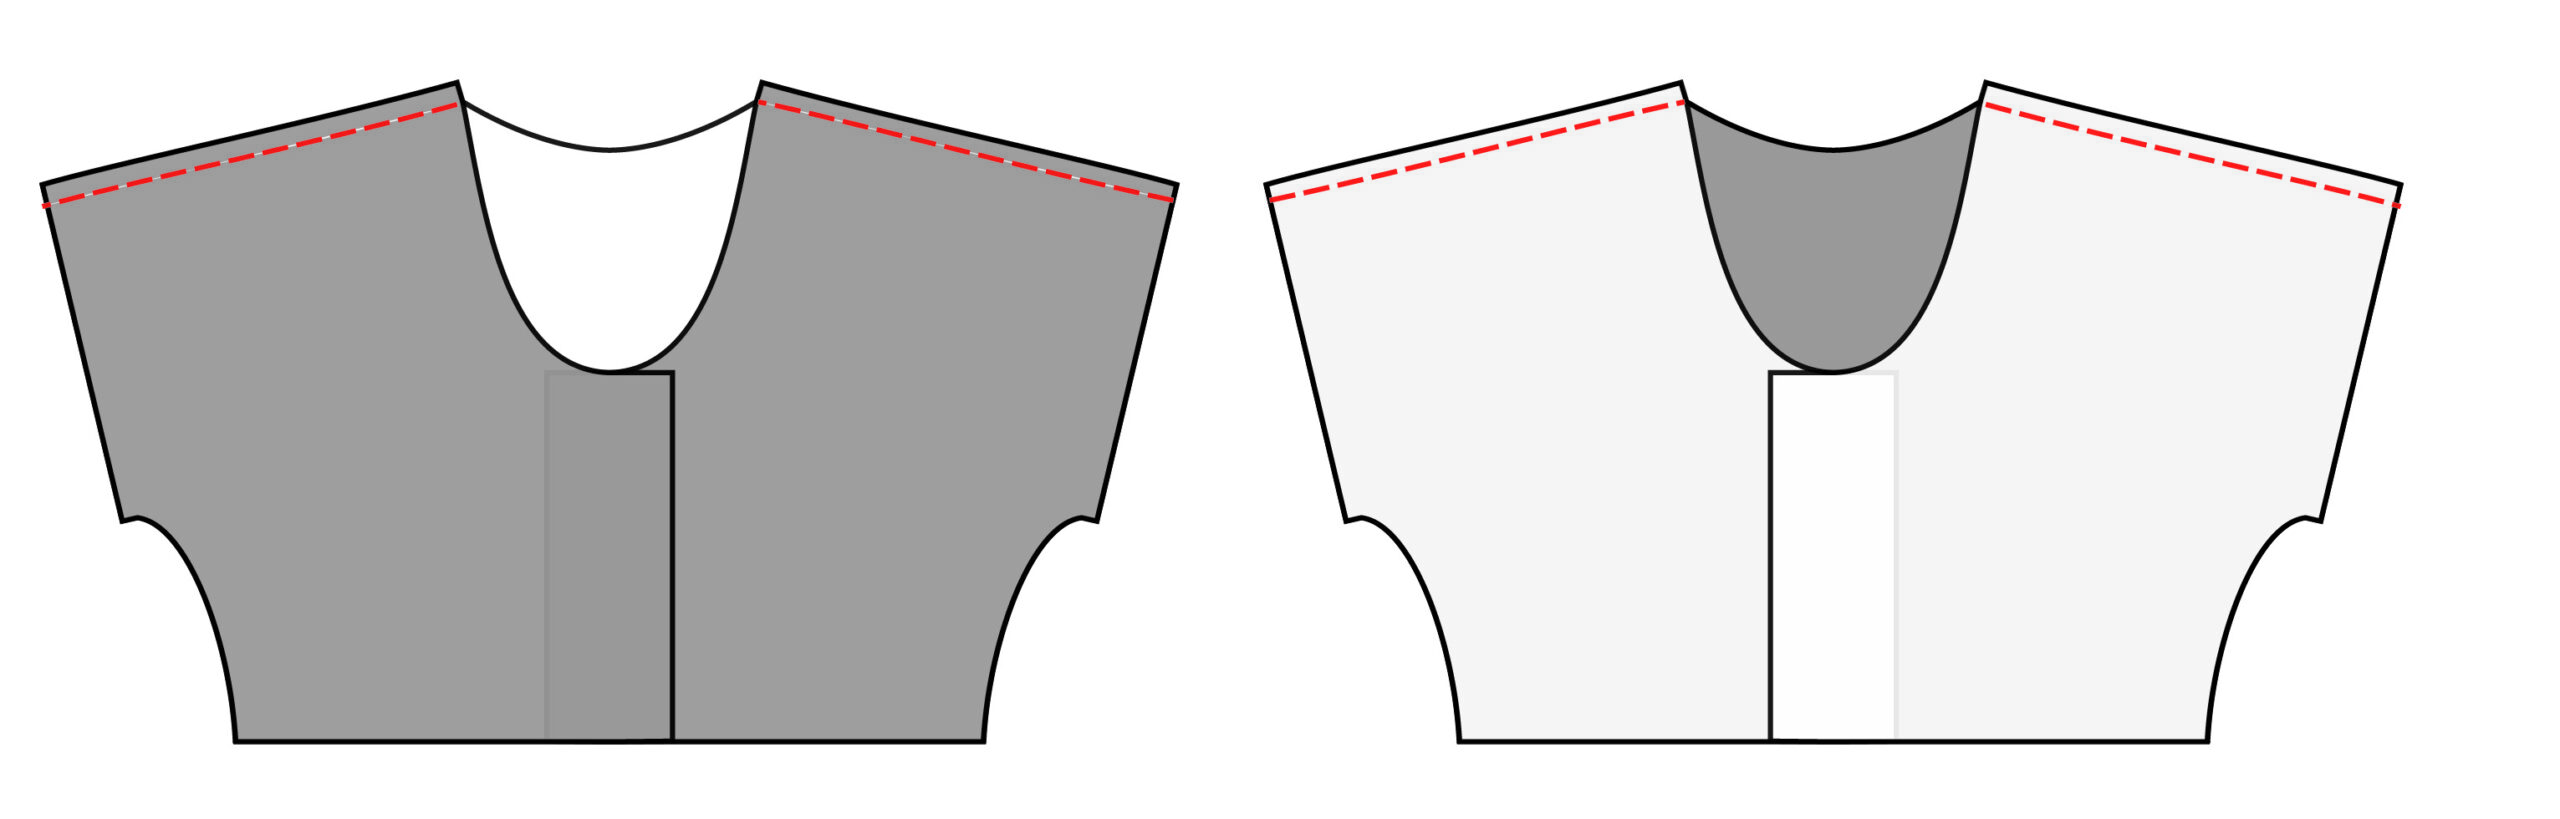
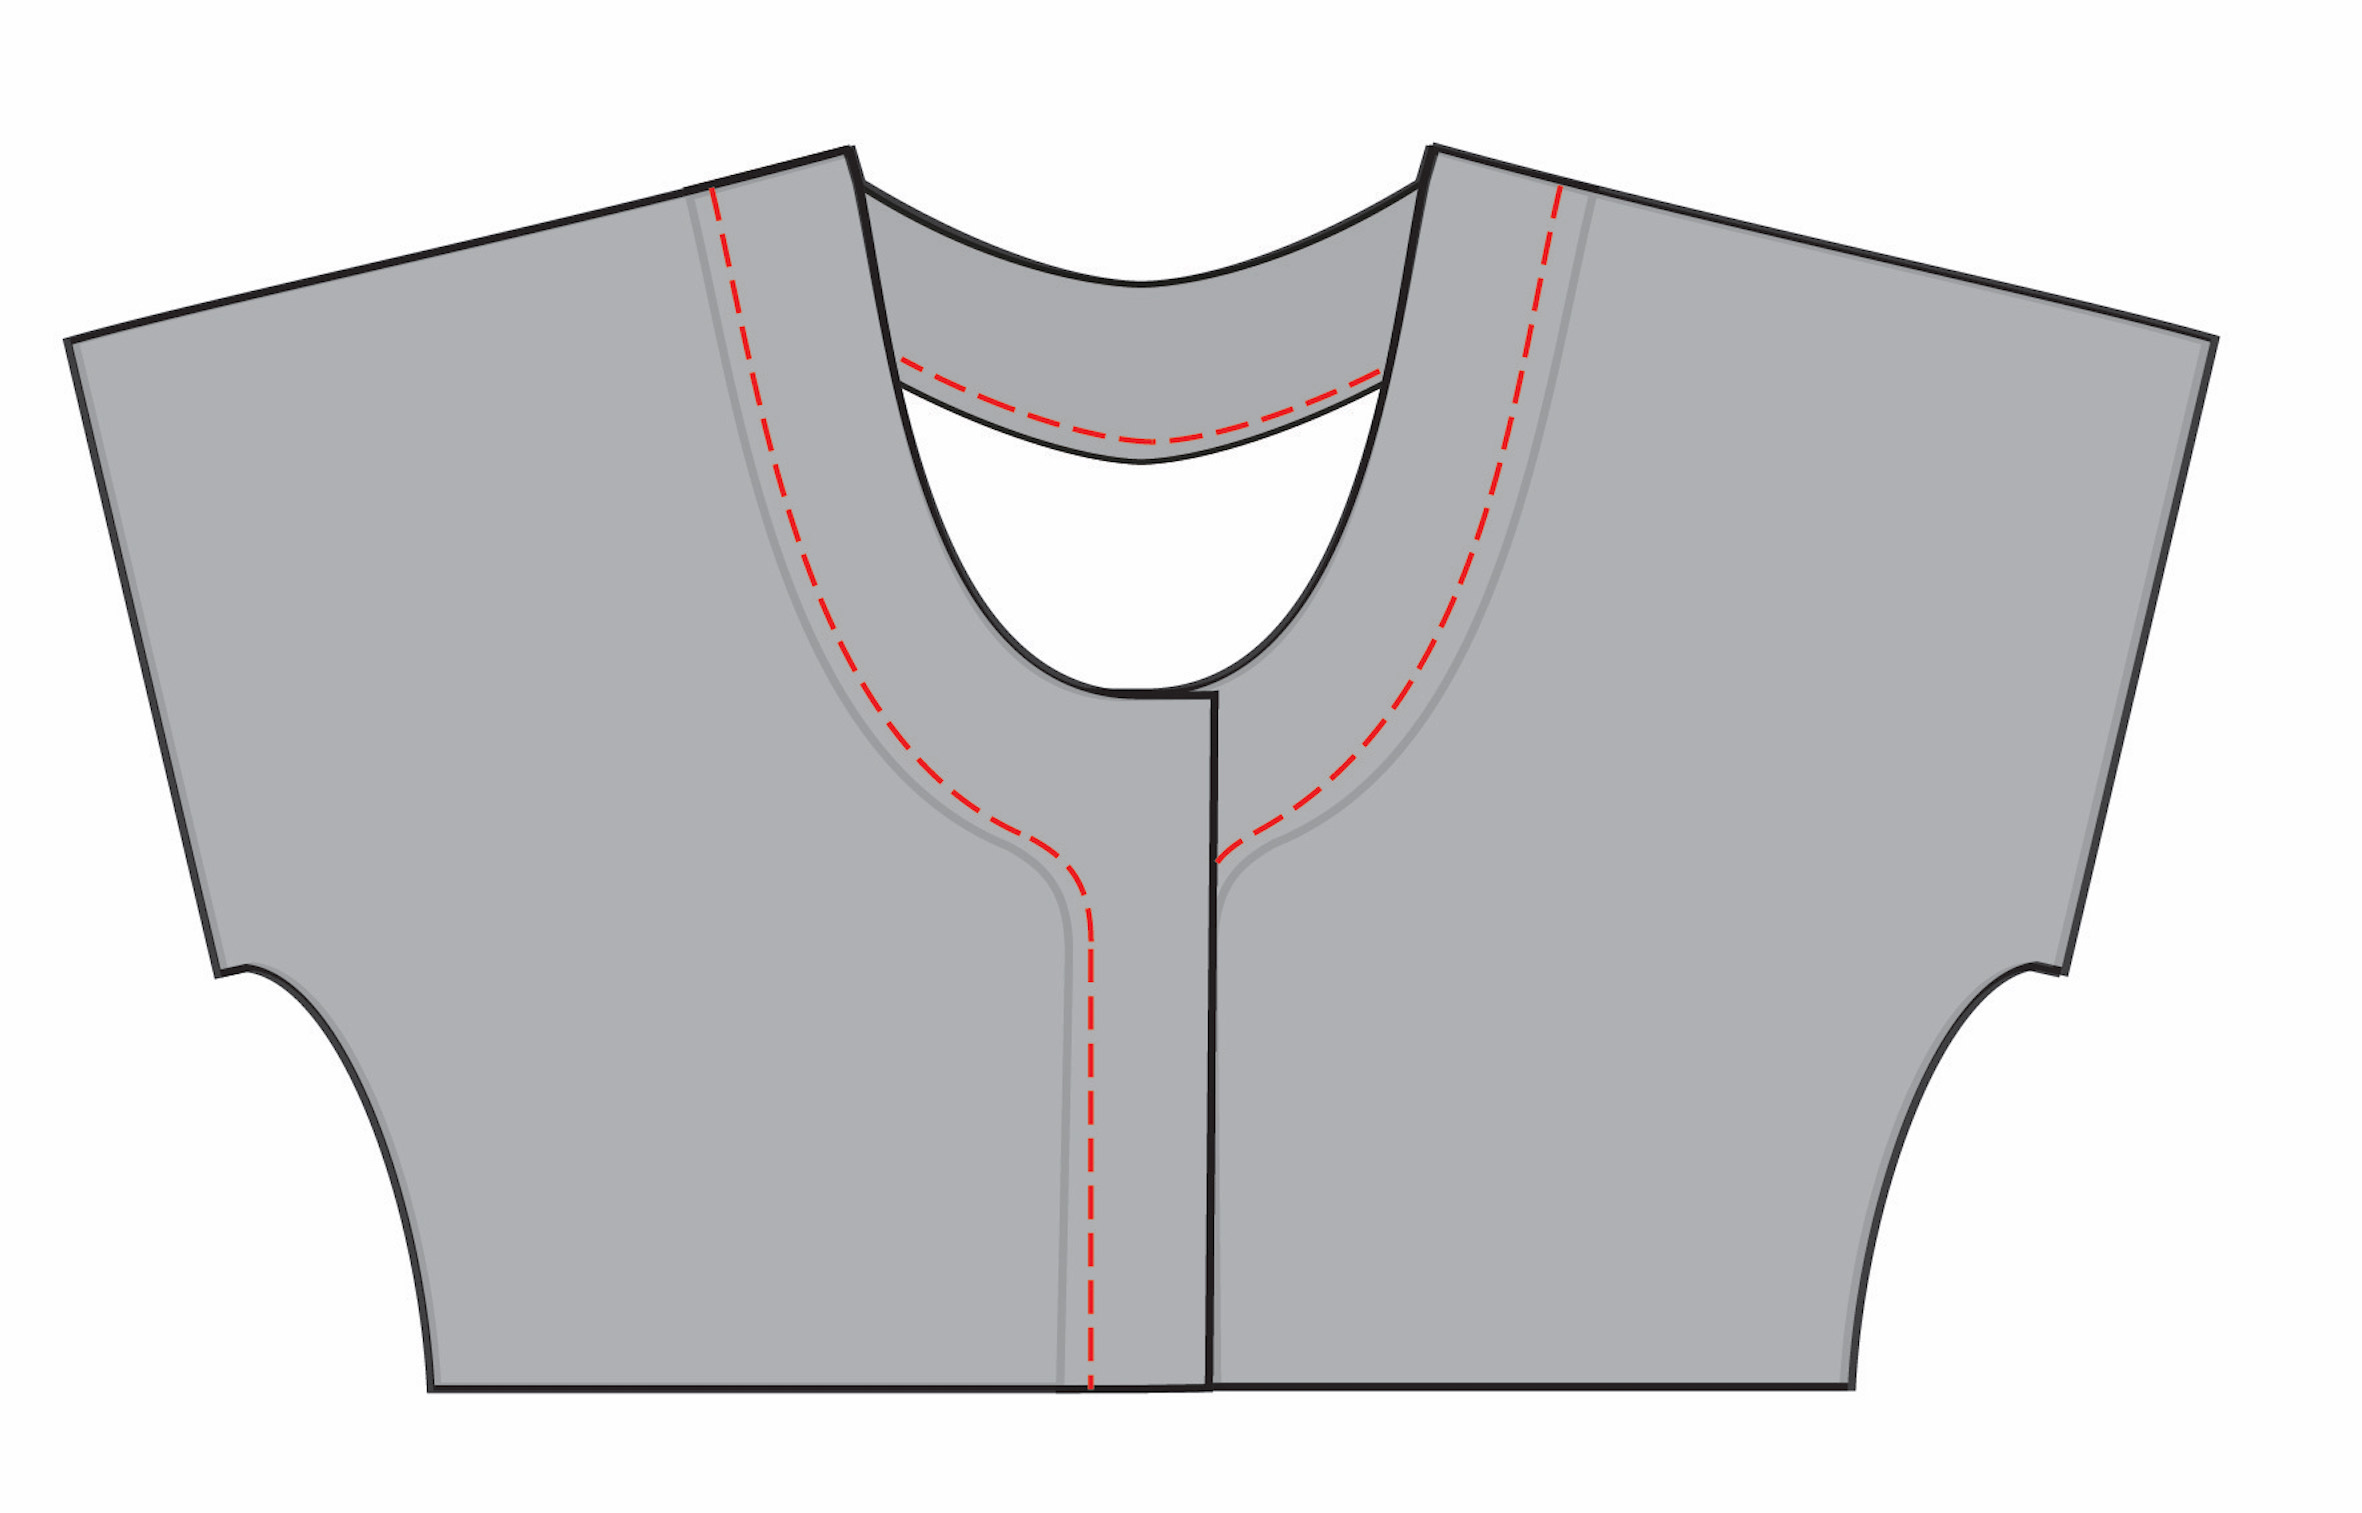
5. Next you need to create a new facing pattern piece to go with your new bodice. Place the existing front facing pattern piece on top of your new front bodice pattern piece.
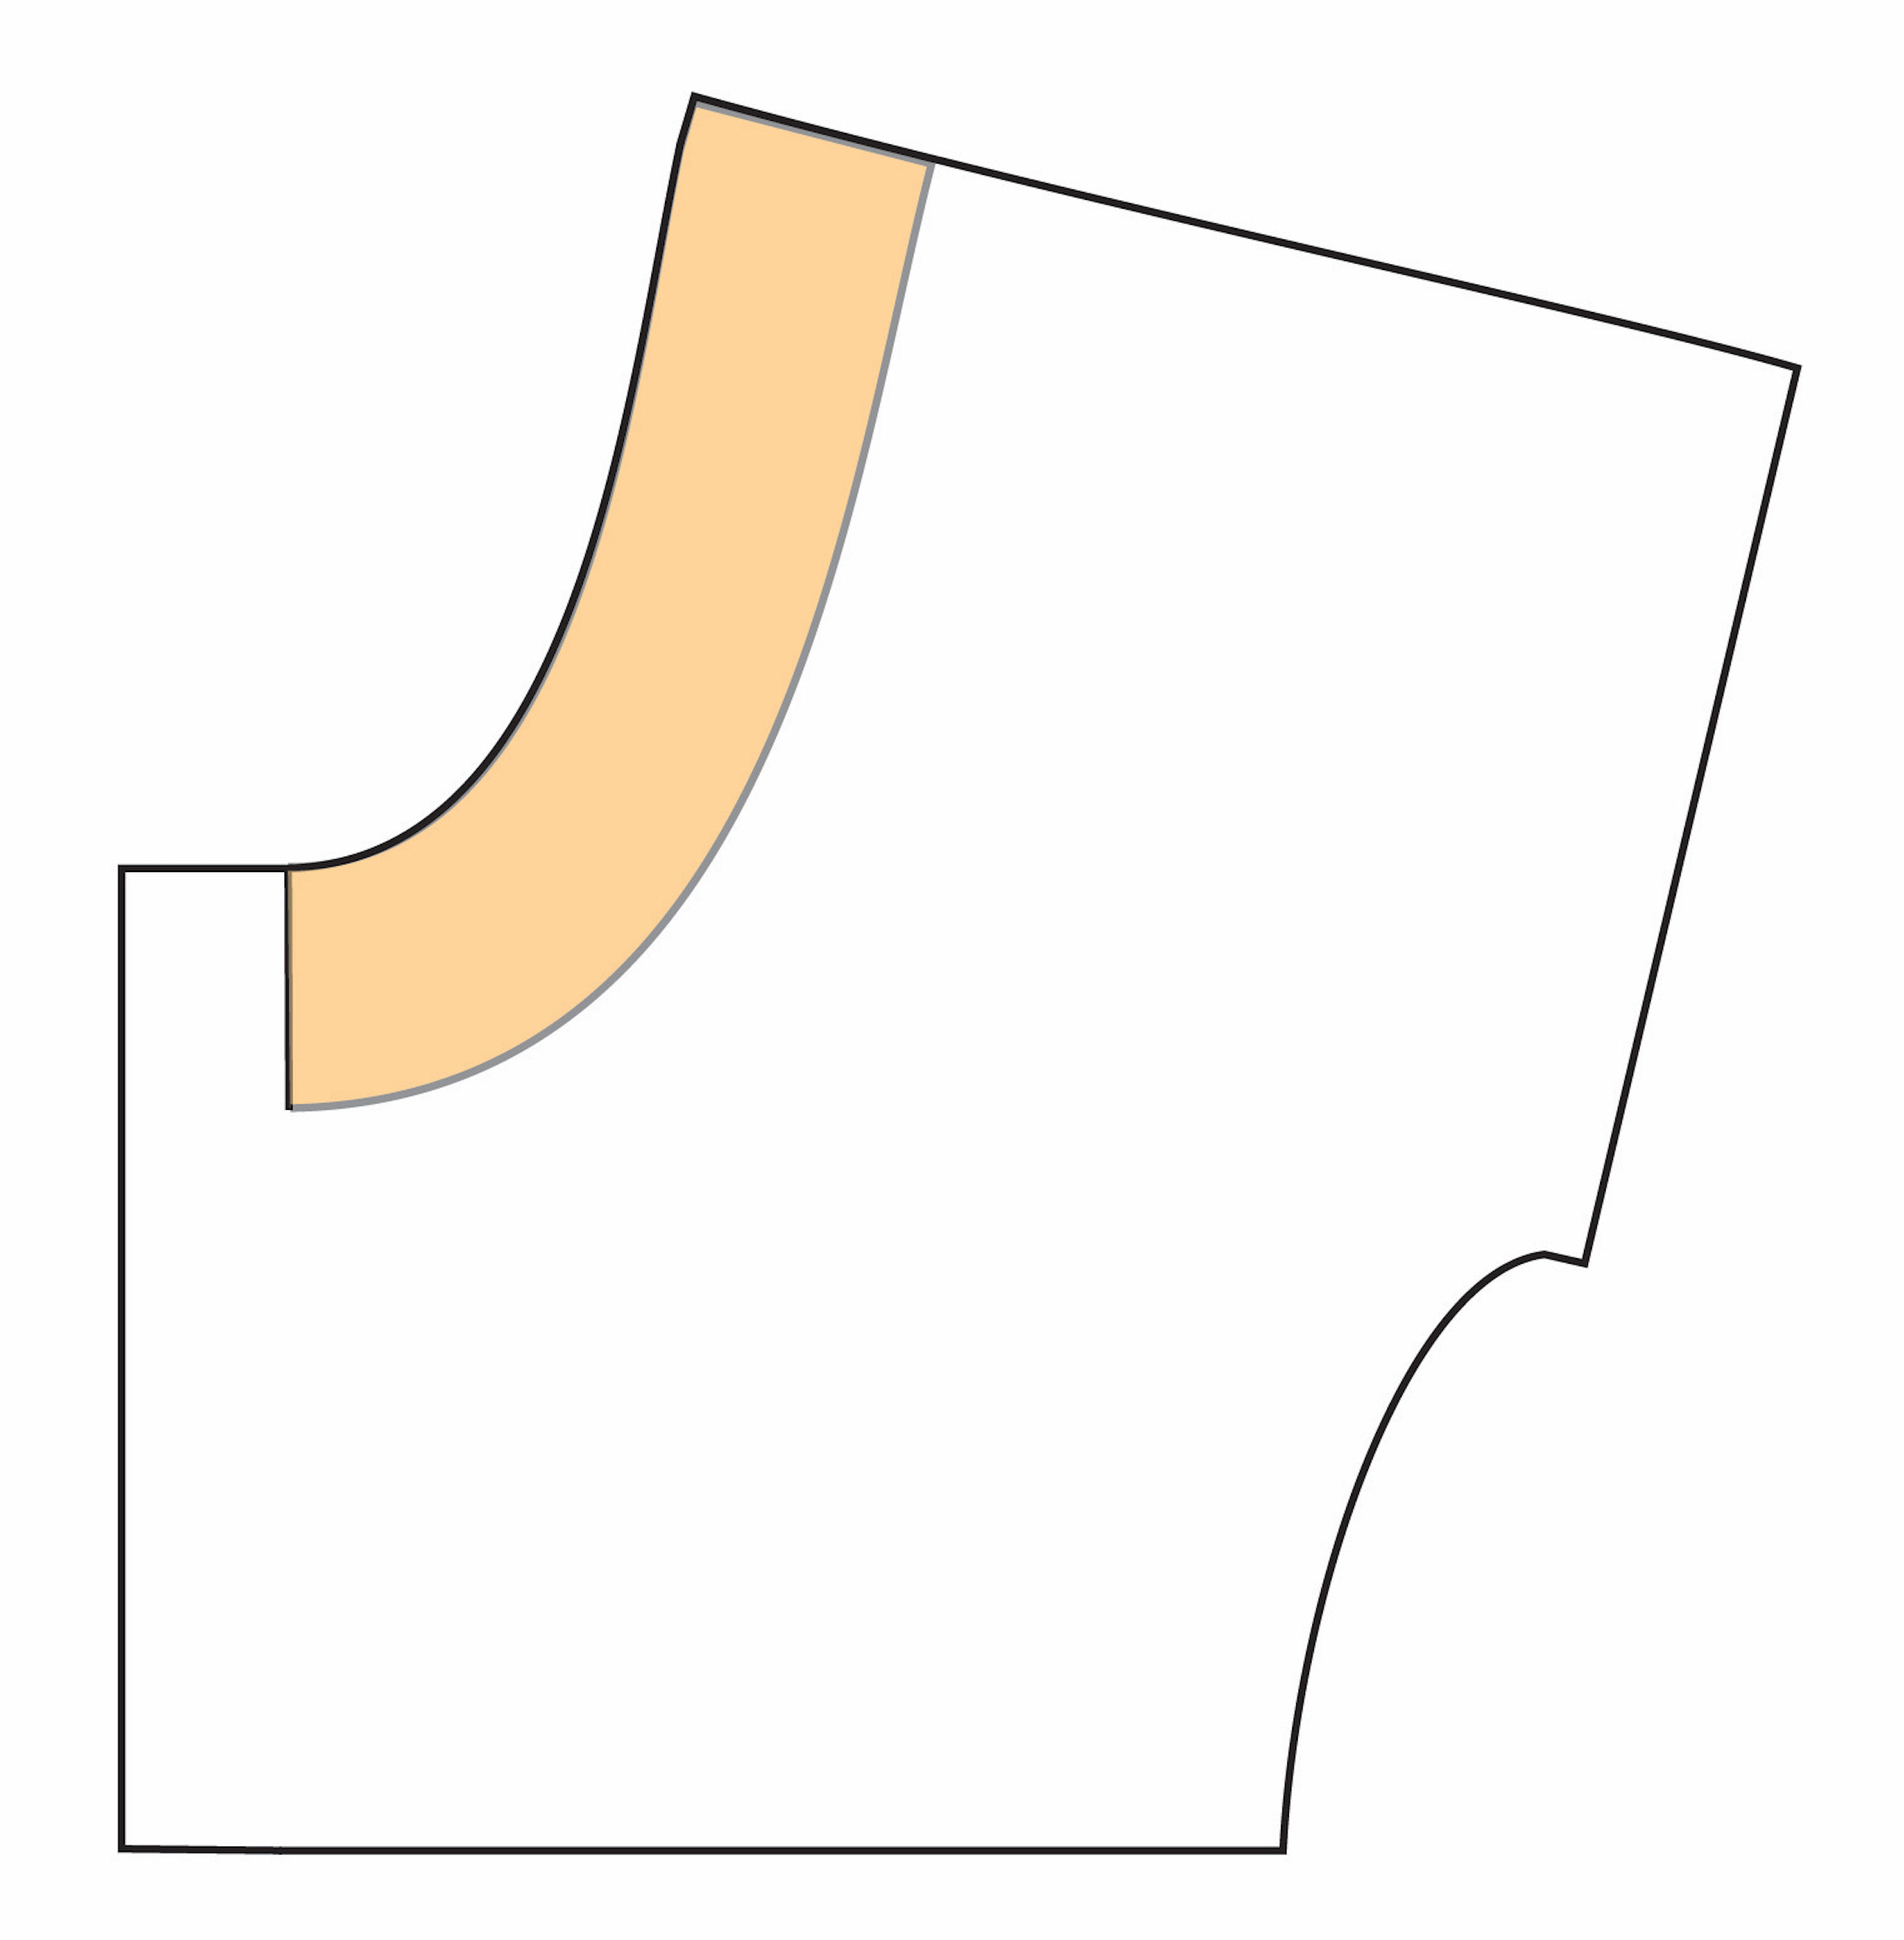
6. Extend the facing pattern piece so that it goes down the centre front. The yellow part is your new front facing pattern piece. Cut 2 (mirror image) from your main fabric.
7. *This step replaces steps 25-27 from the main instructions.*
Take your two front bodice pieces and your back bodice. Place them WRONG sides facing. Pin and sew using a 6mm (¼”) seam allowance. Trim away half of the seam allowance. Press the seam towards the back. Turn your bodice inside out so you are looking at the wrong side of your fabric. Press again. Sew the shoulders again using a 6mm (¼”) seam allowance.
8. *This step replaces steps 30-31 from the main instructions.*
Iron lightweight interfacing to the wrong side of your facing pieces.Place your front and back facing pieces right sides facing. Pin and sew using a 12mm (½”) seam allowance.
9. *This step replaces step 32 from the main instructions.*
Finish the raw bottom edges of the facing with either an overlocker/serger or overlock/zigzag stitch on a regular sewing machine.
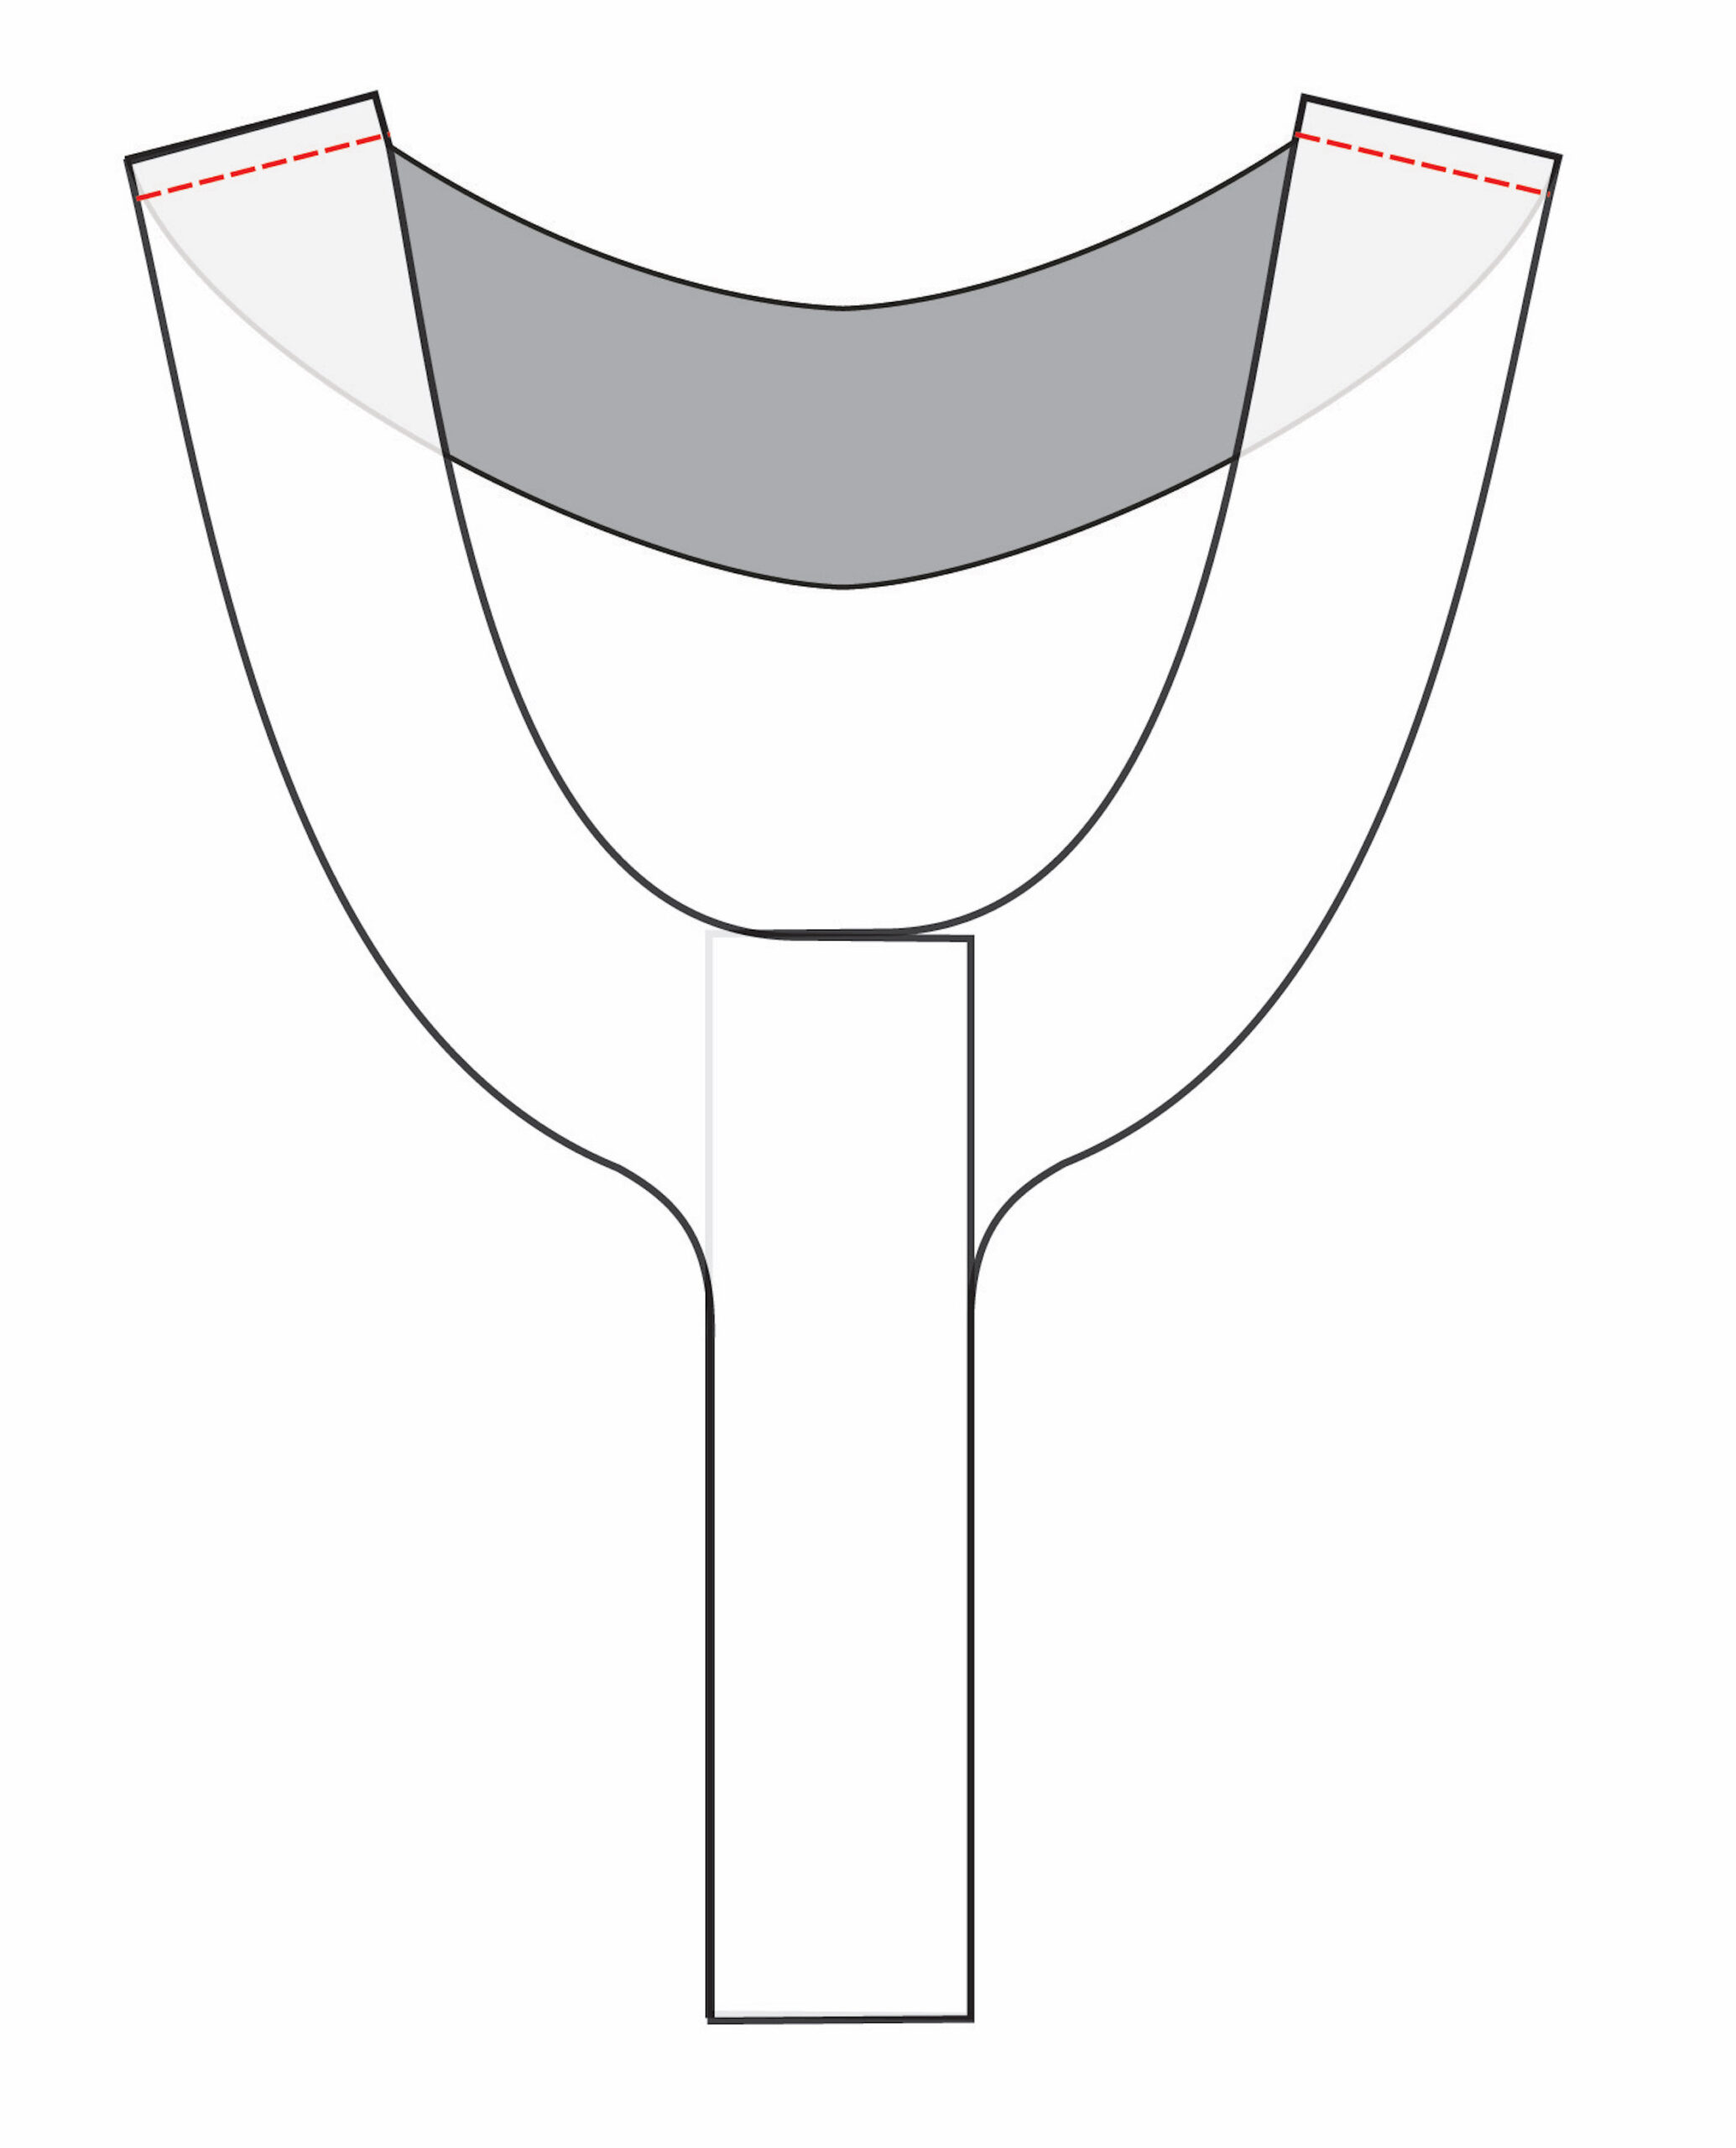
10. *This step replaces steps 33-34 from the main instructions.*
Place your neck facing on your dress right sides facing. Match the shoulder seams. The dress seam should be pressed backwards and the facing seam should be pressed forwards. Sew using a 6mm (¼”) seam allowance. Clip into the V if doing a V neck or into the curve if doing a round neck.
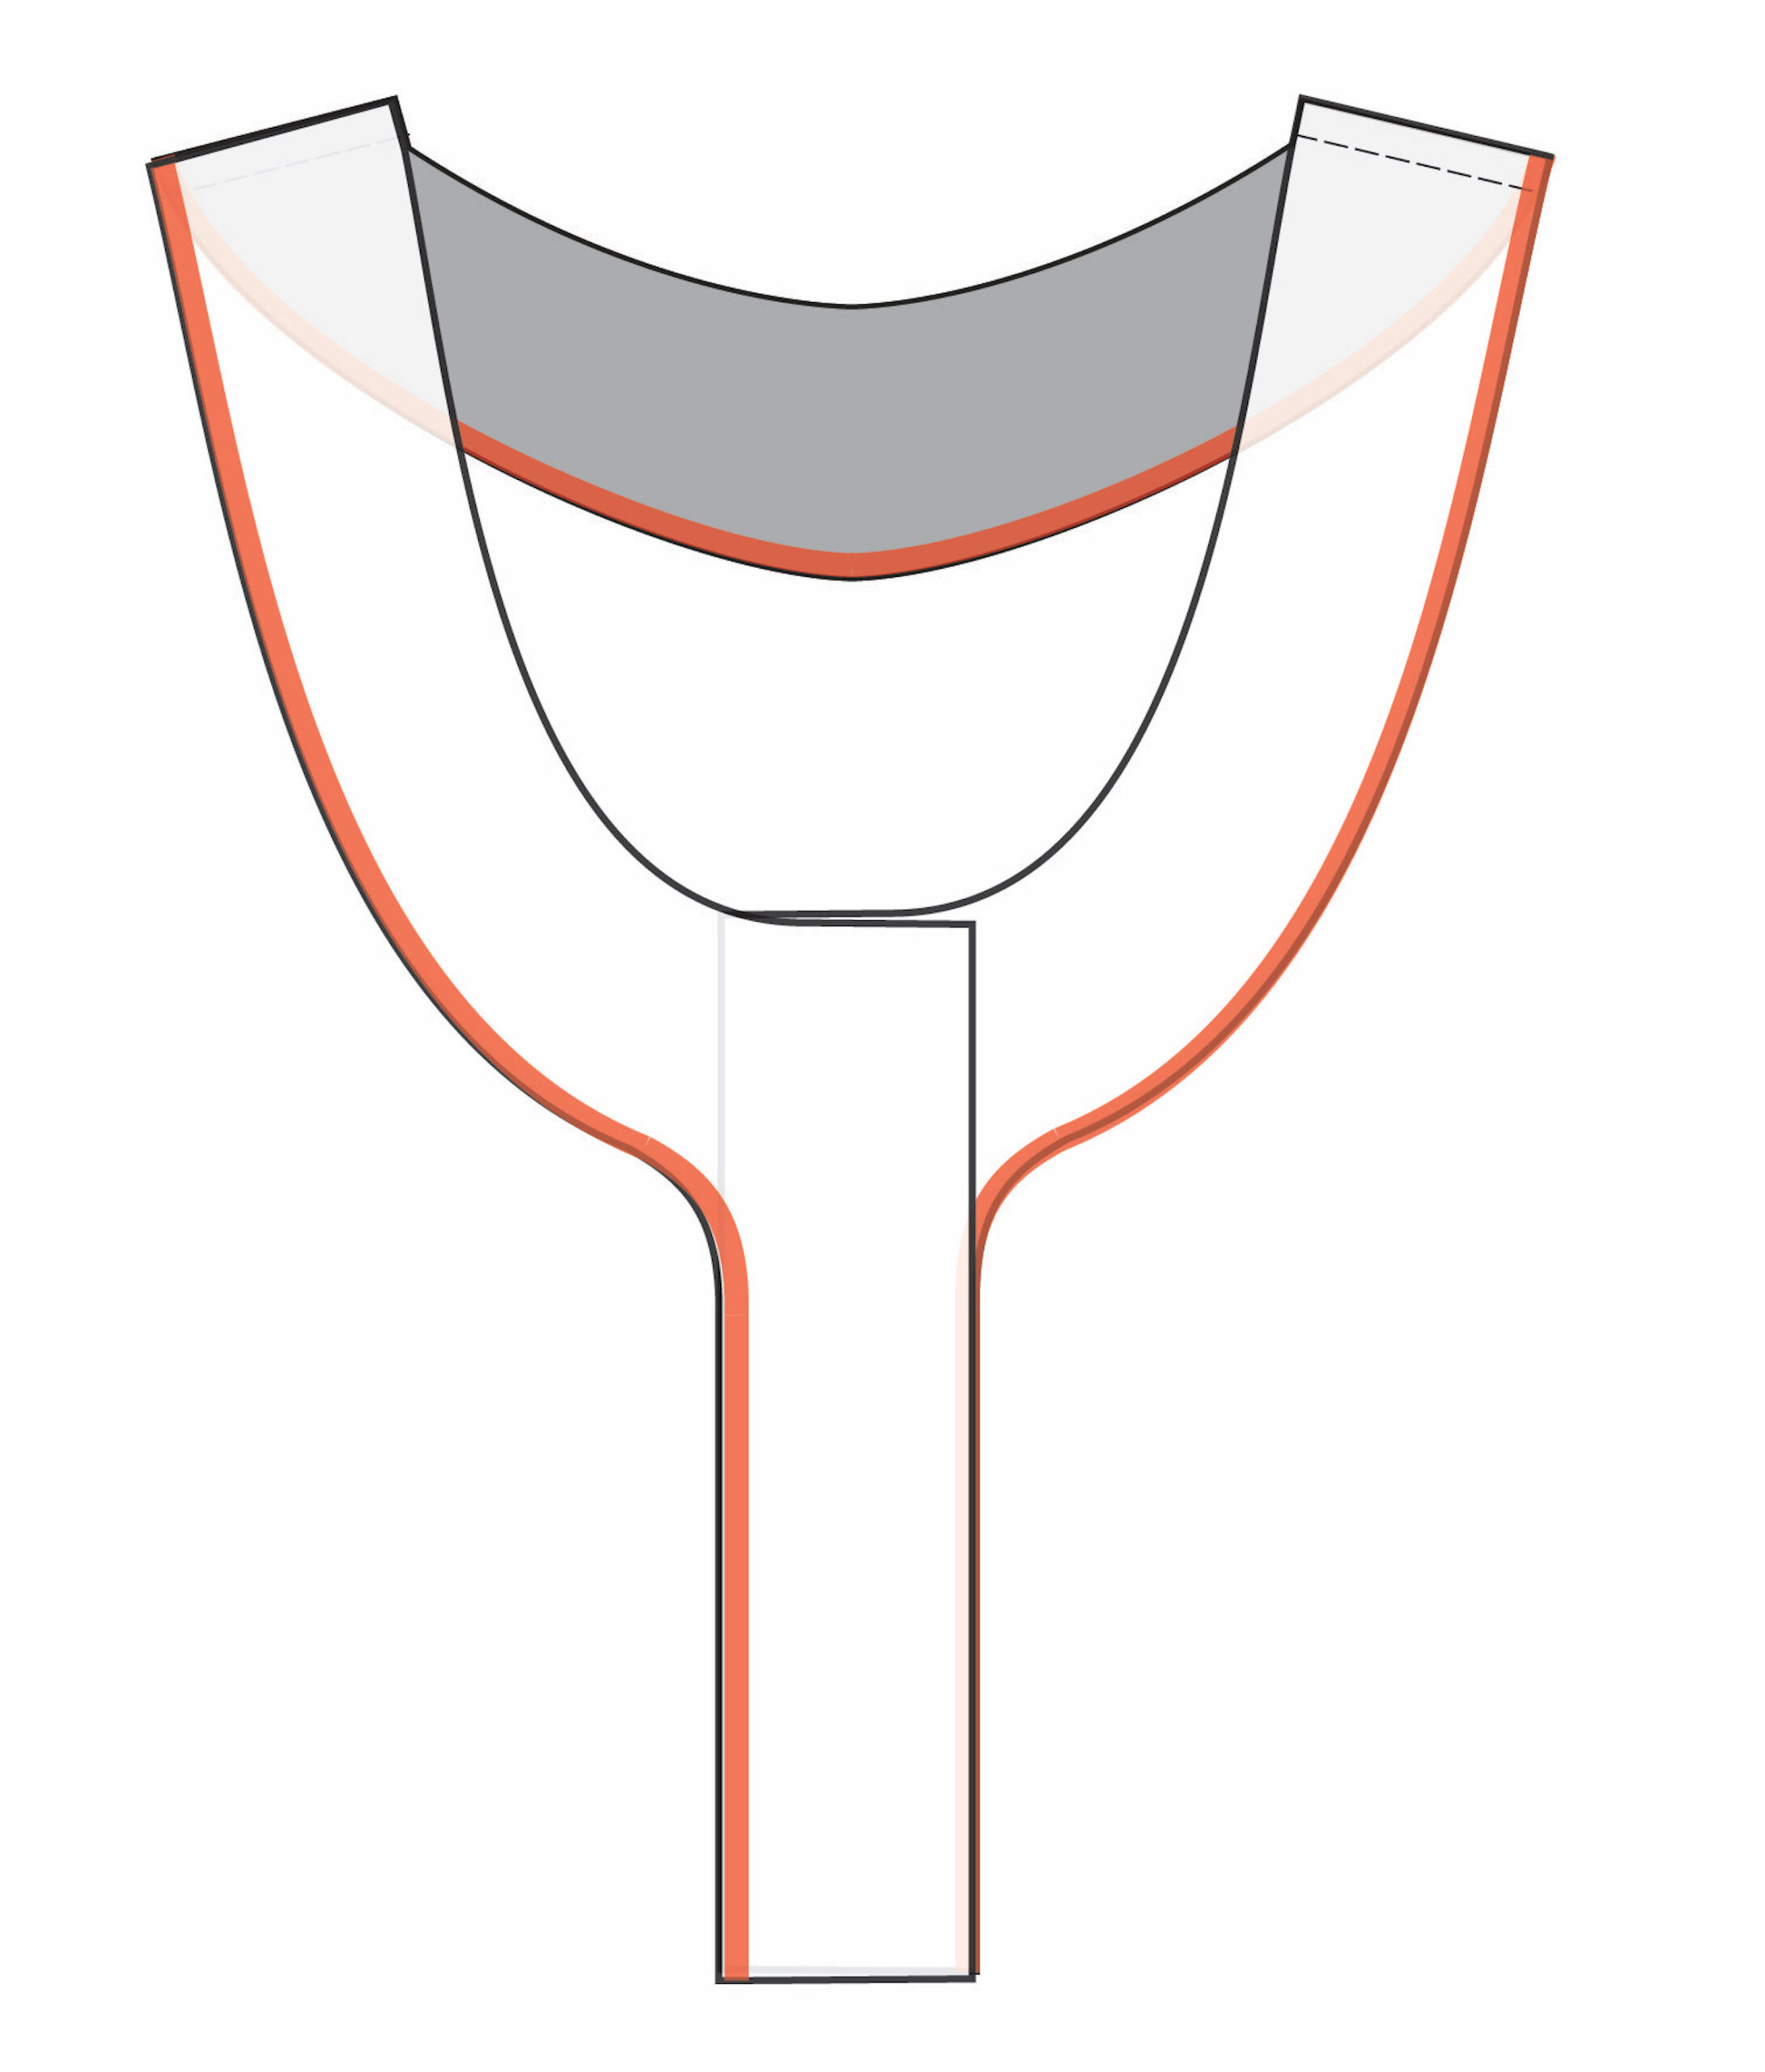
11. *This step replaces step 36 from the main instructions.*
Tun your facing to the inside and press. Topstitch the facing in place close to the edge of the facing.
12. Pin the two layers of your front facing together so that the bodice lays flat. Your pins are doing the job your buttons/snaps will do later. Baste the two layers together along the bottom, close to the edge.
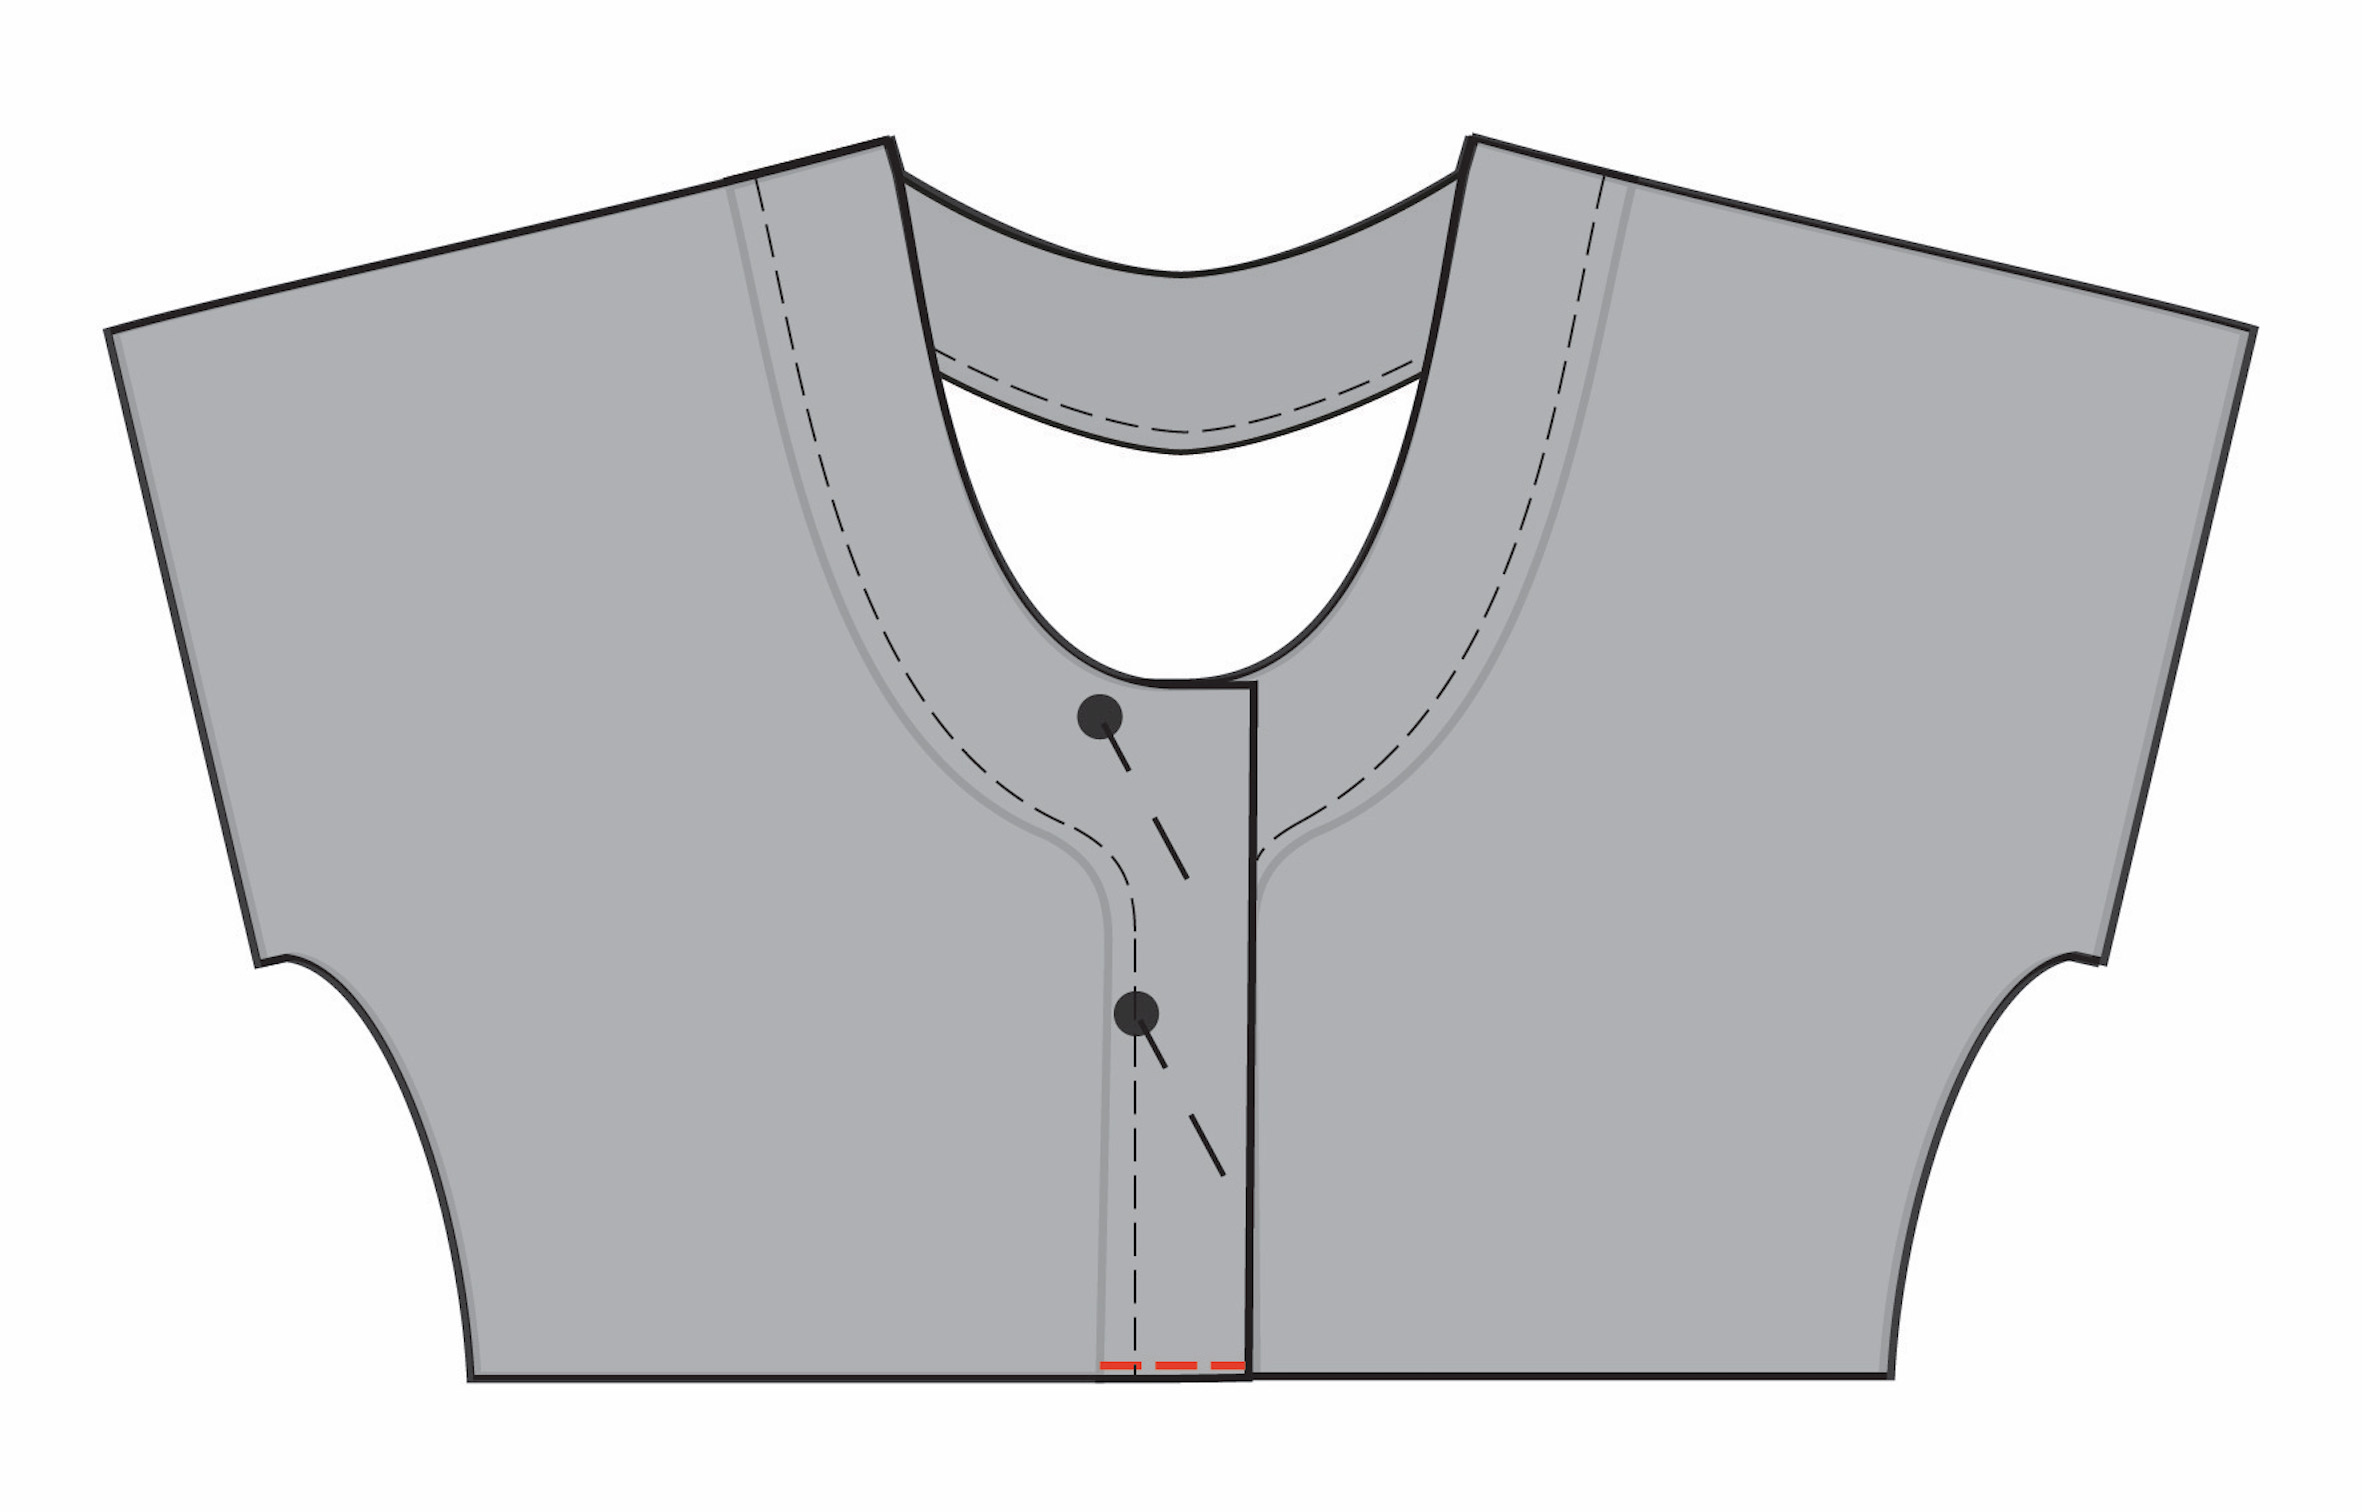
13. Use the main instructions to gather and attach your skirt, sew your side seams, finish your sleeves and hem your skirt.
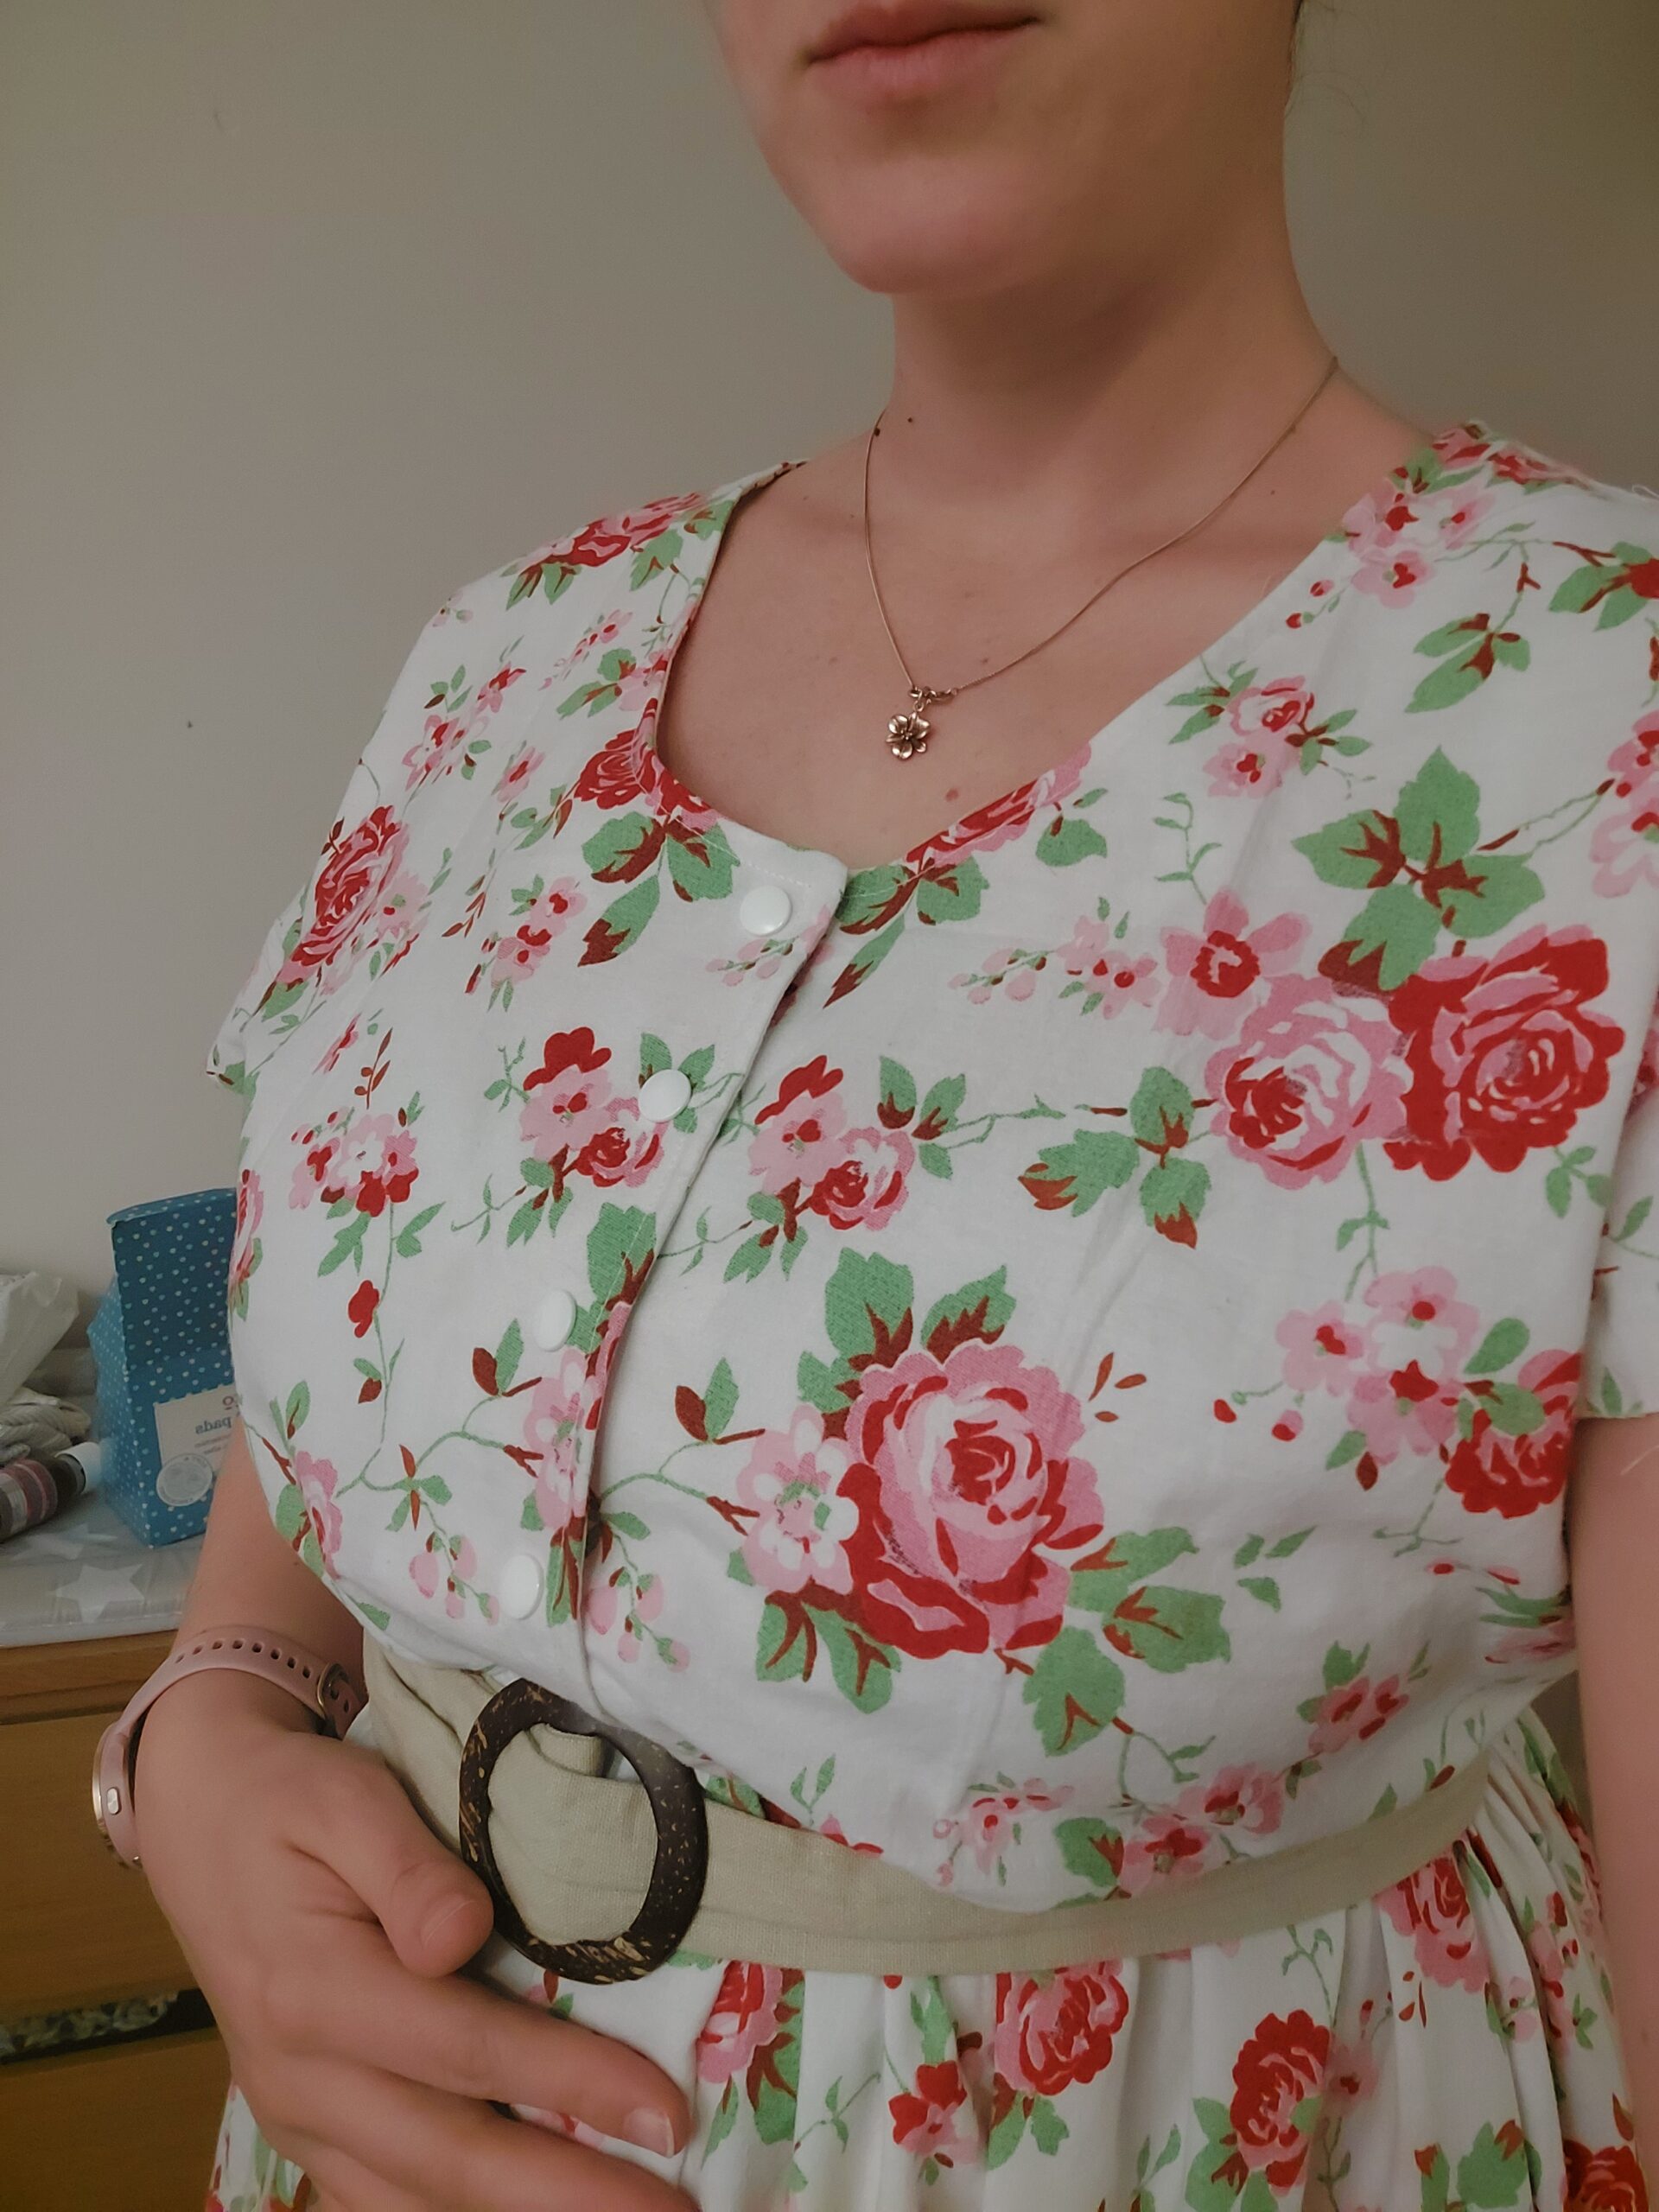
14. Either attach snaps or sew buttons and button holes. Where possible, try the dress on to determine the best position for the button/snaps.
Enjoy!
Brilliant ! Easy to do as always.! My about to be a mum daughter will love this , better get cracking !!
Thank you for this, really helpful x
Hi, when you say (step 8) ‘right sides facing’ do you mean right sides facing each other or facing out (at me)?
cheers
In sewing, ‘right sides facing’ means the right sides of the fabric face each other.