
How To Finish A Seam Part 2
1. Flat Felled Seams
I love flat felled seams! They’re a little time consuming, but highly satisfying, and look wonderful when done.
Flat felled seams are traditionally used in jeans. Denim can be bulky and this seam takes that bulk and places it flat against the body so it is comfortable. Flat felled seams have also traditionally been used in men’s shirts and you will find flat felled seams as an option in the (gender neutral) Sunset Shirt pattern.
I would class flat felled seams as an intermediate level skill. If it’s your first go, practise first and pick a pattern with straight(ish) seams. Flat felled seams don’t work well on sharp corners but can be used for gentle curves such as sleeves. Just take your time, press well and use lots of pins!
If you want to use flat felled seams on a pattern that doesn’t specify them, make sure to check the seam allowance. I wouldn’t recommend attempting a flat felled seam with a seam allowance of less than 15mm (⅝”). If necessary, add to the seam allowance of your paper pattern before you start. I will use a 15mm (⅝”) seam allowance for this example.
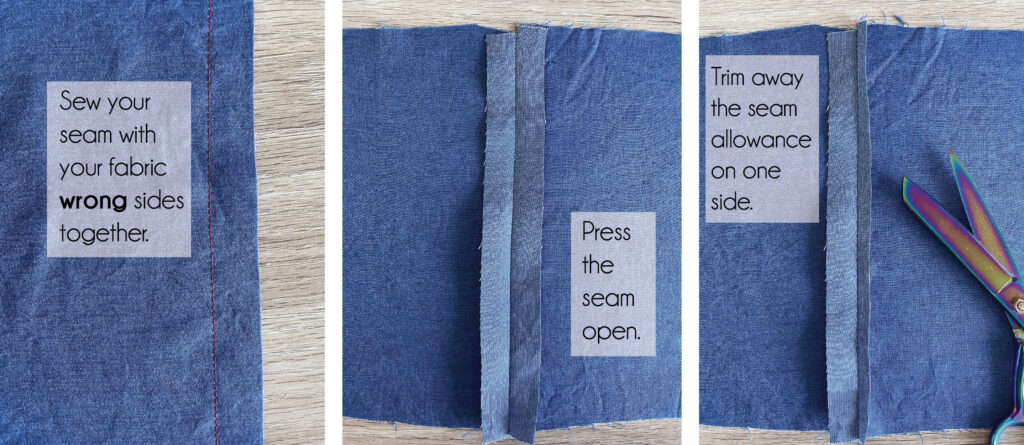
To create a flat felled seam, start with your fabrics wrong sides facing (just like a French seam – again, it feels naughty!). Sew using a 15mm (⅝”) seam allowance. Press your seam allowance open and then trim one side away to 6mm (¼”).
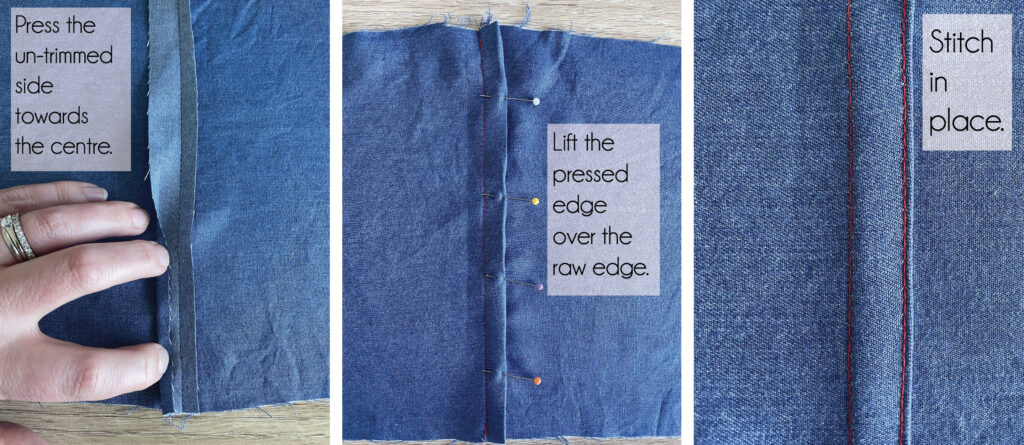
Fold the raw edge of the uncut seam allowance towards the seam 6mm (¼”) and press well.
Fold the seam allowance over, so that it covers the trimmed fabric. Press and pin in place.
Edgestitch along the folded edge.
Voila! You have a beautiful seam!
2. Hong Kong Finish
Fans of the Great British Sewing Bee may remember season 5 episode 6 where Patrick and Esme claimed they had never heard of a Hong Kong finish. Well, quite frankly they are missing out because it’s a lovely way to create a statement finish on a unlined garment.
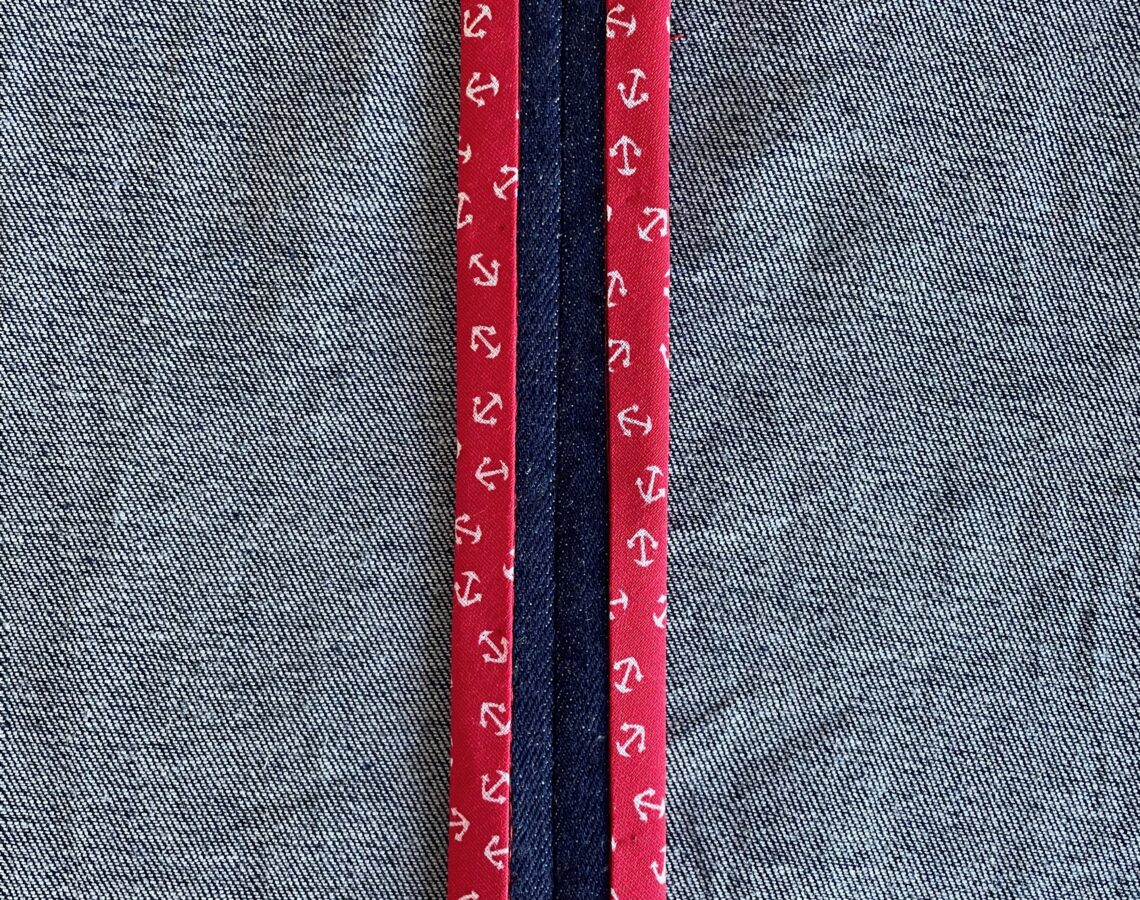
A Hong Kong finish involves covering every raw edge with bias binding. This is time consuming and creates some bulk. You wouldn’t use it on a lightweight shirt (too bulky) or a lined garment (waste of time!). Where it works brilliantly is with heavier garments that could be lined but you choose not to. For example – coats. If you don’t have the lining, you will be able to see the seams every time you take your coat on and off. A Hong Kong finish means that the inside of your garment will be just as beautiful as the outside. The heavier fabrics used for coats are perfect for this finish.
As with flat felled seams, this is not an option that can be used with a small seam allowance. 10mm (⅜”) is just about possible. 15mm (⅝”) is the seam allowance I would recommend.
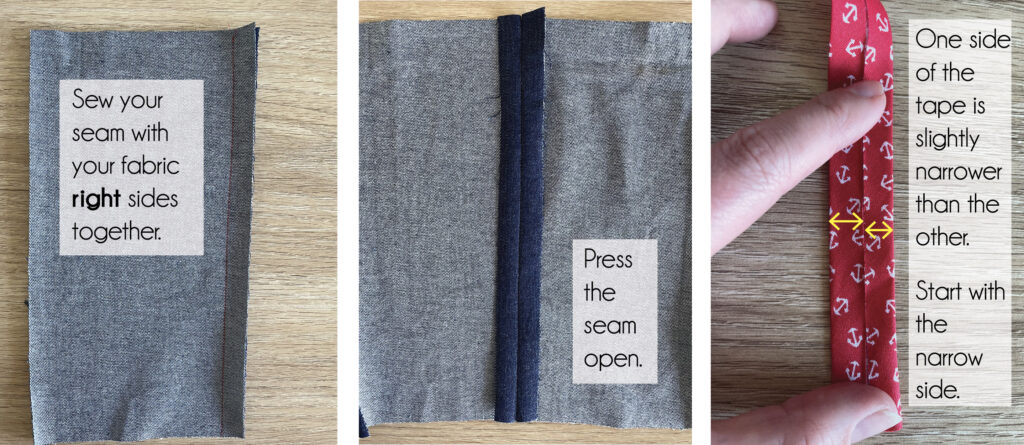
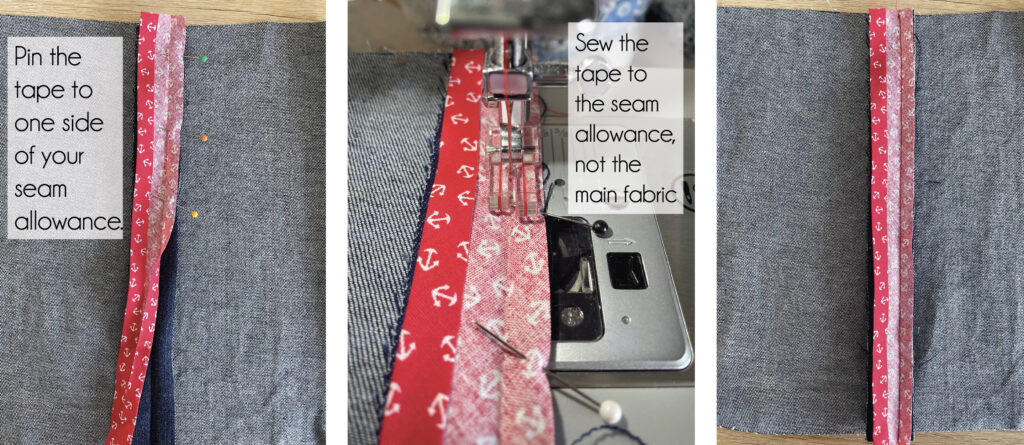
Place your fabric right sides facing and sew your seam with a 15mm (⅝”) seam allowance. Press your seam open. Take a length of 25mm – 30mm (1 – 1 ¼“) bias tape and place it against one raw edge, while the seam is still pressed open. If you are using pre-made bias tape, one side will likely be slightly wider than the other side. If this is the case, start with the narrow side. Pin the tape along one raw edge. Sew the bias tape to the raw edge using a scant 6mm (¼“) seam allowance or following the crease of pre-made tape. Make sure you only sew the tape and the seam allowance, not the main garment.
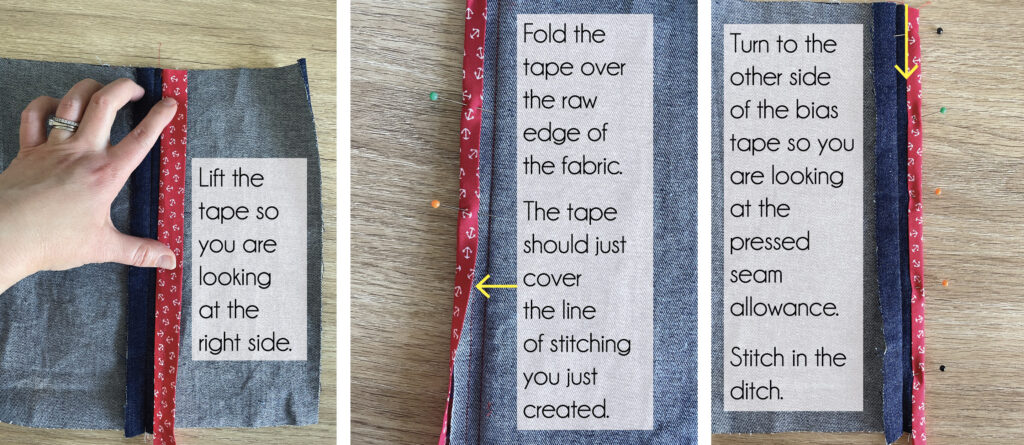
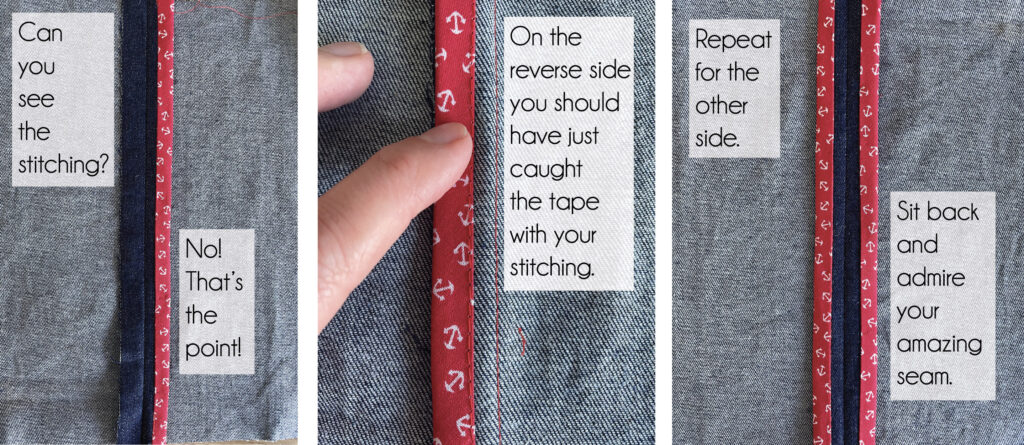
Fold the bias tape over so you are looking at the right side of it. Press. Then, fold the tape over the raw edge of your seam, press again and then pin in place. Stitch in the ditch along the seam you have already sewn. You have now enclosed one raw edge of your seam. Repeat for the second side
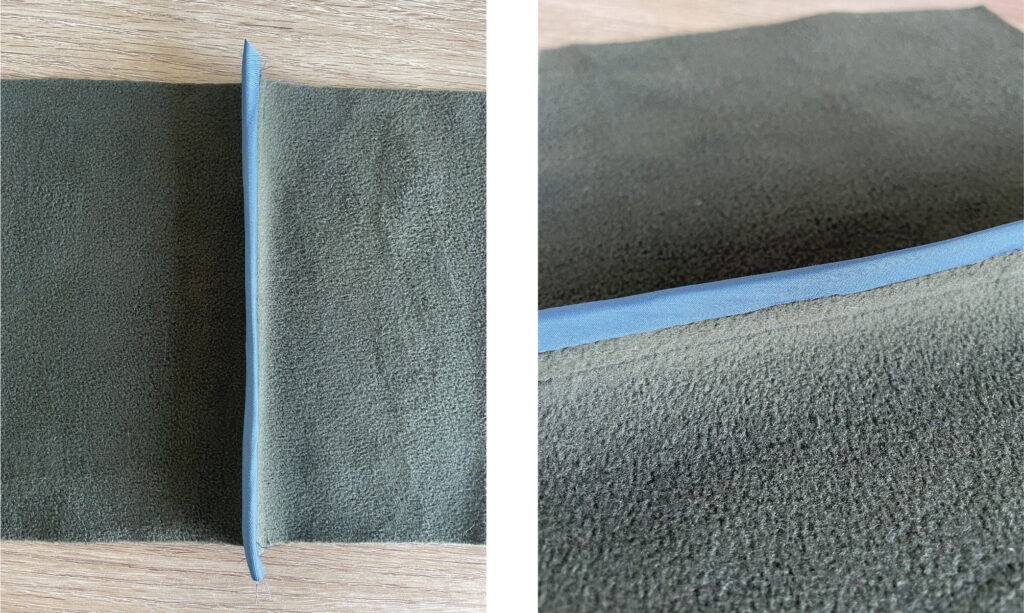
3. Standard Bias Binding Finish
This is similar to number 2 and uses a lot of the same techniques. The only difference is, instead of pressing the seam open and finishing each raw edge separately, you enclose both raw edges at the same time using a single piece of bias binding. The end result is slightly less delicate, but still wonderfully striking and it has the added bonus of being twice as quick to do as a Hong Kong finish.
This is a great option if you’re wanting to make an unlined Woodland Wander!
Fabulous. Keep them coming