
Want The Perfect Fit? Try Blending Sizes.

Have you ever compared your measurements to a pattern size chart and realised that you don’t fit into one size? Don’t panic! All you need to do is blend the sizes…and it’s easier than you think.
Blending sizes might help you to get the perfect fit but you don’t always need to do it. Before you decide to take the time to blend sizes, first look carefully at the fit of the pattern you are making. For example, if your hip measurement fits into the size larger than your waist measurement but you are making a dress with a relaxed fit, flared skirt (like the Kinjarling Dress) then there’s no need to blend up to the larger hip size. Knowing if you need to blend just by looking at the shape and fit of a garment comes with practice so if you aren’t sure, it’s always safer to blend. But a good general rule is that if something is a closer, more fitted style then blending is definitely a great idea, but if the fit is loose or flowing then you might not need to blend sizes.
Although it’s common to need to blend sizes, it’s a good idea to double check your measurements if you find they are spreading across a large spread of sizes. The greater the difference between the sizes you need to blend, the harder it can be to make the blending smooth. Of course, you can choose not to blend sizes at all. In this case you are best to use one of the larger size you measure and be prepared for the fact that you won’t get the perfect fit. Sometimes that’s OK if you wanted a baggy sweatshirt to be super comfy round the house but if you’d prefer the patterns to fit as they were designed then you’ll need to blend the sizes. But don’t worry, it’s actually much easier than you might think…
How to blend sizes
When you blend garment sizes it can be easiest to do it at the earliest stage…on the pattern pieces before you cut out any fabric. You can adjust the fit of a garment once it’s been made (always do this before hemming or adding cuffs etc) but sometimes this can be more fiddly with stretch fabric, and can be difficult if the garment wearer is a wriggly child!
Follow these steps for blending pattern sizes…
Sizing
Always start by comparing your current measurements to the Size Chart (usually found towards the start of the pattern instructions) to work out which sizes you need in the different areas of the pattern e.g. full bust/chest, waist and hips. Make a note of the size you need for each category.
For full bust/chest measure under the armpits around the fullest part of the chest.
For waist measure around the narrowest part of the waist – this is usually close to the belly button.
For hips place your feet together and measure around the fullest part of the hips and bottom.
Pattern pieces
The simplest way to blend different sizes together is to have all the pattern piece lines for the sizes you need in the same place. You’ll then be able to blend (or “grade”) from one line to the other to create the blended size. How you do this will be slightly different depending on which pattern piece type you use.
Print At Home
If you print your pattern pieces at home on A4/legal/letter size paper then use the layers option and print all the sizes you need on one print out.
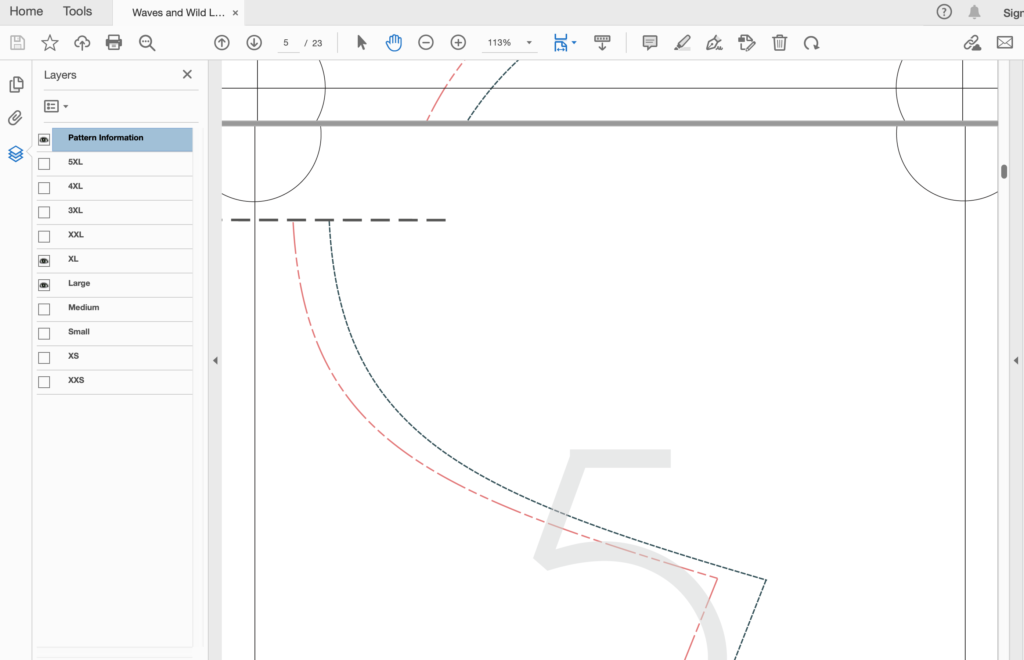
Copy Shop
If you have your pattern pieces printed on a large scale printer (usually A0 or A1) then you’ll probably have one copy printed which includes all the size options available with the pattern.
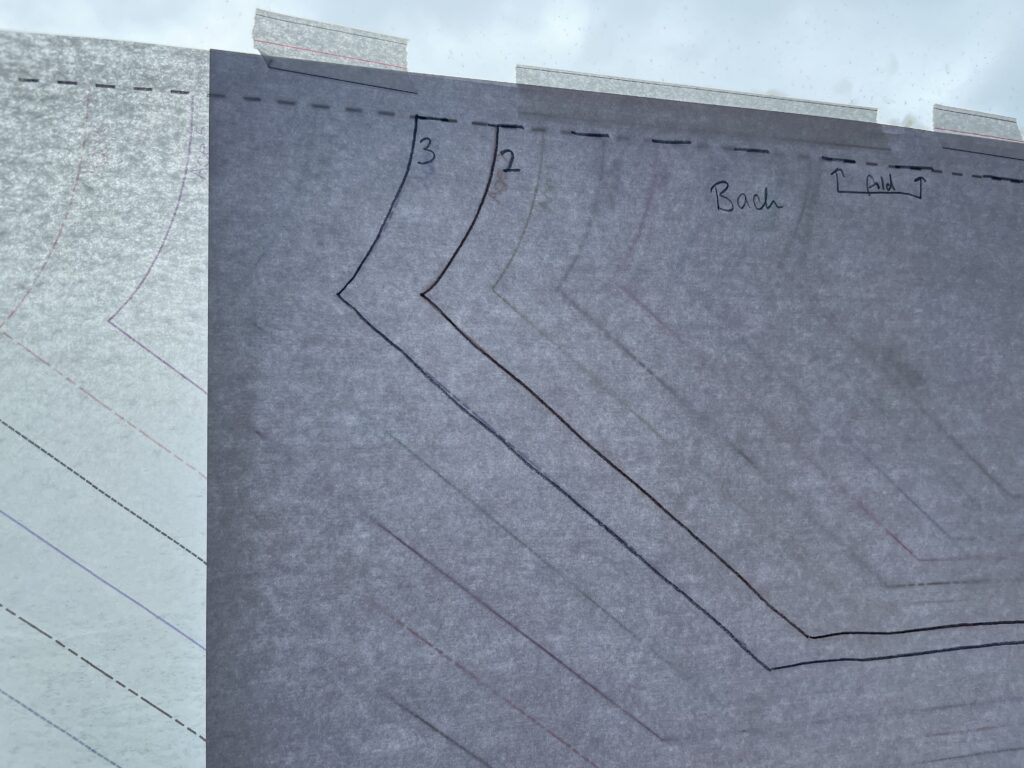
You’ll need to trace the sizes you want to blend. You can either trace them all out in full (onto one sheet) and then blend the lines, or blend whilst you are tracing. I’d recommend the first method if you are new to size blending.
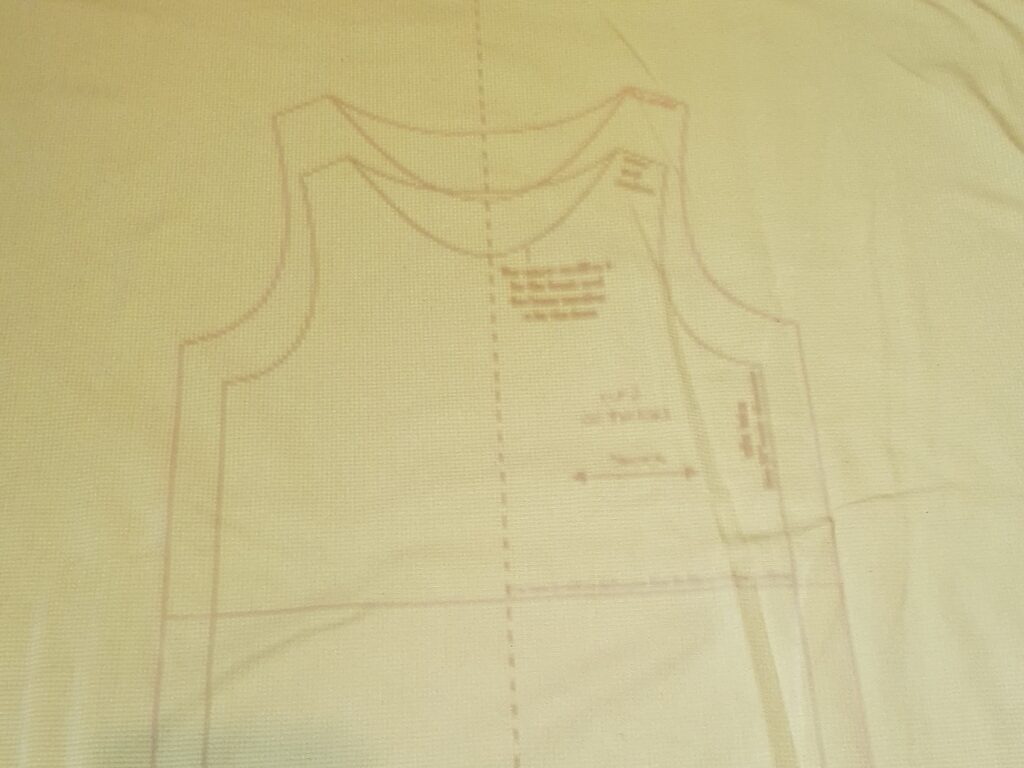
Projector
If you use a projector to view the pattern piece lines directly on fabric then use the layers option and view/project all the sizes you need onto the fabric. You can then draw the size blending lines on the fabric and then cut out the pattern pieces, or you can go straight to cutting but making sure to blend between the sizes you want to use. I’d recommend the first method if you are new to size blending.
Blending
Before you complete the final step of blending the sizes you need to make sure you know where each part of the pattern sits on the pattern pieces and therefore on your body. For example, if you are blending one hip size to a different waist size, you need to know where the hips and the waist will be on the pattern piece lines. Sometimes this is obvious from the shape of the pattern but if not (or if you want to be extra sure), hold the pattern piece against your body and mark where your bust, waist and hips line up with the pattern piece.
To blend the sizes you draw a smooth and gradual line between the sizes. Use the shape the pattern piece lines take to help guide you too.
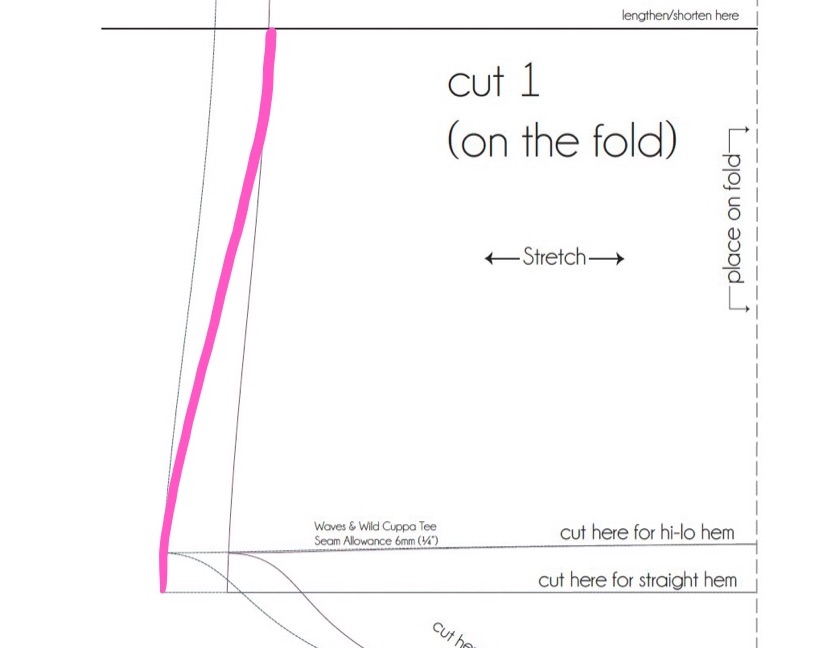
Then cut out your pattern piece using the drawn line as your new pattern piece edge. And that’s it!
A few last tips...
1. Make sure that any blending is done on all the matching pattern pieces. For example, if you are blending waist and hip sizes on a t-shirt, make sure you blend sizes on the front and back pattern pieces.
2. Always use a gently curving line. Even if a pattern piece has straight lines, the blend will be too severe if you use a straight, diagonal line to blend from one size to the next. If you think you’ll need to blend sizes very frequently, it might be useful to have a curved ruler. There are lots of different options specifically designed for garment sizing.
3. If you haven’t tried blending sizes for a particular pattern and want to use one of your favourite/most special fabrics to make the garment, make a test version first (also known as a toile or muslin). It means it will take longer but this way you won’t make any mistakes with your treasured fabric.
Leave a Reply