
Fussy Cutting Without The Fuss
Fussy cutting is a really fun design detail that can be used in lots of different sewing projects. But what is fussy cutting?
Essentially it means cutting fabric to highlight a specific part of the print. It’s more commonly used with smaller pattern pieces such as pockets, straps, sleeves, hat parts, knee patches, cuffs etc. Fussy cutting doesn’t always mean having a central or individual feature of the fabric print in the centre of your pattern piece. It can simply be purposeful placement of the pattern piece when cutting out fabric so that a certain part of the fabric print appears in a specific place on the finished part of the garment.
Three ways to fussy cut
There are several different methods for successful fussy cutting. They will all give the same end result so choose whichever one works best for you, the pattern piece you are using and the tools you have available.
1. Pattern piece window
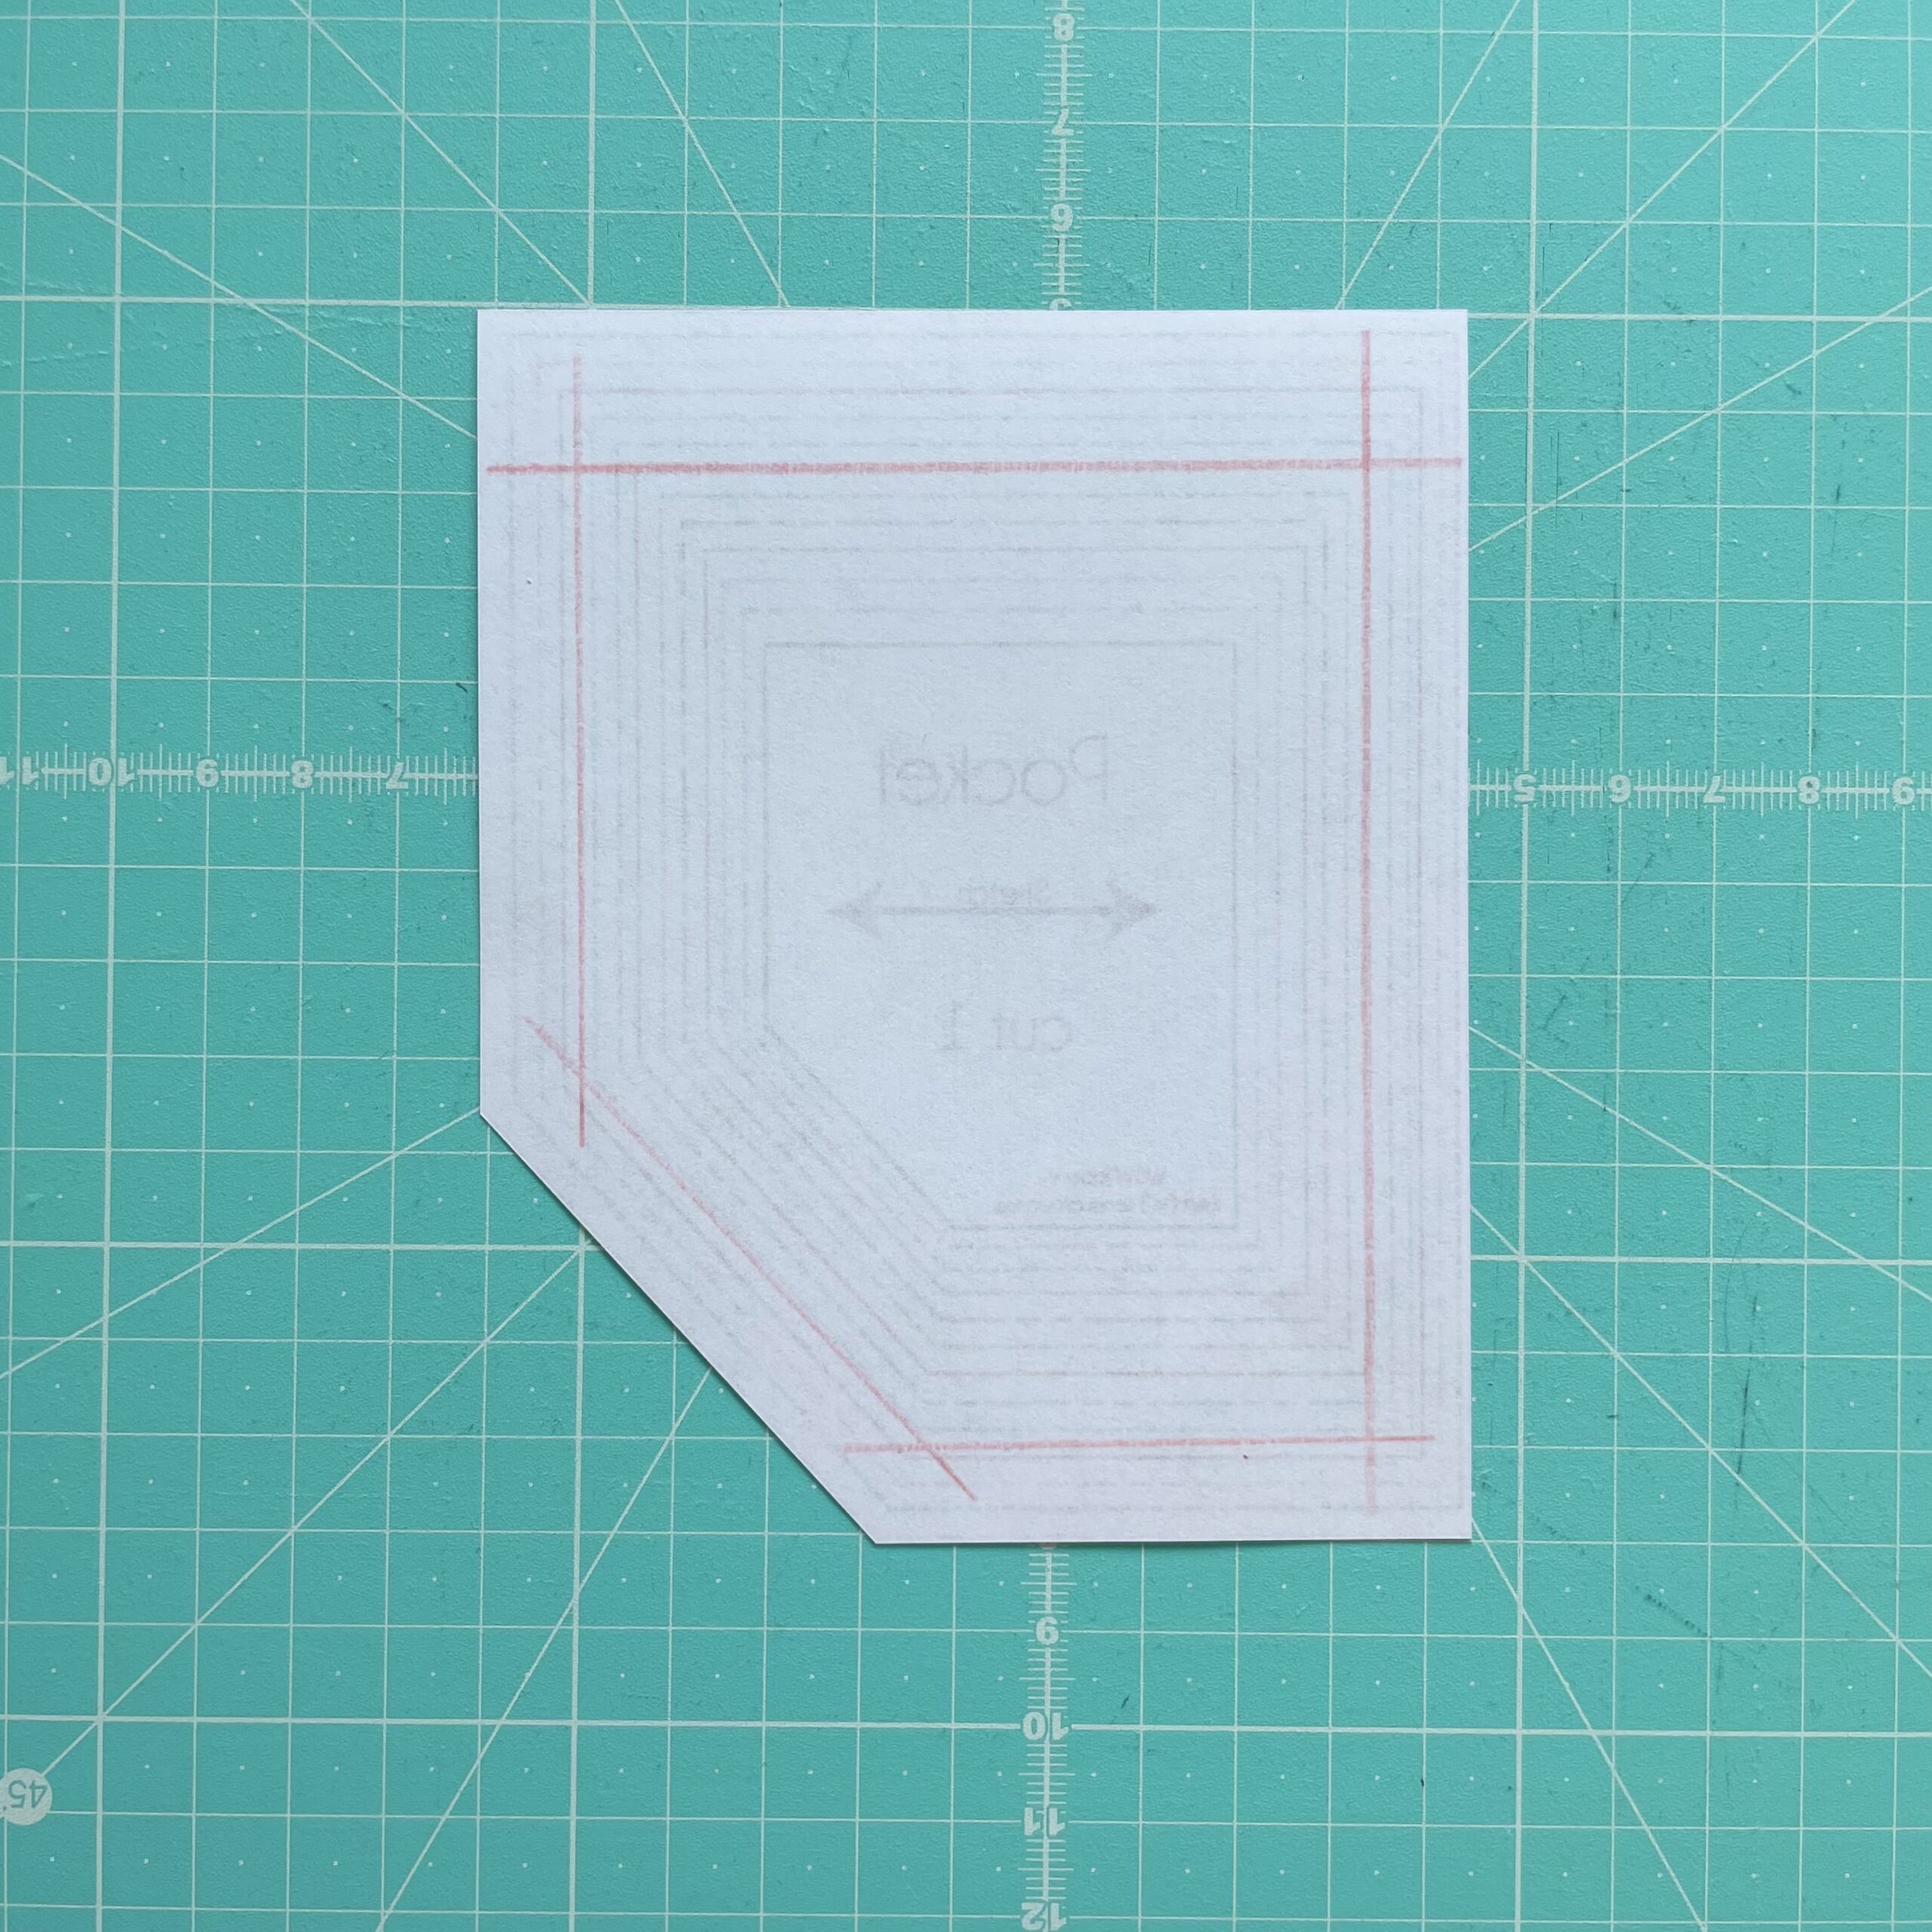
This method involves cutting a hole in the centre of your pattern piece to turn it into a frame with a “window” in the centre to see the fabric print. Simply cut out your pattern piece as normal then cut a hole in the middle. If you want to be really accurate with your fussy cutting then cut the pattern piece so that the frame (the paper than is left round the edge) represents the seam allowances of that particular pattern piece.
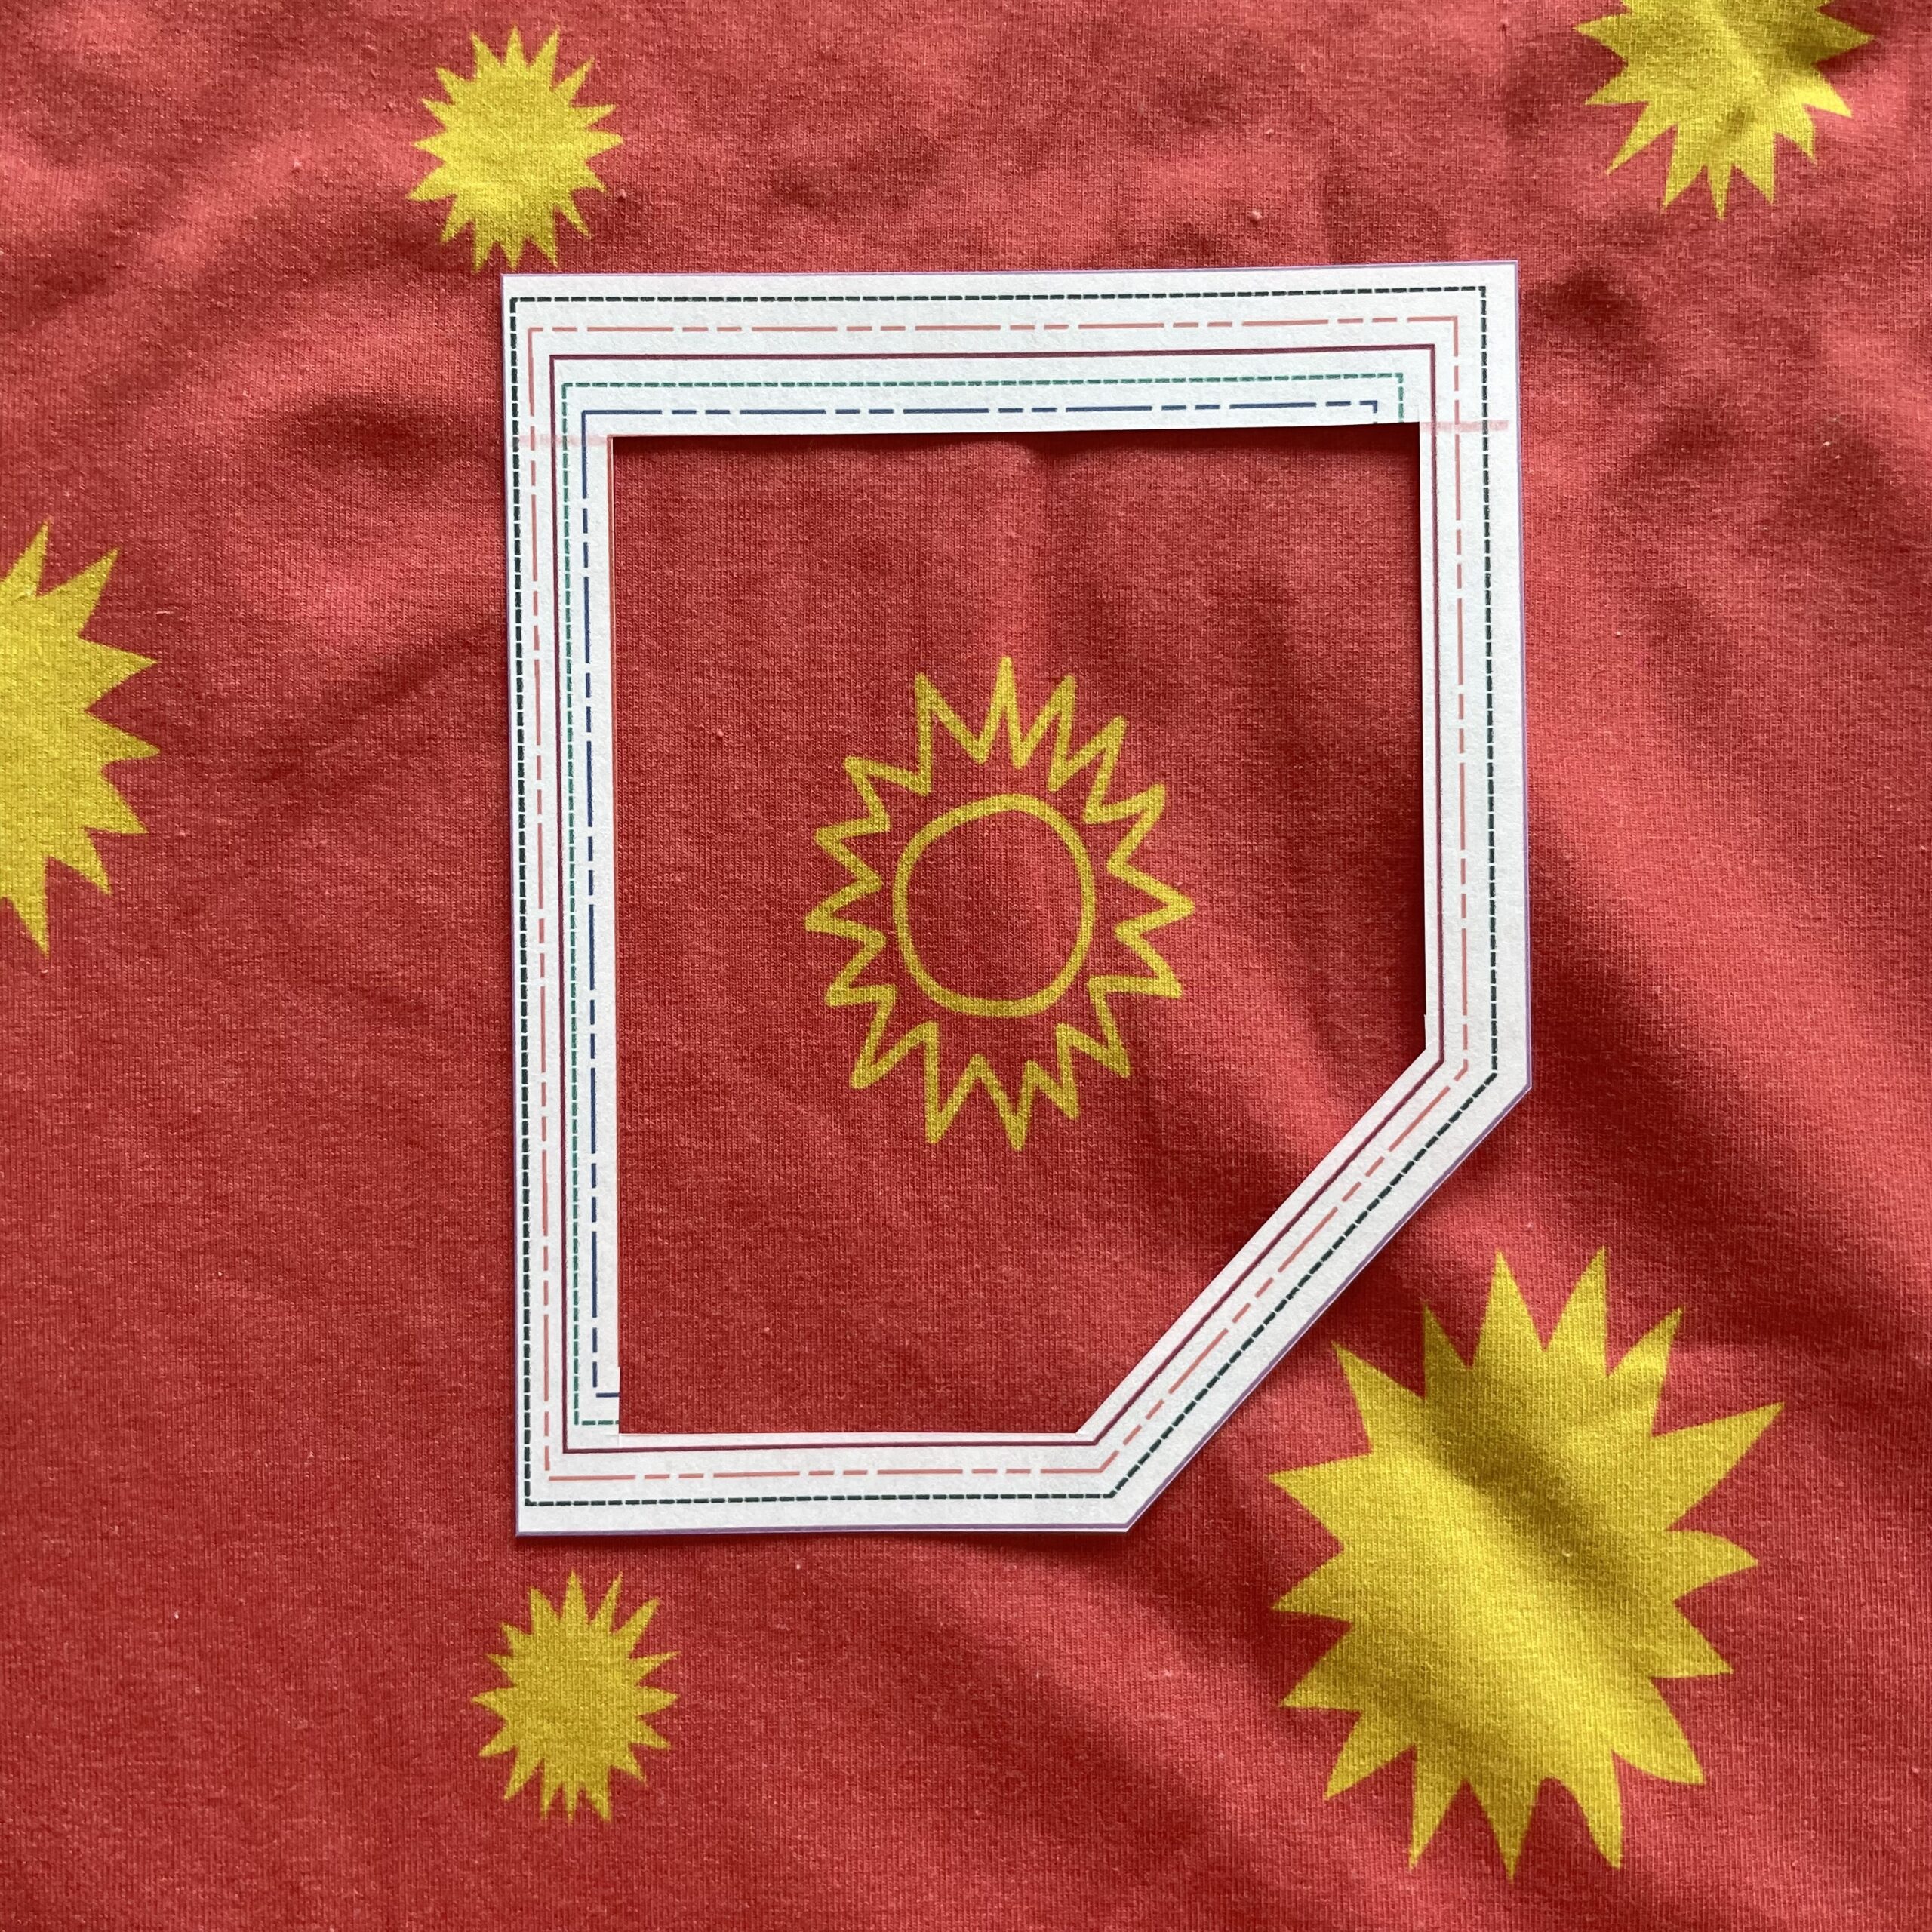
In the example below I’m using the pocket from the Jacky V T-Shirt. This pattern piece has a 5/8″ seam allowance across the top edge and 3/8″ seam allowance on the remaining edges. I marked the back of the pattern piece with lines to show these distances from each edge and then used those as guide lines for cutting the “window” in the pattern piece. Now when I place in on the fabric, I can make sure the sun will be in the centre of the finished pocket.
2. Tracing paper
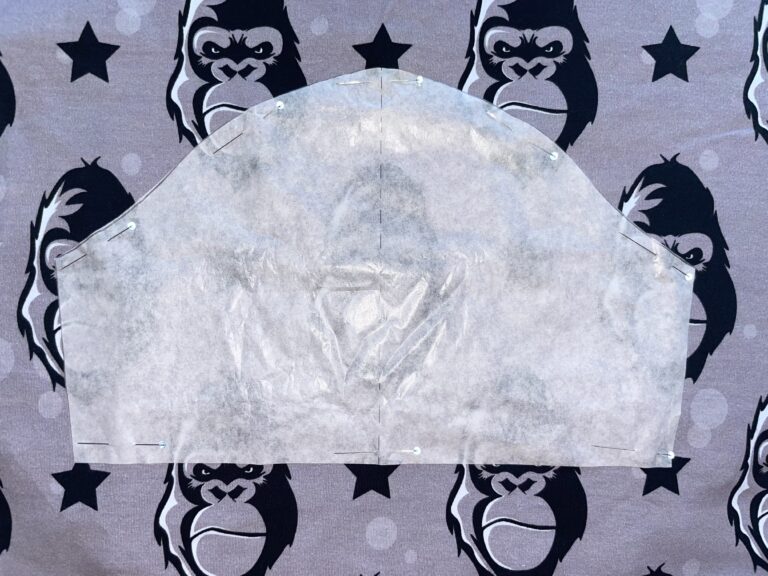
This method involves cutting out your pattern piece from tracing paper. As tracing paper is easier to see through than regular printer paper, this means you will be able to see the fabric print through the pattern piece without having to cut a “window” in it.
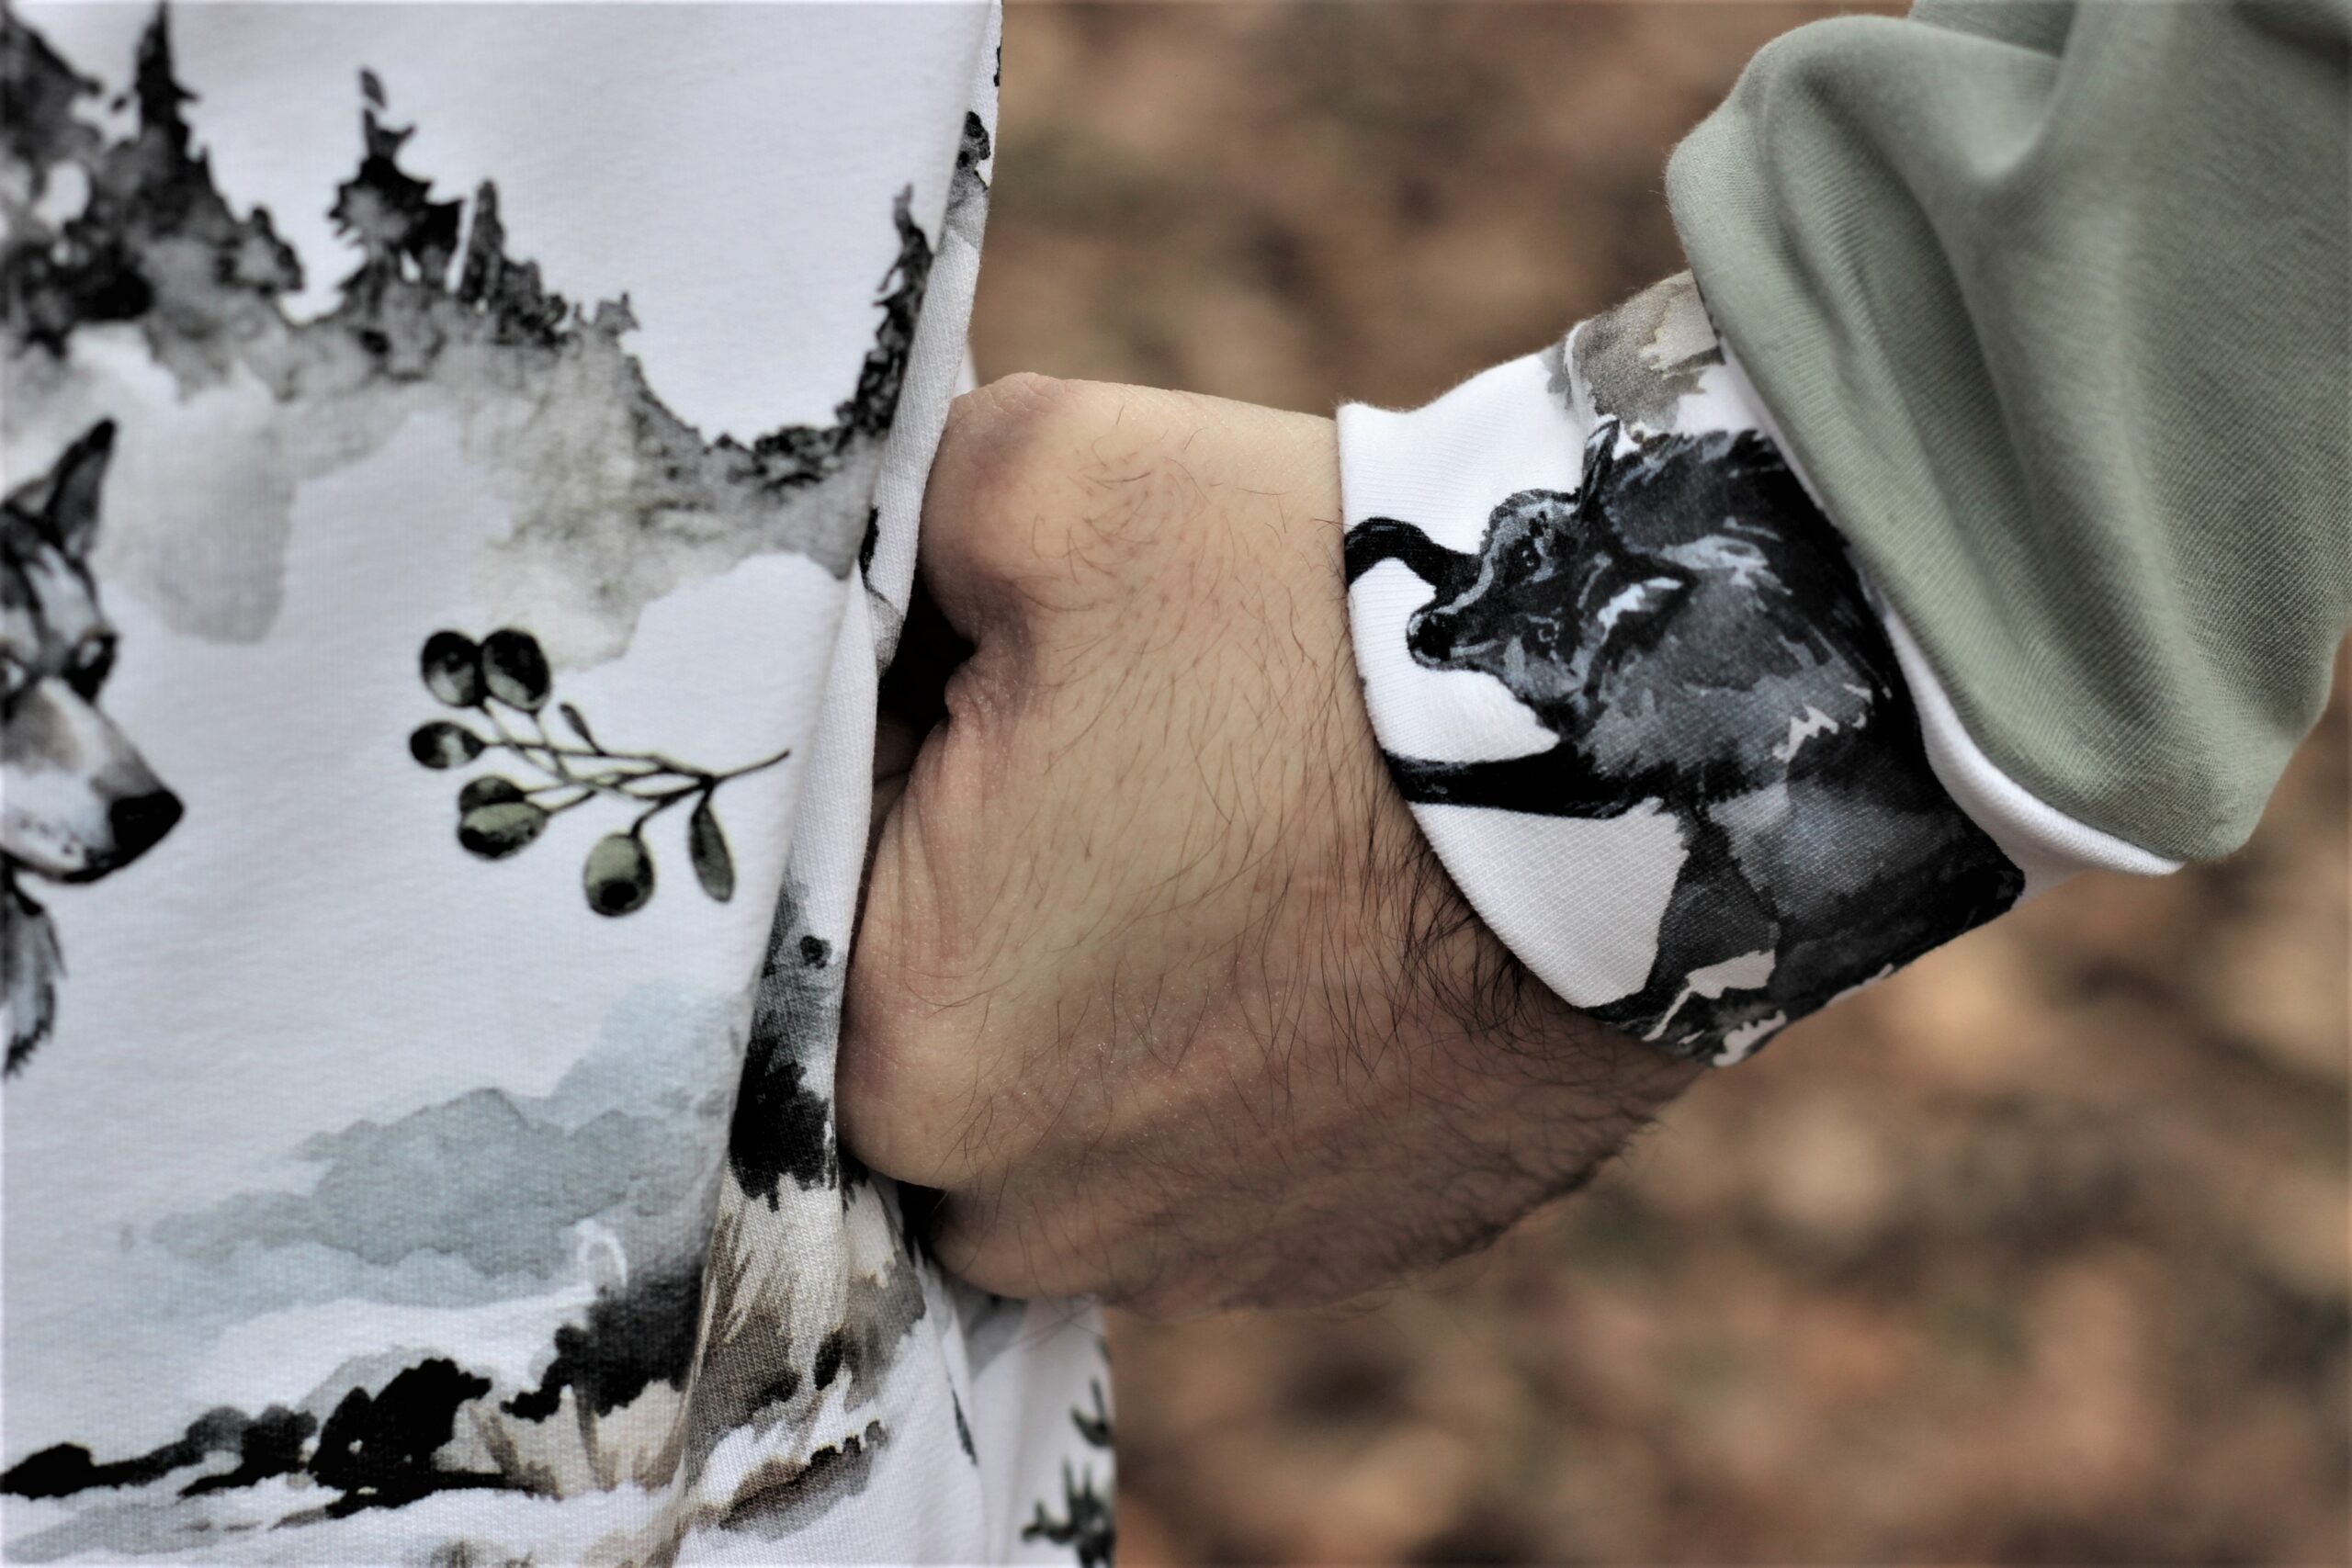
I’d especially recommend using this method if you want to fussy cut for a pattern piece which is usually a “cut on the fold” piece. When you trace out the pattern piece onto tracing paper, create a full version of it (i.e. no cut on fold) but still mark the fold line on too as this shows the centre of the pattern piece. This makes it easier to orientate your fabric print with the pattern piece as you are seeing the whole thing. Still be careful to keep in mind the seam allowances of the pattern piece and make sure you take this into account when positioning it. In the example below I’m using the short sleeve from the Eclipse T-Shirt. The vertical, dotted line is where the “cut on the fold” edge of the pattern piece would usually be. I’ve used that line to help centralise the gorilla’s head in the middle of the sleeve and have left enough space all the way round for the seam allowances.
3. Measure it
The final method involves measuring the pattern piece and using those measurements to help guide the placement on the fabric print. This can be a bit more time consuming than the other two methods but can be done without extra tools (like tracing paper) and without cutting holes in your pattern pieces (which can remove important information and make them more flimsy/prone to damage).
Take the pattern piece you want to use for fussy cutting (in the example below I’m using the top section of the Sandcastle Bucket Hat) and measure the height and width, and any areas where the shape really changes. Then transfer these measurements onto the fabric. This can take a bit of trial and error so I’d recommend marking your fabric using a fabric pen/pencil that is easy to remove. Start by marking the top and bottom of the pattern piece, then the width. When you think you have these positioned correctly around the fabric print section you want to highlight, place the original pattern piece onto the fabric (using there markings as a guide for placement) and draw round the pattern piece. Now check the placement. If you are happy then cut out the piece but if it’s not right, simply repeat the whole process.
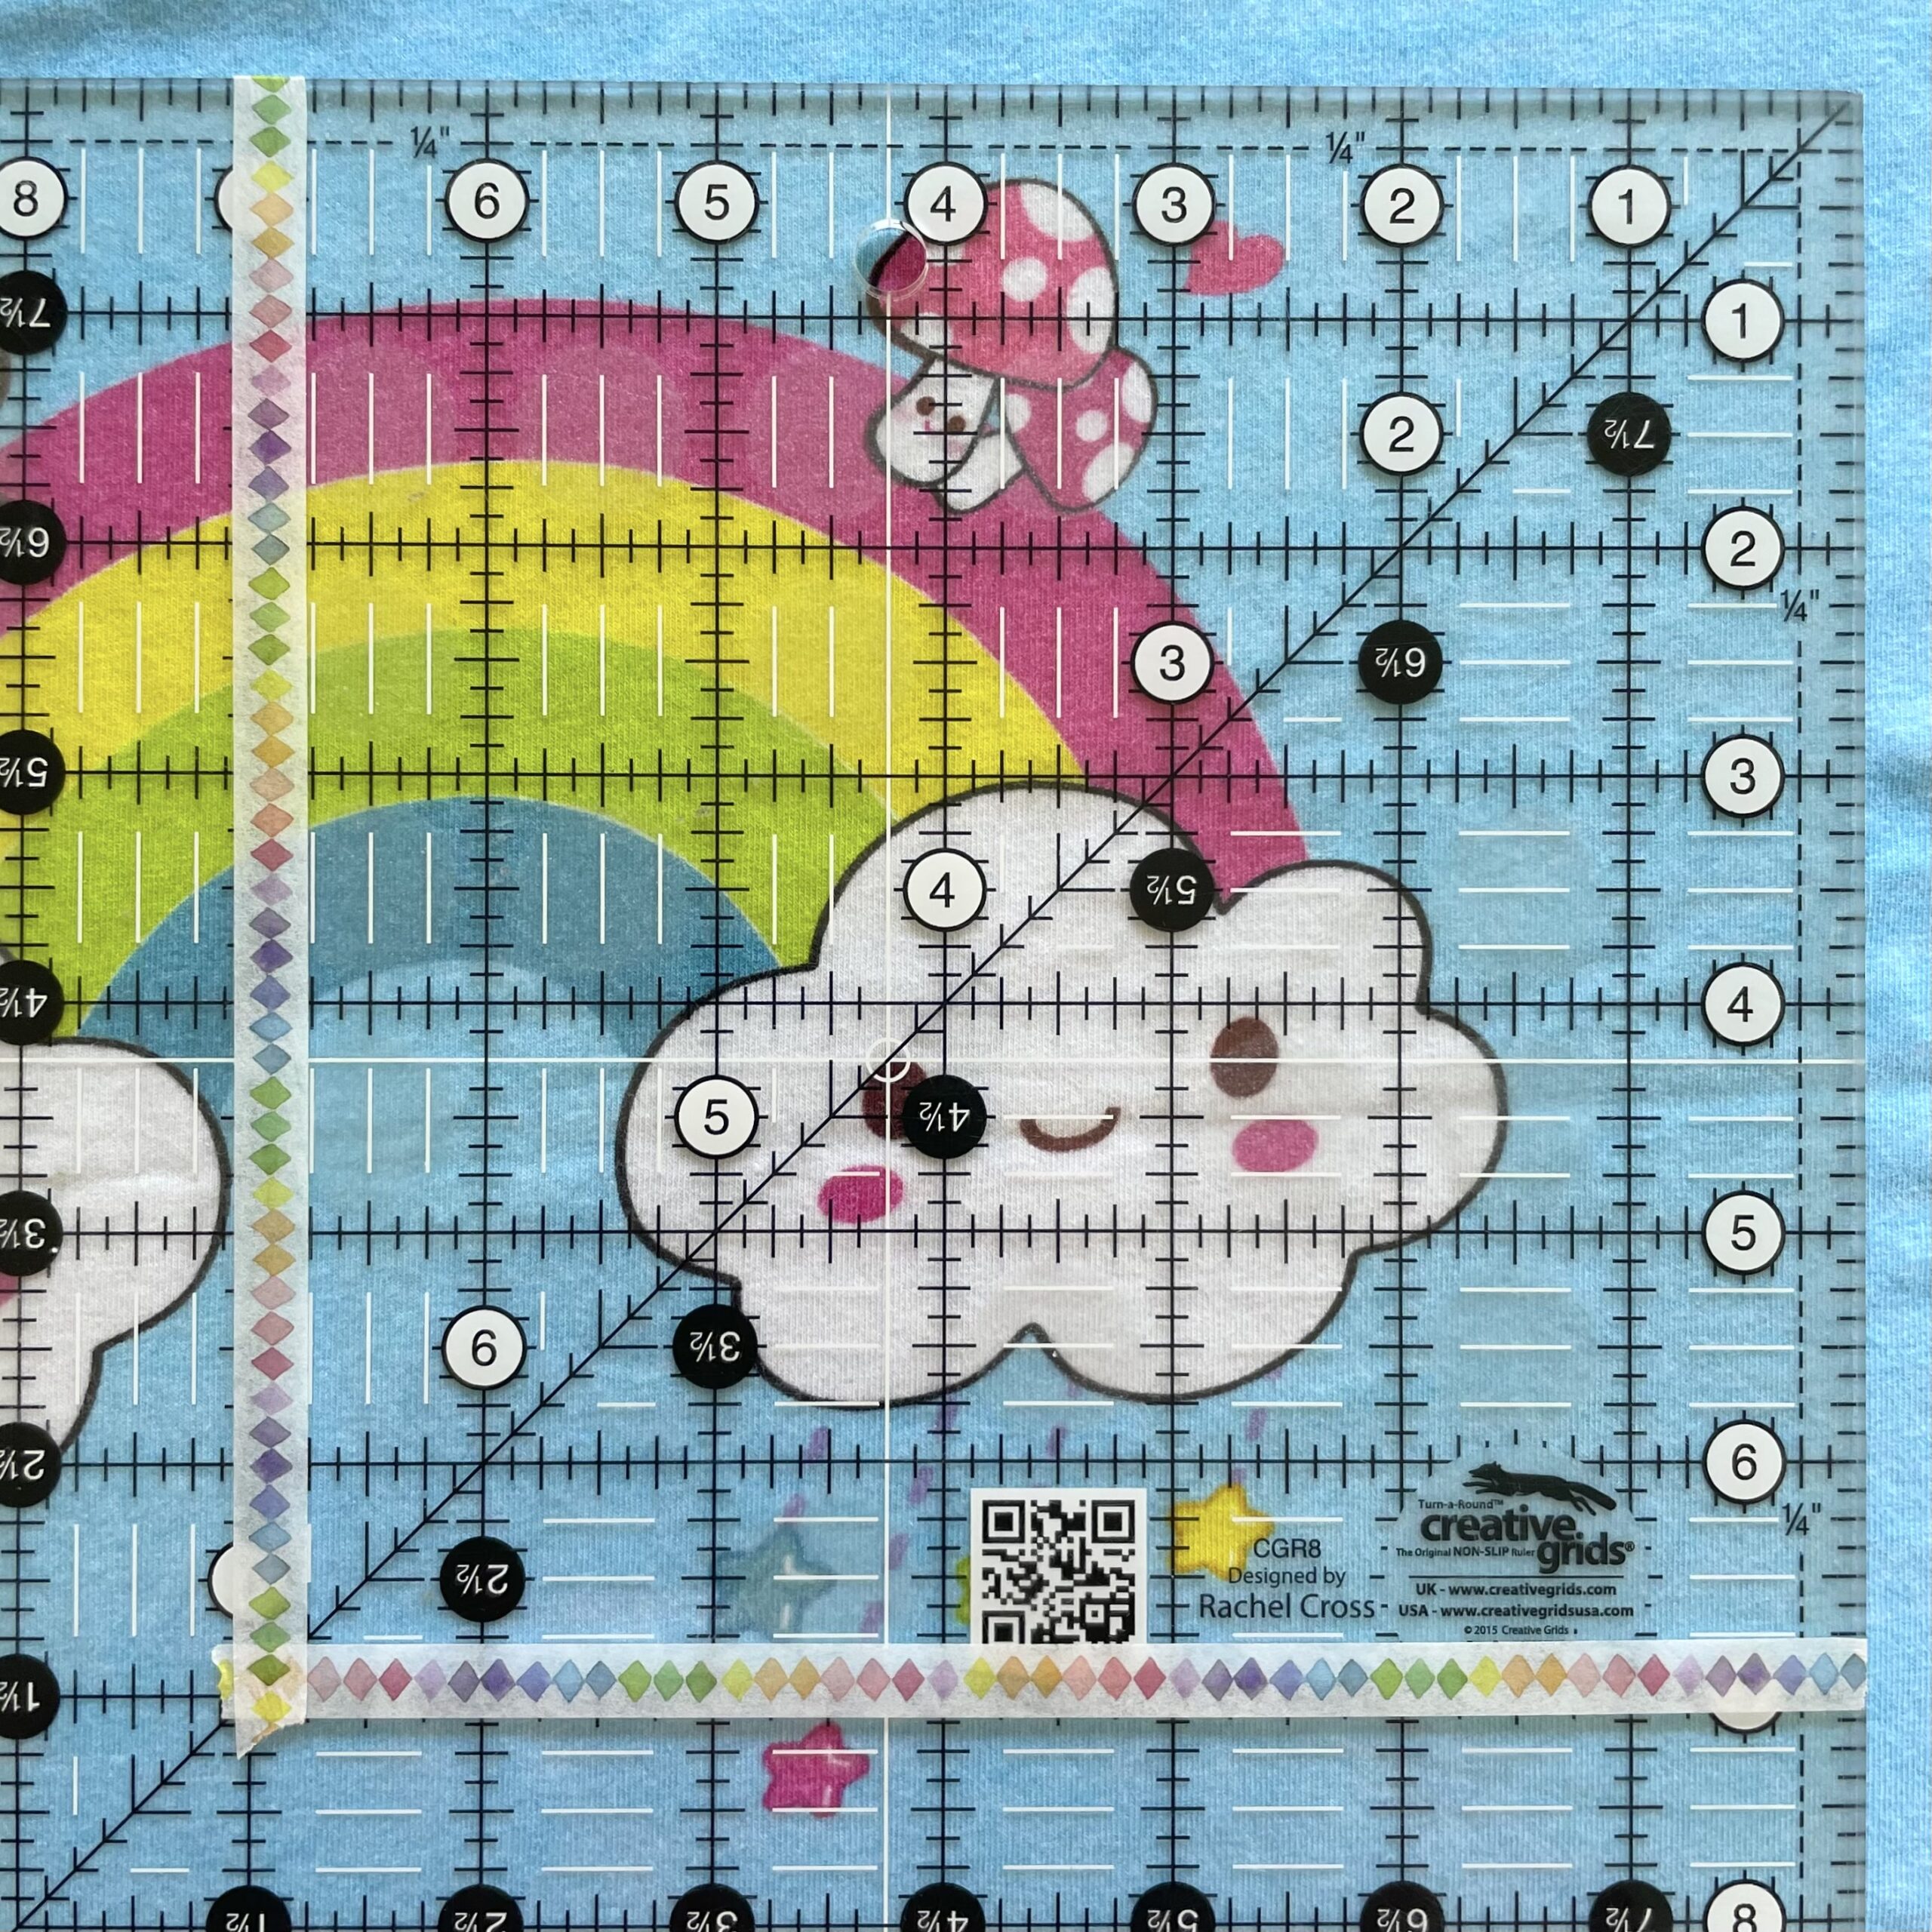
You can speed up this process with a large, acrylic ruler; these are often known as quilting rulers. Use the ruler edges and add washi tape to mark out the main dimensions of the pattern piece then place the ruler onto the fabric. The bonus off these rulers is that they are see-through and so give you a good view of the fabric print beneath.
A few extra tips
- If you are new to fussy cutting, or are cutting from precious fabric, then I’d recommend tracing around your pattern pieces (no matter which method you are using) so you can double check the placement before you cut.
- Always remember that you will lose some of the fabric print into the seam allowance so make sure you take this into account when placing the pattern piece.
- Fussy cutting isn’t an efficient way to cut fabric so you might not be able to fussy cut if you have exactly the right amount of fabric that is listed in the pattern instructions. Lay out all the pattern pieces to see how much flexibility you have for the placement of pieces you want to fussy cut. If you know you want to do some fussy cutting when you buy fabric, it might be safer to order a little bit extra.
Some fussy cutting examples...
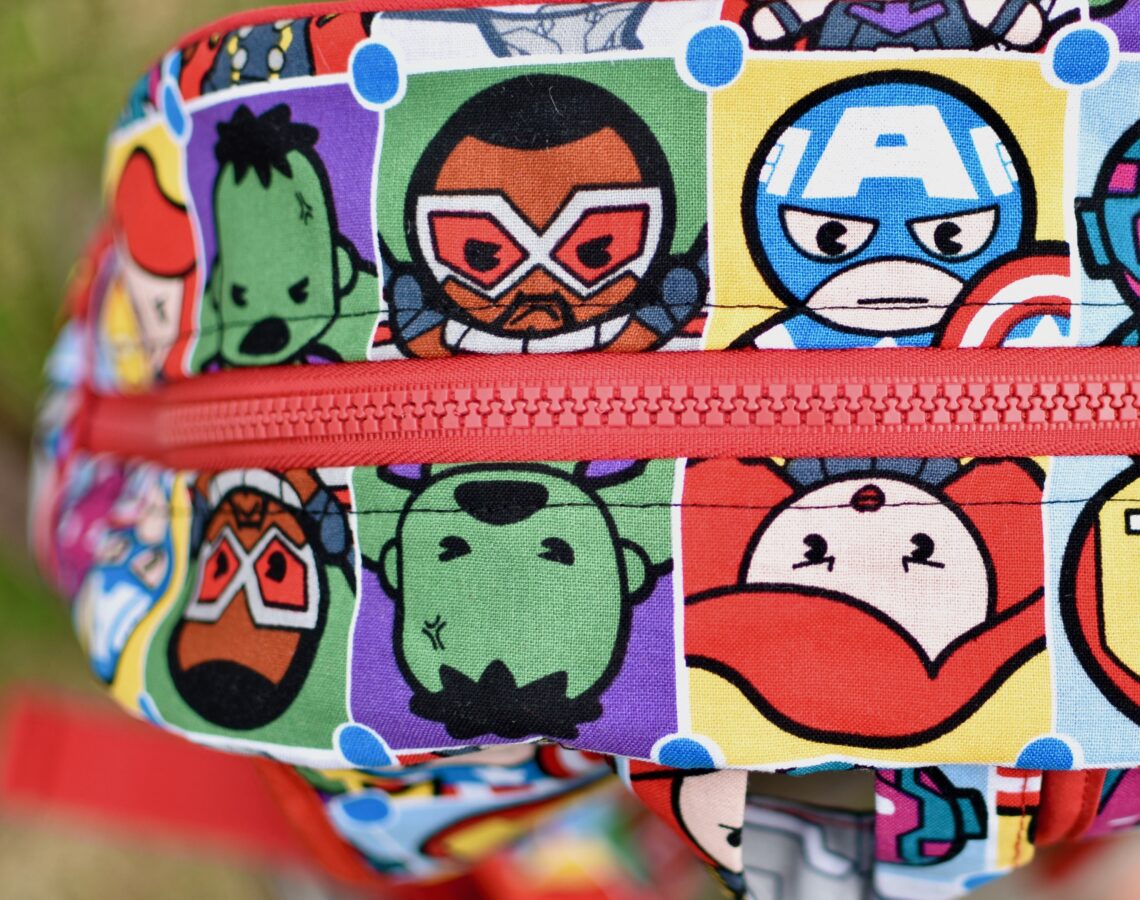
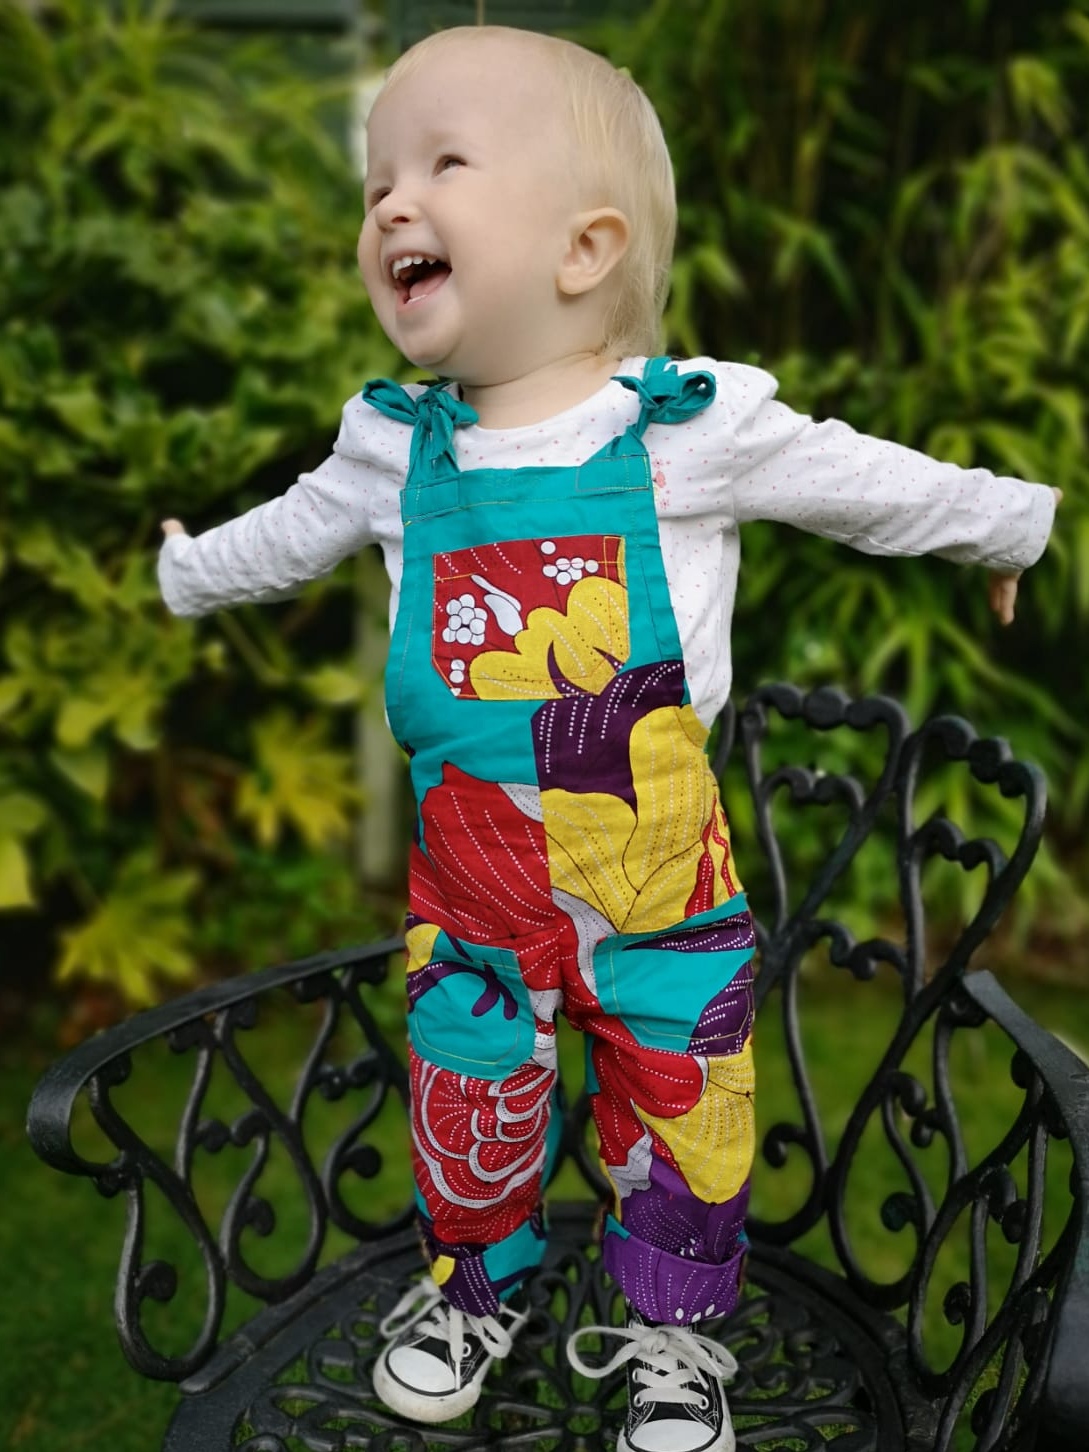
Here are a few examples to show the different places you can use fussy cutting and now effective it can be!
I have been sewing a very long time and have never come across the pattern piece window! What a brilliant tip…
You missed out gussets!
Fussy cutting gussets for the wonder undies makes every wee a joy!!
How could I forget??! They’re the best!!
Fussy cutting is super easy with a projector too!
There’s another way to fussy cut when you want a patch pocket to appear invisible. This can be done when a pattern piece has markings for where to place a patch pocket. Important though is that you can see through the pattern or have traced the pattern pieces onto something you can see through. After you cut out the part that will be under the patch pocket, place that pattern piece on top of the cut piece, lay the pocket pattern piece over it aligning the markings, then trace some major lines of the print onto the pocket piece. Lay that pocket pattern over the fabric (that you haven’t cut out yet – very important) so that the major traced lines match on the fabric.