
Top Tips for Organised Sewing | Part 2
In the first part of Top Tips for Organised Sewing we looked at five general tips for keeping your sewing space, pattern pieces and fabric organised. But being organised when you sew can help with more than just not getting into a jumble. Being prepared and organised can prevent mistakes too.
The well-known “Five Ps” quote is a bit severe but there is also a lot of truth in it…
“Proper preparation prevents poor performance”
(James Baker, former U.S. Secretary of State)
Let’s take a look at three common garment-making mistakes and how some organisation could prevent the mistake.
Mistake One – choosing the wrong size
One common mistake that leads to making the wrong sized garment is using an out-of-date measurements list to choose the size. To prevent this, try keeping a dated list of measurements of the people for which you regularly sew. You could use notes on your phone, have a dedicated notebook, or even a scrap of paper that lives with your sewing machine. It doesn’t matter what you use to make the list. The important thing is to keep it organised by having all the measurements you need up-to-date and easily accessible. Dating your measurement list is especially important if you sew for children. Children can grow and change shape within only a few months, or even weeks! To avoid making the wrong size, make sure you check their measurements regularly.
Mistake Two – forgetting to cut something out
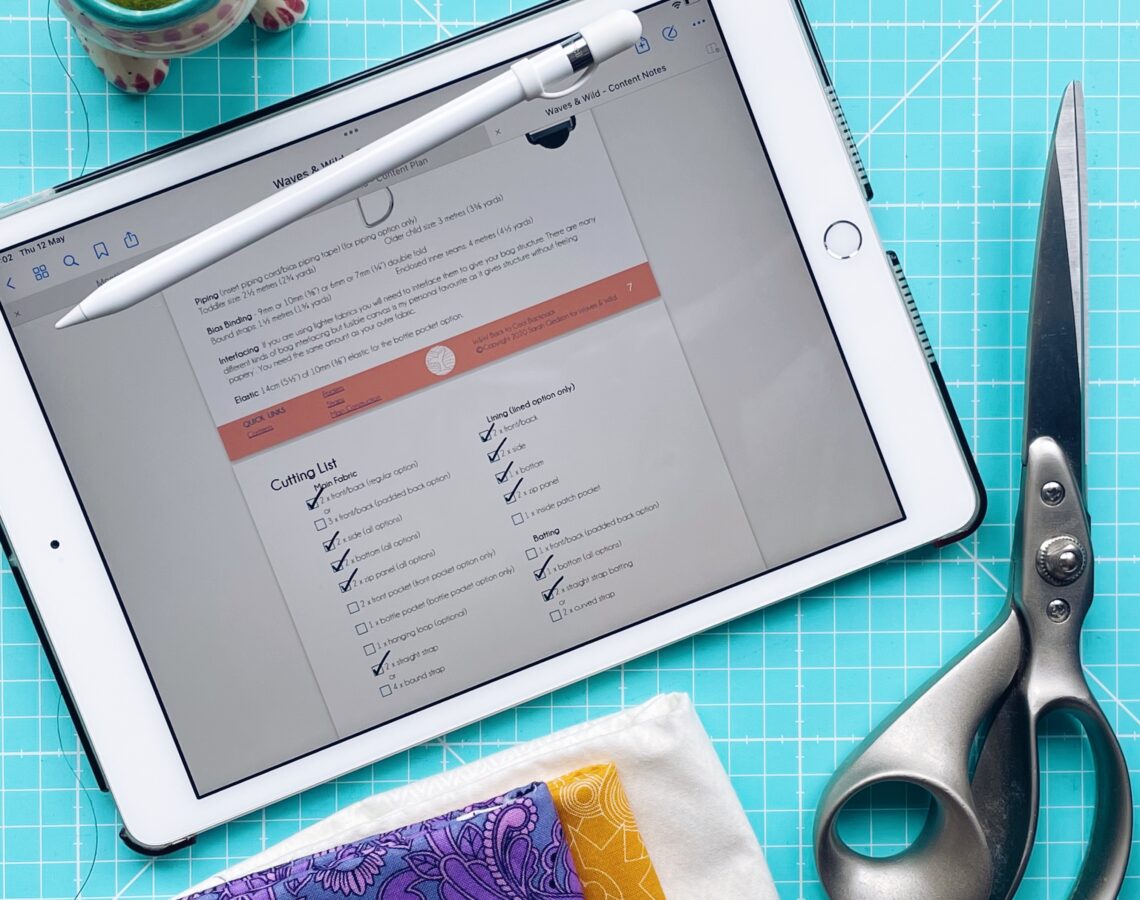
I don’t know about you, but I like to cut out everything I need for a project before I start sewing. I find it much easier to keep my sewing space tidy and organised if I can put certain tools away (or at least out of the way) when I’m done using them, especially larger tools like cutting mats. It’s so frustrating when you think you’ve got everything you need ready to sew, then get part way through constructing a garment only to realise you are missing a piece. And if you work in a small sewing space you might not have room to have everything out at once, so having to get your cutting tools out again to cut a missing piece could mean having to pack your sewing machine away. So much wasted time! Luckily Waves & Wild has your back when it comes to not forgetting to cut out all your pattern pieces. Have you ever noticed? In all W&W pattern instructions, usually after the list of supplies, is a super handy Cutting List, complete with little tick boxes for each piece you need…and who doesn’t love ticking things off a list?! Using this cutting check list is a great way to make sure you have everything you need before you start sewing.
Mistake Three – using the wrong needle
If you’ve read our blog post How to Choose the Correct Needle then you’ll know that using the wrong needle in a sewing project can lead to skipped stitches, messy thread bird nests, broken needles and potentially a few swear words too. But even if you know which needle you should be using, how can you easily keep track of which one is which (let’s face it, they do all look really similar) and make sure you actually do reach for the one you are meant to use. You’ve guessed it…keep your needles organised! Happily, there are a few ways you can easily keep your needles organised so you know which is which at a quick glance:
- Keep your needles in the boxes they came in.
Needles are usually purchased in slim plastic boxes with the type and size labelled on the front. Leaving them in these boxes (and making sure you always put them back in the right place) is a really simply and easy way to keep your needles organised. - Sectioned storage box.
If you have lots and lots of needles (and don’t want to store loads of those mini boxes they come in, or you bought them in bulk meaning them came in a flimsy cardboard box) then a sectioned storage box is a great idea. Just make sure that the section dividers go all the way up to the lid…you don’t want all your needles to get jumbled if you drop the box! - Labelled needle case.
Fabric needle cases don’t just have to be for hand sewing needles. Use each “page” of the needle case for a different type of needle. You could labelled each page with the needle type for even quicker reference. - Colour code your needles.
Most needle brands are colour coded but they can be quite small, and the colours vary across different brands. Create your own colour coding system and colour the top section of your needles with different colours of permanent marker pen (only colour the section that goes into your machine, not the section that goes into fabric). Make sure you keep a list of what each colour means…perhaps tape it to your sewing machine so you always have it ready.
Leave a Reply